
Cricut Tips for Beginners: Everything You Need to Know
A Cricut machine doesn’t have to be hard to use – but it can be intimidating. Here are the best tips for those of you starting out with your Cricut machine!
When I got my first Cricut machine many years ago, I was so intimidated by it. It sat in the box for months, because I just didn’t know where to start.
Well, those were wasted months, because it has turned into one of my favorite hobbies. I’m not one of those people who has every project turn out perfectly – in fact, many end in tears or just end prematurely because it just isn’t worth finishing!
However, I have learned a lot over the years, and I hope that this post will help those of you who are just starting out and need a little bit of extra help. If you are a Cricut newbie, want to learn simple projects, or you need answers to popular questions, we have you covered.
What machine should I get?
If you are reading this, you likely already have a new Cricut machine – but you may also be trying to decide which one is best for you.
There are a ton of different machines out there, but the two lines that they still actively update and promote are the Explore and Maker.
I am fortunate to own the Air, Air 2, Joy, Maker and Maker 3, and really, they are all amazing machines. There are things I like about the Air more than the Maker, but overall, I like the power and possibilities of the Maker.
Here are a couple of articles to help you decide which one you should get. The newest machines are the Explore 3 and Maker 3, but you can still find the other machines for sale so they are certainly worth considering.
- Cricut Joy versus Explore Air 2 Versus Maker: Which Should You Get?
- Cricut Maker vs. Explore Air 2: Which is Best?
Here are some guides that dive specifically into each machine:
- The Cricut Joy: Answers to ALL Your Questions!
- The Cricut Maker Machine: Everything You Should Know
- How to Use the Cricut Explore 2: The Beginner’s Guide
What’s in the Box?
So, what comes with our Cricut?
Well, that depends. If you check out the Cricut website, they have different packages available, and the more money you pay, the more you get (obviously).
However, if you were to buy the most basic option from the website right now, you will most likely find in your box:
- Machine
- Storage Bag
- Power and USB Cord
- Fine Point Blade
- Standard Grip Cutting Mats
- Getting Started Guide
- Silver Pen
- Samples
So, you don’t get a ton of things, but it’s enough to get started. However, I do recommend buying one of the starter sets for your first Cricut machine, as they do include more of accessories that I feel are necessary for success.
Here are a few items I think everyone should make sure they have when using one of these machines.
- Extra Mats (in different sizes – Buy on Cricut.com or Amazon)
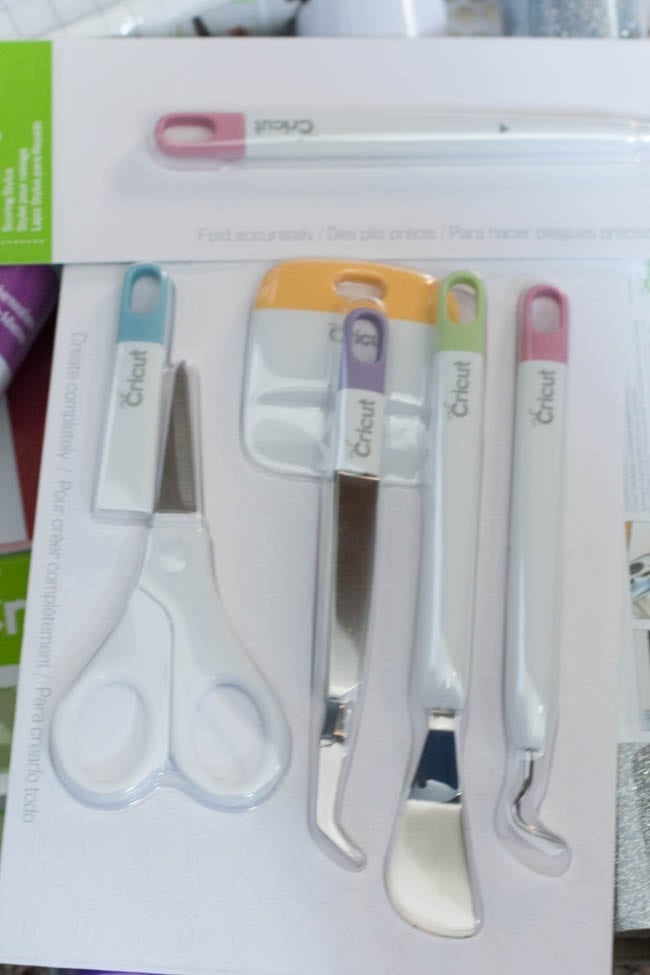
- Cricut Tools Craft Basic Set – this includes scissors, scraper, tweezers, and spatula…all of which are VERY helpful (this can be purchased on Cricut or Amazon).
- There are other great tools that you can buy here.
- Extra Blades
- HP Instant Ink Subscription – if you have a qualifying HP printer, this is the BEST thing you can do – you’ll never run out of ink again for your projects, and you’ll save a bundle. You can get your first month free here.
- The Essential Tool Kit is one of my favorite tools
I’ve also written a post that goes into what you might need – depending on what kind of crafting you might do: Cricut Essentials.
Read the instructions
Maybe you all are great at reading instructions, but I am not. I’m the type of person who just jumps into something without reading all the information first.
Sometimes it works, other times, not so much.
I did that with the Explore Air when I first got it, and let’s just say, I struggled.
So, save yourself some time and frustration and read EVERYTHING that comes with your machine.
Cricut Education
There are SO many great articles courses and videos out there – many of which are free.
Here at Clarks Condensed, we have TONS of tutorials and projects that can help you get started with your machine – click here to view all of them. You can also check out our YouTube channel here.
And finally, there are people far more talented than I am who have created some AMAZING online courses and communities – if you are really wanting to dive deep, check this post out to learn more – The Best Online Cricut Courses For Every Budget (personally, I’m partial to Cricut Made Easy).
Cricut Mat Care
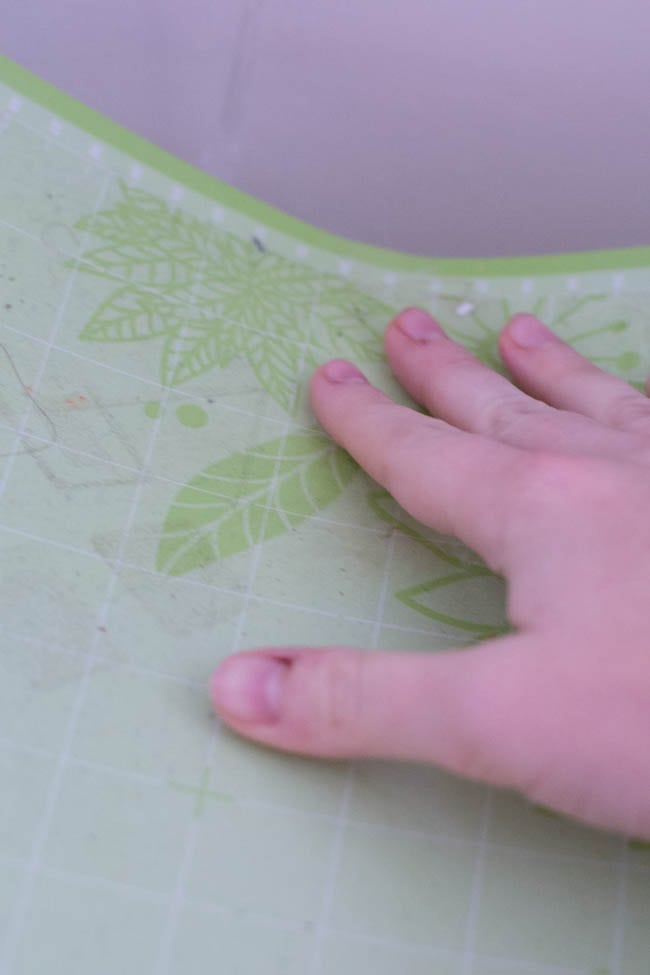
Cricut mats will be your new best friend, especially when you’re working on beginner projects and learning about your new Cricut maker.
The cutting mat is essential to success with your machine. You really need it to make sure you get a cut on just about all the materials you will use. It helps with clean cuts, and it’s the best way to go if you want to make an intricate design with your cutting machine.
Without proper care, they can get messed up pretty quickly. I’ll talk about this more later but you should ALWAYS make sure you do a test cut. I’ve ruined a mat because I had the cut setting too high.
Beyond that, one tip I learned is to wipe it down with non-alcoholic baby wipes (water wipes would be perfect) after each cut. This can help keep it cleaner, stay sticky for longer, and just increase the longevity of it.
You can use a paper clip to pick up tiny pieces of leftovers that are hard to get, as well as a lint roller.
If you are hoping to make your mat sticky again, here are two pieces of advice:
- Good ol’ soap and water: This really does seem to work! My mat was starting to feel a little less sticky, so I just gave it a good cleaning with soap and water, and it seemed to revive itself.
- Krylon Repositionable Adhesive: I have not actually used this, but I’ve heard that it can help make a mat sticky again
For more detailed advice, be sure to check out this article on how to clean and restick your Cricut mats.
What mat should I use?
There are currently four different mats:
- Blue – LightGrip (Cricut / Amazon)
- Green – StandardGrip (Cricut / Amazon)
- Purple – StrongGrip (Cricut / Amazon)
- Pink – FabricGrip (Cricut / Amazon)
The pink mat is specifically designed for the Maker and is to be used with fabric.
The blue is for materials that stick rather easily and won’t slide around.
The purple is for thicker materials that have a harder time staying put (such as balsa wood, chipboard, etc.)
In general, my rule of thumb is this – the thicker the material, the stronger the grip.
What Materials Does a Cricut Cut?
These machines can cut SO many things – the sky is really the limit. The first thing that probably comes to mind is vinyl – which is definitely a big one (and there are TONS of different kinds of vinyl as well).
However, that’s just barely scraping the surface. There are over 100 different materials you can use, but here are some of the top materials listed on the website:
- Paper – Standard, Cardstock, Vellum, Poster Board
- Vinyl – Standard, Premium, Dry Erase, Chalkboard
- Adhesive Vinyl
- Iron-On – Heat-Transfer Vinyl (HTV)
- Craft Materials – Washi Tape, Craft Foam, Glitter Paper
- Upcycled Materials – Chipboard, Cereal Boxes, Aluminum Cans
- Fabric – Felt, Denim, Polyester, Burlap, Canvas
- Plastic – Stencil, Window Acetate, Silicone
- Thick Materials – Leather, Balsa Wood, Magnet Materials (check out this tutorial on how to cut wood with your Cricut machine)
You can purchase many compatible cutting materials straight from their website. You can use things that aren’t Cricut branded, but I always know that if I use something from the site, it will definitely work.
Make sure that you read our post on 50+ Unique Cricut Projects to find out all the different ways you can use your machine!
Test cut
Always do a test cut – especially if you are cutting with a new material. I’ll be the first to admit that sometimes I’m lazy in this, and I almost always regret it when I see my new materials aren’t being cut all the way through.
It takes just a few seconds for a test cut to be done, and it can help to ensure that you won’t have to do extra cuts or that the pressure of the cut is so much that it will cut into the mat.
Cutting with fabrics
I’ve found cutting with fabrics to be somewhat tricky – there’s some trial in error involved. For instance, for Oliver’s birthday, I made him a shirt with fabric that I cut from the machine. It worked pretty well.
However, I tried to cut some flannel the other day, and it was a disaster. It was pulling all over the place, and it cut fine in some areas but horribly in others.
I’ve found that the secret is to use something like heat and bond to make the fabric a little thicker. If you aren’t going to be bonding it to something, you can at least attach it to some interfacing.
The flannel, I had chosen to use a spray adhesive, but I wish I had just used Heat ‘n Bond I feel that it would have made it a stiffer surface, and it wouldn’t have gotten pulled around as much. Test cuts are super important when cutting with fabric!
UPDATE: The Maker cuts fabric BEAUTIFULLY – make sure you check out our post about the Cricut Maker and Fabric for more details 🙂
Writing/Drawing
One of the fun features is that you can draw with it – this can be fun for signs, cards, etc.
Cricut has its own markers that work well with the machine, so I do recommend picking up a set of those. However, don’t feel like you can’t use anything else. Anything else that will fit can work. Sharpies are a popular option.
Be sure to read this post on how to write with Explore Air to get you started! This was written specifically for the Explore Air, but it’s pretty much the same for all the newer machines.
How to clean your new machine
As with any kind of machine, you must clean it to keep it working in tip-top condition. This a great video that shows you how to clean your machine:
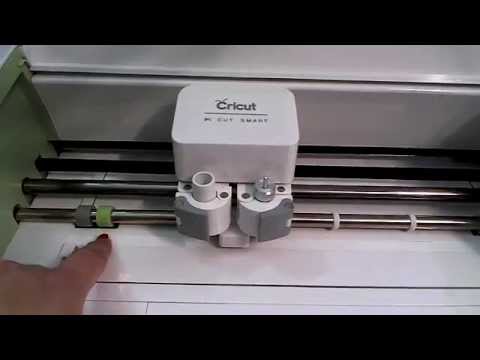
Non-alcoholic Baby wipes are a great option for cleaning both the machine and the wipes
Double-check your settings
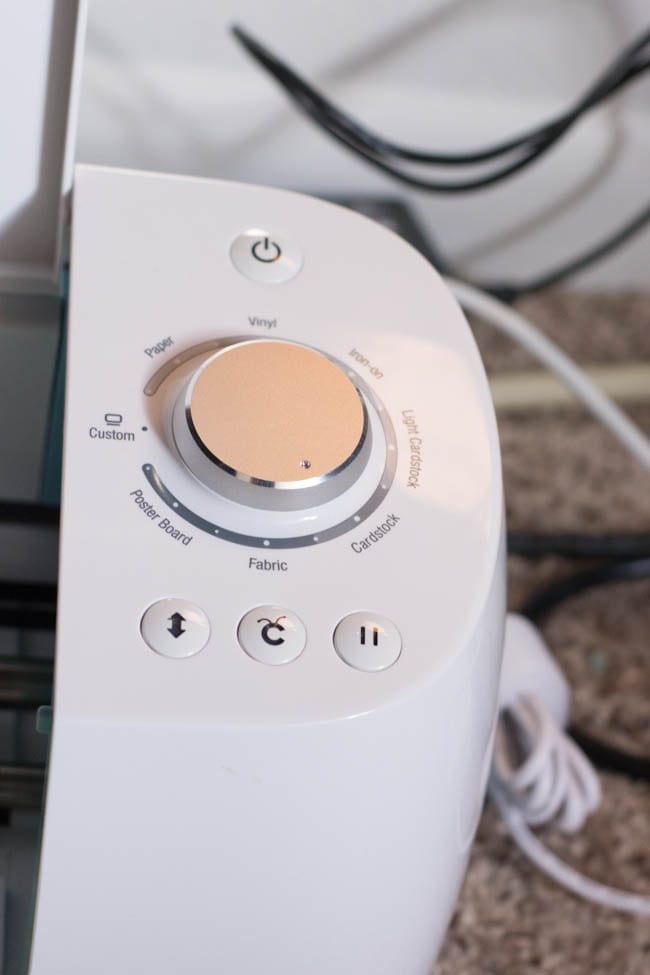
Always make sure you have your machine set to cut the right kind of material! You can do this by changing the knob on the machine, or you can do it manually within the software.
Within the Design Space software, it will give you settings for TONS of different cutting materials – far more than are on the knob on the machine. It gets pretty specific with the material. I also like that you can adjust the settings in there, just in case the machine isn’t cutting the material exactly the way you want it to. a
Keeping blades sharp
Blades will dull over time – and it’s usually a slow transition. I remember when I finally replaced the blade on my old machine, and I didn’t realize how bad it had gotten.
I recommend having different blades for different kinds of materials that you cut frequently – so one that is only for fabric, one for vinyl, etc. Then you could have another blade for materials that you don’t use as frequently. Here are the different blades that are available:
- Fine Point Blade (Cricut / Amazon)
- Deep Cut Blade (Cricut / Amazon)
- Bonded Fabric Blade (Cricut / Amazon)
- Rotary Blade (Cricut / Amazon)
- Knife Blade (Cricut / Amazon)
The Maker has the QuickSwap tool set, which provides many more options and tools!
You should also clean out the housing for the blade after each use. This can get gunky very easily. I’ve found that using compressed air is pretty easy to use.
Transfer Paper
Transfer Paper is essential for many projects – specifically for use with vinyl. However, you can use transfer paper more than once – so make sure you don’t throw it out!
Make sure you cut the transfer paper down to the size you need to eliminate excess waste. If you don’t want to pay for the Transfer Paper, you can just use regular ol’ contact paper. It might save you a few bucks!
Vinyl Tips and Where to Find Vinyl
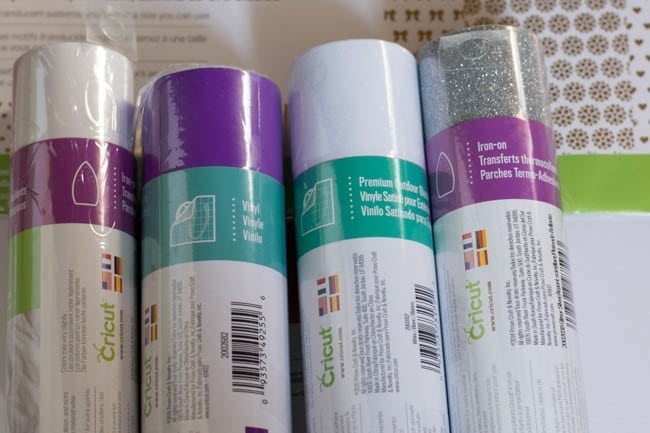
I think when people think of cutting machines, they think of vinyl. I know that’s the first thing that comes to mind for me! So, I figure it’s worth mentioning a few tips for cutting with vinyl.
First off, it’s important to understand that there are MANY different kinds of vinyl – interior, exterior, heat transfer, matte, gloss, glittered…So many. It’s important to look at what kind you are using in order to cut it correctly.
For instance, when I first started using heat transfer vinyl, it took me FOREVER to figure out what side was supposed to be cut (haha, pathetic, I know!).
When you are getting ready to cut the vinyl, make sure you line it up with the edge of the mat and fills the entire mat. I always have issues when I try to cut out the exact size and place it in the exact right spot on the mat. Just fill-up the whole space!
Once the vinyl is cut, I recommend cutting away excess vinyl before you remove it from the mat. If you don’t do this, you risk pulling up vinyl that hasn’t been cut.
When you do the transfer to the transfer paper, it’s easiest to do this while it’s still on the mat.
Start simple – vinyl does have a learning curve, and it can be easy to become frustrated with.
You can find vinyl a lot of different places. I bought a huge pack of vinyl from Amazon for cheap, and while it did the job, I didn’t feel like it was the highest quality. I really love using the Vinyl straight from the website or from Expressions Vinyl.
Here is a tutorial I’ve done on using Iron-on Vinyl (read more details here).
Cricut Design Space
This is where all the magic happens. Design Space is available to use through their desktop version and through the mobile app. You do need to be able to access the Internet in order to complete your designs and login, but they do have offline access available.
You can come up with your designs, or you can use pre-designed templates. I love that you can use the mobile app anywhere – it’s so convenient when you are lying in bed or sitting in the car.
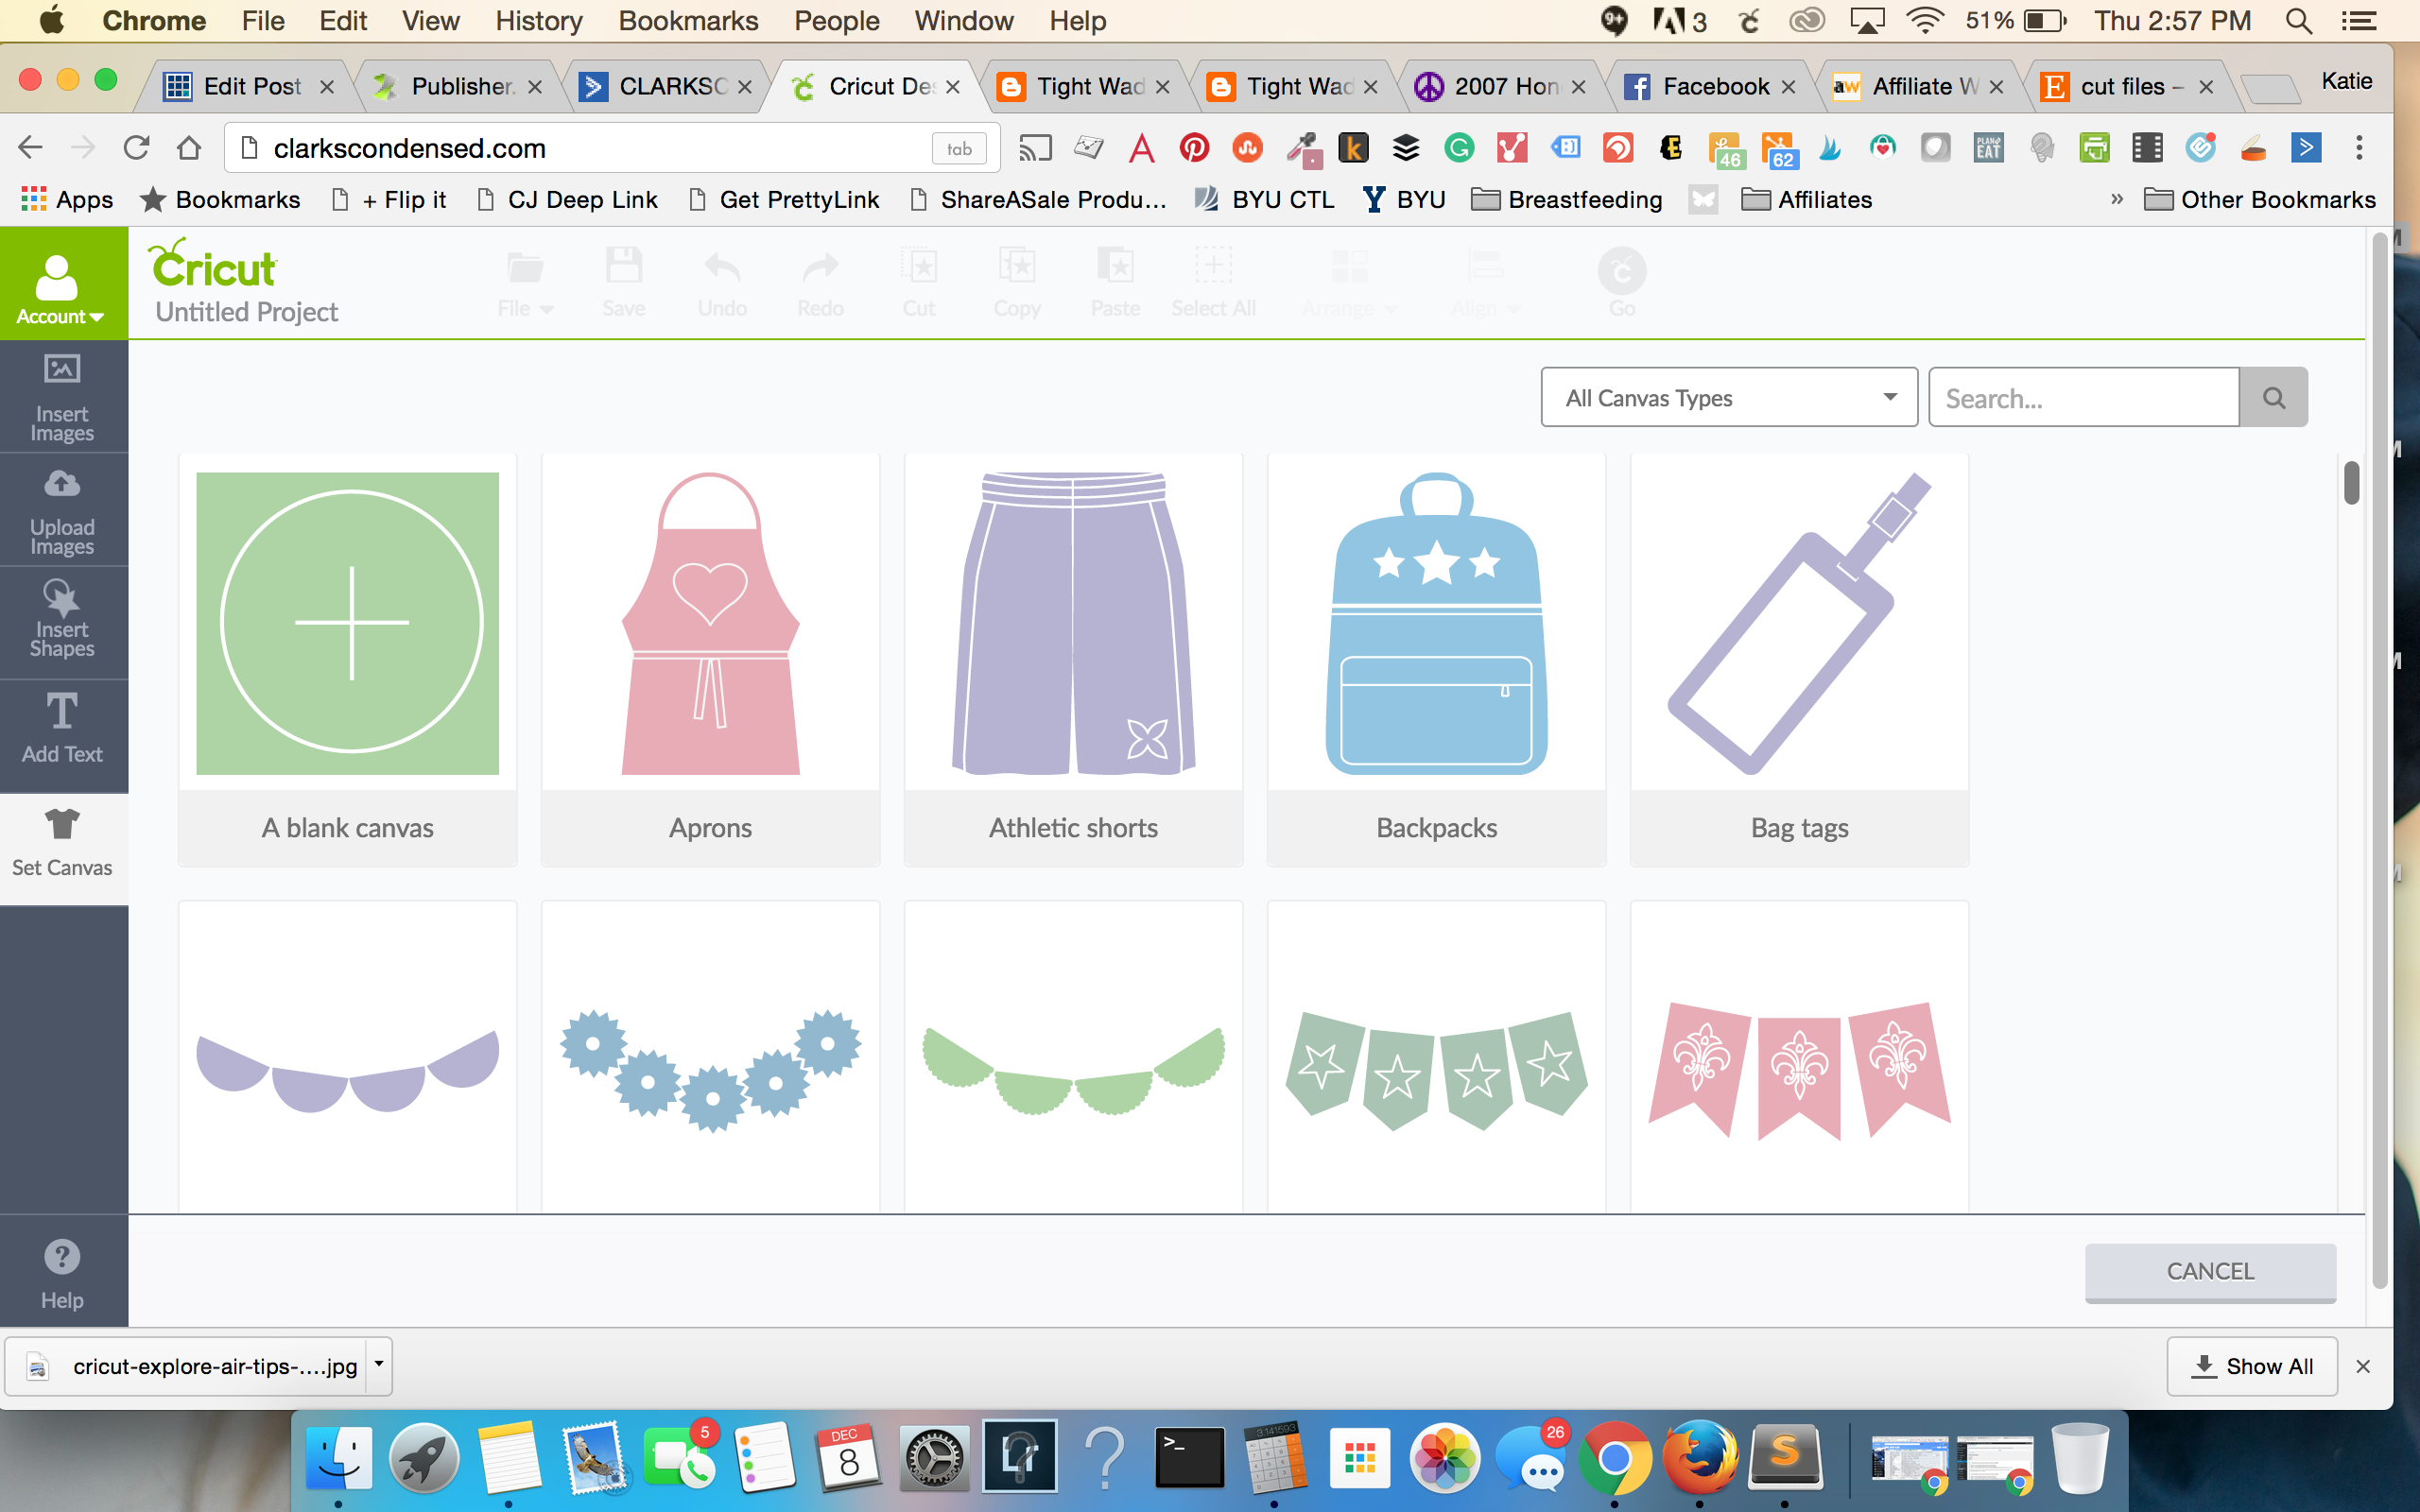
I recommend signing in and getting to know the system first before you get started. There is a learning curve, but I don’t feel like it’s too difficult to pick up fairly quickly. Here is a screenshot of the screen on the web platform:
Set Canvas in Design Space
This is one of my favorite features of Design Space – it has tons of templates for SO many different projects. You just select the project, and then it overlays it in your design screen so you can make sure you get the sizing correctly.
For instance, when I made Oliver’s birthday onesie, I went under pajamas, and it pulled up a onesie so I could design right over the top of it. It’s very helpful for visual learners.
Cricut Access
If you are a serious user and you want to have access to their entire library of images and fonts, I think that this is well worth the investment. They have several different plans ranging from $7.99-$9.99.
You can find out which Cricut Access Plan is right for you in this post!
You get access to over 30,000 images, 370 fonts, and thousands of project ideas, and you get 10% off all purchases from Cricut.com.
Your Images and Fonts
You can use your images and fonts in Design Space. To use your own font, just install a font that you’ve purchased or downloaded online to your computer. Restart Design Space, and it should show up in your fonts.
With images, on the left side of the Design Space platform, there is an option that says “Upload Images.” You use this to upload the image that you want to cut – super easy.
You can upload most .jpg, .bmp, .png, .gif, .svg, and .dxf files and convert them into cuttable files. Etsy has lots of really great cut files that are inexpensive and great for any occasion!
I also am a big fan of SoFontsy.com and Design-Bundles.net.
You can check out this post on how to upload images to Cricut Design Space for more help!
More Cricut Support
We have various Facebook groups where you can get support from us and other Cricut fans. Be sure to signup for one of these groups below:
- Cricut Support Group (this is our largest group!)
- Cricut Joy Creating
- Makers Gonna Make – Cricut Help
More Posts You Might Enjoy:
- 30+ Blanks for Vinyl Projects You Can Buy on Amazon
- How to Make Car Decals with Cricut 101
- 6 Best Cardstocks for Cricut Projects and Machines
- The Cricut Joy: Answers to ALL Your Questions!

Katie, what a great article! I’ve had my Maker for 3-4 years and was waiting to have a craft room in my home. Long story, but I now have one and the Maker came out of the box and I’m just staring at it. Your article gave me the motivation to set it up and create. Thank you so much for ALL the links. You’ve done so much research and I appreciate that. My 1st project, whatever it is, will be dedicated to you!
I am so glad this was helpful!!
Hi, just found your site. Got a cricut while home during this covid pandemic. Your tutorial on the heated vinyl was really informative and easy to follow. I think I will try that next, thank so much for posting it!!
I am so glad it was helpful! Thanks for joining the Cricut family on Clarks Condensed!
I have had my machine three years,,,in the box, too overwhelming! What is transfer paper and what is it’s use? How does one do a test cut? where do i go to find answers to things like that, Thanks!!
Transfer paper/tape is a sticky material that is similar to contact paper. It helps to easily move vinyl to the blank you are using. A test cut isn’t super easy with Cricut, but you can just add a small item to your design and put it on a separate mat and do a test cut with just that mat with your material. Our Cricut Support Group on Facebook is a great place to get answers!
Hi. I bought my Cricut 2nd Hand last summer and, at that time, only registered it. I now want to make labels saying “PEACE” to apply to white tree ornaments. Your tutorial above has helped me get ready for this endeavor including knowing what vinyl, transfer tape, mat, & tools to purchase. My one question, so far, is what blade to purchase. Thanks for any thoughts you can share.
Hello! I’m glad this was helpful. I would recommend getting the fine point blade for that project. The next blade I would get is the deep cut blade.
What is the Cricut Design Space?
It’s Cricut’s online platform to create designs to be cut with the Explore Air or Maker 🙂 You can find it design.cricut.com
Awesome tutorial for a creative but not so tech savvy person like me! It makes me more confident and eager to get started! Thank you so much!!
I’m so glad!
I hope someone can help me! I down loaded a file and actually got it to my design space, however the problem is the file has three items on the one page and I don’t need two of them. So it looks like this … large castle, set of two mickey heads, two set of retro mickey retro heads. I only want the last ones but don’t know how to separate the last two so I can use them only. How do I do this? Thank you!!!!!
Have you tried ungrouping the images?
I have an Embroidery Machine with lots of purchased and free fonts, can I use these with the cricut?
Yep! As long as they are installed on your computer, you can use them with Design Space!
i am struggled with my cricut my blade is dragged i have taking it out and try wipe it clean and it still does it this cricut confuss me so much and i want to learn but i have read all the lesson on my laptop please help me i want to make things with but i am not a compoter with the language thank you not dont understand the language for my laptop
Why is my cricut telling me to print my design. It has been uploaded and is showing on the computer, but then scans my printed picture and cuts it. I have tried using blue tooth an wired.
Are you doing print and cut?
I got my Explore Air 2 for Christmas.. This by far the best tutorial EVAH… I was a little overwhelmed… Thanks for dumbing it down for ME… I am now ready to conquer the CRICUT! Thanks for ALL the links too. You rock and I THANK YOU.
Oh thank you so much! I am so glad you enjoyed this post. That means so much to me for your comments.
I absolutely love that you put links for us to purchase the products you were suggesting! That makes it so easy. Thank you for putting in the extra time to do that.
-Angie
Thank you for saying that, Angie. I appreciate it! And I’m so glad it was helpful to you.
Hello Mrs. Katie,
Thank you for very helpful information on the Cricut Air. I want to use your information as a teaching tool. Where I live there isn’t a craft store that sells or have items for a Cricut if you want anything Cricut supplies you have to drive one hour away. I want to bring the Cricut product to my town. In doing so I will teach how to use a Cricut this way the only hobbie/craft store in town will bring the Cricut and hire me to teach how to use it. Sorry for so long of a qestion, can I use your information to teach?
Thank you, Peace, Mrs. Leticia Forbes
So sorry for just seeing this. You are welcome to use it!
Thank you for this helpful information. I want to purchase a Cricut for creating canvas signs with stained wood around it, coasters and maybe an occasional shirt. What’s my best option and what do I need to make sure a machine has?
Hmm are you wanting to create the coasters yourself? Or just put vinyl ont hem?
Hi Katie, I have to admit I’ve had my Cricut Expressions 2 for a few years originally wanted to do glass etching on the bottom of dishes, casseroles, etc. But doing this requires a mirror image and I believe that’s why I stopped using my Cricut. I’m retired now and have more time to play around with it. Are you able to tell me if the Expressions 2 can do a mirror image? Thanks so much the great post, very helpful!!
The Explore AIr 2 does do a mirror image 🙂
I’m brand new to the Cricut world. I’ve been doing some research before buying my first machine. I’ve decided to go with the Cricut Maker. I plan to utilize the knife blade primarily since leather work is my main hobby. My struggle is trying to find out what additional items will be most helpful at the beginning. Do you have a list of mats, tools, etc that don’t already come with the maker you would suggest? Thanks in advance!
Yes! This Must Have Cricut Maker Accessories might be helpful to you 🙂
It’s a great post, very complete and well explained. I’m actually quite impressed, congrats on the great job!
Excellent post…very frustrating that there are SO many adverts in it though….made it really hard to read.
Sorry, Ryanne! Unfortunately ads are a necessity to allow us to put as much time as we do into this blog and answering questions. Thanks for the feedback! If we ever decide to offer a subscription based website with no ads, we will let you know!
Which vinyl brand do you recommend for mugs I’m having a hard time I try to cut letters and when I peel it off the whole vinyl and letters come in one piece
Oracal 651 🙂
I’m rather frustrated that I keep having a issue where when I get the design ready to cut it says the machine is not connected. It is connected and if I turn everything off and begin again all works but then I have to design all over again. This is with a explore air 2, is it me.
Ok, you’re not going to come across more of a “virgin” when it comes to this, so please bear with me. I asked and received for Christmas, a Cricut Explore Air 2. For now, all I want to be able to make, are fonts and silhouettes to make shadow boxes. I’m trying to read everything I can find about this machine and my mind is already about to crash. The following are what I have to work with and quite honestly, I don’t know the purpose as to why I have to have such things, to have this machine to work. I guess I thought everything would be included within the machine. Don’t laugh or say “I wish” cause I told you, I am a total dummie when it comes to such things. I can see how just getting started in itself, is very overwhelming. I have an iPad Air, a Mac Probook laptop and a Samsung Galaxy 7 Edge phone and a Canon Pixma MP530 printer. Do I need any of these and if so, are they going to be compatible? If I have to turn around and buy something special to get my machine to work, I might as well send it back to Santa ? Let’s start with what I’ve told you so far and hopefully I’ll be able to continue our conversation. If you feel we need to cover all this via email, please do so and I’ll keep my eyes open for it. Thanks for taking some time for me!
Hi, Deb! You can definitely use the iPad Air or the Mac ProBook laptop with your Cricut – no worries there! I did this video a few days ago – it may help you if you can bare with the live nature of it (so being interrupted with questions, not super polished). Feel free to shoot me an email if you have other questions. I promise, I would never laugh!
https://www.facebook.com/ClarksCondensed/videos/2011971052152505/
Hi Katie,
I am thinking about buying a Cricut but do not know which would be best for me. I am a scrapbooker and card maker and would be using only for those crafts. Which one would be best to purchase, the Explore Air or Air 2? I do use the computer but am not all that savvy and usually end up calling my husband. Do not want to be doing that all the time.
Some fellow crafter friends have said the company is not selling new design products for the Air. Is this so and is it a problem?
Thank you for doing this for us newbies.
Hi!
So the main difference between the Air and Air 2 is that the Air 2 has faster cutting. Beyond that, they are essentially the same.
As far as the company not making more design products for the Air – it is true that their new machine is the Maker, and they are developing products that are only compatible for the Maker. However, the Air line is not out of date – they still definitely support it and crest projects for it 🙂
Hi Katie
I have the cricut expression 2 andI tried to connect to my computer. I tried with cricut craft room and design space, but my computer is not recognizing it. Do you have any tutorial about connect it?
Hi, Marce! Are you using Windows 10 by chance? I typically see this issue with people trying to use Craft Room in Windows 10, which it isn’t compatible with.
Is there a way to slow down the speed on my Cricut Explore Air?
You know, I don’t think you can change the speed. YOu can change the pressure though, which may help.
I want to cut papers for various size hexagons and other paper piecing shapes. Once I learn how to use the design space and actually cut something. LOL
Does Cricut have quilt piecing patterns?
They sure do!
Hi! I want to get a cricut but not sure which one would be best for beginners! Please help!
Hi! Either the Cricut Maker or the Cricut Explore would be great – beginners can definitely use both. What are you wanting to do with your machine?
Hi Katie,
I just got a new Cricut Explorer Air 2 and I am trying to read everything I can before starting. Question: I will be cutting felt, pleather, and denim. Should I have a designated blade for these materials?
Loved your tutorial and your site. I will be back to learn all I can.
Hi, Sandra! So glad you enjoy the site 🙂 You don’t technically need different blades for each one, but I think it can help if you have a separate blade for those materials…but if I’m being honest, I just use the same blades for everything 🙂
Enjoy your site. I am brand new to the Cricut scene and I have the new Cricut Maker. I have one major problem I do not know what I am doing wrong but I cannot get the vinyl to transfer to tape. I have bought Oracle and Cricut transfer tape. I am making smaller fonts for mugs and frames. But even the larger projects I still cannot get to fully transfer. PLEASE HELP! I have emailed Cricut and the company I bought the transfer tape and they just apologize. I have googled and youtube and they never show problems, they make it look easy. Am I rubbing wrong or what??? I have used the rubbing tools and other things…Frustrated.
I’m so sorry, Tracey! I will tell you that I, too, have HUGE issues with transferring over the vinyl. The only time I don’t seem to have issues with Expressions Vinyl’s products and their transfer tape. I have had a lot more luck with the strong hold transfer tape from Cricut -https://shop.cricut.com/en_us/stronggrip-transfer-tape.html. You may also just try regular contact paper – I know a lot of people who use that. I LOVE the Cricut company, but their transfer tape definitely leaves something to be desired.
I really dont’ know to much because I hvae had three strokes and have not used my machine.
Well please let me know if you have any questions!
I’m contemplating between getting an air 3 of a maker, I still don’t really understand what the difference is?? The air 2 cuts fabric and leather as well??
Hi, Cassie! While you can cut fabric and leather with the Air 2, the Maker cuts them much easier. You need backing for the fabric with the Air 2, and the cuts aren’t quite as smooth. The rotary blade was designed specifically for fabric and other flexible materials (such as felt and soft leather) to cut much more smoothly and precisely.
As far as leather, the main selling point is the ability to cut it more easily and thicker pieces. The knife blade isn’t released yet but will be sometime this year. It can cut much thicker materials, and I can’t wait. I hope that helps!
Enjoying this info that you post. Has been very helpful. Thanks!
You’re welcome!
Thanks for such an informative site. I bought a Cricut Explore 2 for myself and have been reading the last three weeks to get started. After reading this I am ready to try something. I am hoping to make our Christmas cards using the machine.
I’m sure you will be able to! I hope your Christmas cards turn out great!
i am wondering if this site will work for the original cricut cutting machine?
Hi, Kathy:
I don’t have a lot of experience with the older machines, but I’m happy to help you trouble shoot any issues you have. Our Cricut Facebook group has users of older machines that are very helpful!
I’m so intimidated by this machine. have had it for almost 2 years and its barely been out of the box. Please help or advise where best place to go for help is. I’m a very visual person and not very computer literate.
Hi, Donna! I would love to help you understand your machine a little bit more. Feel free to shoot me an email or comment back here with some videos you’d like to see me make to help you out!
I am so-o-o thankful I found your website! I’ve had my Cricut Explore Air for a number of months & haven’t done much with it. The learning curve seems to be straight up! I’ve been reading the manual & watching the videos & then trying to re-create projects demonstrated. For the past 24 hours I’ve been trying to create a card with writing. No go & major frustration. I watched the video numerous times, stopping it every few seconds to review every step. Then I went to the Help & Chat areas. Chat was totally unhelpful. I decided to search for Cricut for Dummies & located your site. Eureka!! In a few minutes my issue was resolved & I successfully created the card. The Cricut instructions were not specific enough & the person on Chat seemed unable to respond to my questions. “Select All” & R click Attach was the simple solution. Thank you, thank you!! Now, I’m going back to get more words of wisdom. I’m feeling hopeful that I’ll conquer this new learning experience!!
Oh thank you for your sweet comment – it means so much to me, and it makes it feel like writing these posts are worth it 🙂 I hope you’ll stick around for more. I try and do a couple Cricut posts a month 🙂
I have been searching since January for someplace to give me simple instructions to make a vinyl tshirt design and I just found it! Thank you so much for making your video so easy to understand for those who are intimidated by this machine! After watching you make your shirt, I feel confident that I am ready and can do this! Whew. Finally, a place that gave me the confidence to fire up this machine and get the dust off it! Thank you so much! I have already requested to join your Facebook group!
Thanks so much for your comment Sharon – it means so much! I’m glad that you found the video helpful. I can’t wait to see what your final project looks like!
Hi! This is very helpful. My cricut is on its way! I’m wondering if you have a favorite hp printer. I need to replace my old one and participate in the instant ink program. Thanks!!!
Hi! I’m glad you found it helpful 🙂 I have the HP Envy 7640 https://amzn.to/2qKWDCS (affiliate). I love it! Totally compatible with the Instant ink!
Thank you Katie, this will be very helpful. I’ve just purchased the Explorer Air 2 Rose bundle. Looks complicated, but I’m willing to take on the challenge even more with your helpful hints.
Best of luck!
You talk about always doing a test cut, but how do I actually do this?
So in Cricut, there isn’t a button that says “test cut” (in total honesty, when I wrote that test cut, I was thinking back to my Silhouette days!). However, in Cricut, all you need to do is just open up a separate canvas, make a basic shape, and cut it using the settings you plan to use on your other canvas.
This article really helped me. I was considering returning the Cricut I received for Christmas.
I’m so glad this post was helpful to you! <3
Is there any way to get around the size issue when up loading an image?
What do you mean? You can try resizing an image in a free program like PicMonkey if it is saying the size is too large 🙂
HI Katie
My wife and I are thinking of getting a Cricut air 2 we just want to know how the iron on vinyl stands up to the wash and normal wear and tear.
Thank you
John
Hi, John! I think it holds up pretty well – just make sure you wash it inside out 🙂
I am having trouble with the sticker paper going through my printer properly. It gets stuck and doesn’t print out properly so I can’t cut it out.
Is there a printer anyone out there has been successful printing with the Cricut sticker paper?
Hmm, I’m not sure about this! What kind of printer are you using?
I got a Cricut Explore Air for Christmas last year and messed up on cutting, so I boxed it back up promising myself I’d try again “later” and moved on. Now I’m wanting to make Valentine’s Day gifts and this post helped me tremendously. Thank you!
Oh I’m so happy to hear this! I’d love to see how your Valentine’s Day gifts turn out (if you are on Facebook, feel free to share them in the group or on my Facebook page!).
Hi! I only have one place where I can put a blade, but not a second where I can put a sharpie! , it looks like all machines come with 2 of these, but mine came with one. can I add one?
Annann
Hi, Ann! What kind of machine do you have? Feel free to send me an email at katie@clarkscondensed.com and I can help troubleshoot 🙂
My husband purchased me a Cricut Explorer Air2 for Christmas. I’ve done a couple vinyl stickers with the pictures provided on the design space. I’ve downloaded a picture and tried to cut it. However it keeps showing as a print and not a cut. Then when I send it to see what happens it says the cut marks can’t be seen. How can I make this just a cut? Also what is your facebook page? Reading your tips are a lot easier to understand than others I’ve read. Thanks for your help.
Hi, Beverly! Please accepted my apologies for not responding until now. I had a bunch of comments buried that hadn’t hadn’t been answered.
In order to change to cut instead of print, you have to click on the image in the layers panel on the right hand side of Design Space, and a little panel should open. At the top will be something that has different symbols – a print, scissors, a pen, etc. Choose the scissors to cut!
Here is the Cricut Facebook group 🙂 https://www.facebook.com/groups/711777112325006/
I am having trouble using my slice, I can’ t seem to get it to light up to use it. I am trying to slice a letter and it is not working for me.
I am have having some trouble with the iron on. The machines cuts it and all, but when I put the item on a shirt and iron it on only some of the letter stick. Is there something I may be doing wrong? I have watched several videos and it seems super easy and I can’t see why I am having so much trouble.
Hi, Denise!
I’m sorry you are having this trouble. I’ve encountered this before. Are you using some kind of cloth between the vinyl and the iron? I”ve found that sometimes if it’s too thick, it will cause troubles with it sticking all the way. Sometimes I will just take the cloth between off all the way and iron directly on to the vinyl for a few seconds. Feel free to join our FB group and I can help you troubleshoot more – https://www.facebook.com/groups/711777112325006/.
Hi Katie,
My husband bought me a cricut explore air wireless for Christmas! I haven’t even opened it because it seems SO complicated! I have an embroidering machine that I was able to teach myself how to use! Just feel overwhelmed with everything I am reading online about the cricut. I tried to join the facebook page to see if I could get more information, although it said it was a closed group. Does that mean I can’t join the group?
Hi, Lisa! you can definitely join 🙂 Does it not let you request to join? If not, send me an email with your Facebook emaiil address and I’ll invite you 🙂 Katie@clarkscondensed.com
There’s a video on YouTube by Melody Lane that is really helpful! It’s 2 hours but worth the watch, especially if you are feeling intimidated. I didn’t touch my expressions for a year I was so afraid of it! Lol. My husband bought me the air for Christmas this year and that video helped me with the transition. Good Luck!
I am new to Cricut explore air, I’m excited I found your blog and hoping to learn alot from you. 🙂 Hope to chat soon.
Hi Katie, I’ve wanted a Cricut machine for long time now, but I am overwhelm at this point but I don’t give up easy. You recommended purchasing the 9.99 Cricut subscription . Does this mean I will have access to all of the images instead of paying individually ? And if I had purchased one image, is it one cut for will it stay in my images permanently ?
I’m so sorry that I was so late in responding to this. I’m sure you’ve figured this out by now, but I thought I would respond for the sake of others. Yes, if you purchase an image it is in your collection forever. If you get Cricut Access, you will get access to thousands of images and fonts, though there are still some that cost money.
Easy to follow information. I linked a cartridge for fonts, it shows it’s linked but when I attempt to open it shows no results found. Any suggestions?
Hi,
I received my cricut for Christmas and haven’t taken it out of the box yet.. I like to educated myself before tackling a new venture… Thanks for your Pinterest post.. Now i feel confident to open my box and get started!
Thanks!
Tina
I create a project and go to print and all of my objects are all over the place. How do I print exactly what I’ve created?
Hi, Leesa! You should be able to select all of the pieces and weld it by right clicking and hitting weld.
I always use weld if using a text that I have rearranged the letters individually, the letters blend better than using attach, but you cannot un weld. When putting a page together prior to printing I have found that using attach works as well and you can unattach. That way if you want to make changes later it’s possible.
This article really helped me. I was considering returning the Cricut I received for Christmas. All the blogs, etc., just seemed more complicated than I could handle. I also thought I would end falling into an internet black hole. After reading this, it seems so much simpler. Thank you.
Hi! Thank you for your comment – it means so much to me. I hope you’ll check back or subscribe my cricut newsletter – I will be sharing more tutorials and tips soon. I’m so glad that this was so helpful to you 🙂 I found the same thing when I first got my Cricut. Not a lot of helpful posts, especially with a machine that has so many options.
This may not be the place to ask, but, how well would Cricut Air 2 cut leather. My hobby is leathercraft and I am trying figure out if this machine would be a worthwhile purchase.
Your information above suggests that you are bit of an expert with these machines.
Thankyou
David Wiesner
Hi, David! Thanks for commenting. These machines are definitely designed to cut with leather, though I don’t have any personal experience. This is a great article on how to use the original Explore, but it would be a similar approach. https://damasklove.com/how-to-cut-leather-cricut-explore/
Doing some test cuts will help you figure out the best setting for your l leather, but there should be a preset setting to get you started. There are some great YouTube videos to show a demo of the leather cutting as well. And this is Katie responding (I’m logged into my husband’s account 🙂
Not sure which one to buy. I am wanting simple but latest. I want to use it mainly for leather and fabric. Could use your advice
I’ve had a Cricut for years, and this post was actually super helpful for me, too! Thanks for all these tips!!
I’m so glad!