
How to Cut Wood with Cricut Explore and Cricut Maker
In this tutorial, you will learn how to cut balsa wood and basswood with your Cricut Machine!
For the past little while, I have been experimenting with cutting wood using my Cricut.
While the Cricut Explore Air isn’t technically the best for cutting wood, it is possible, and after a lot (and I mean a lot), of trial and error, I think I finally figured out the best ways to cut balsa wood and basswood!
I’m eagerly awaiting the release of the Knife Blade, which will make it even easier to cut different kinds of wood (and thicker pieces, as well), but until then, I’m happy to know that I can with my current setup.
The good news is that you can have an Explore Air machine or the Maker since both of the blades I used in this tutorial can be used on both of those machines.

Please keep in mind that neither of these woods are on the official “approved” list from Cricut, so you are cutting them at your own risk. However, I did not have any issues with them, and I cut a lot from these materials recently.
Let’s start with Balsa Wood!
How to Cut Balsa Wood
Materials Needed:
- Balsa Wood
- Fine Point Blade (more on this in a minute)
- StrongGrip Mat (purple)
- Cricut Maker or Cricut Explore Air (1 or 2)
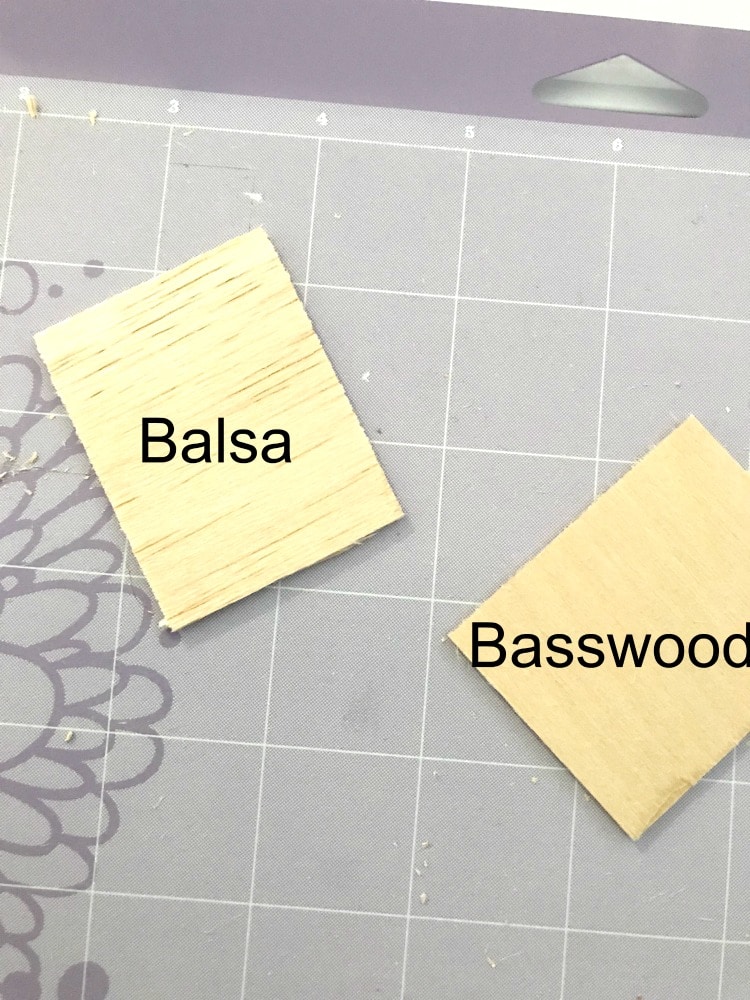
If you aren’t familiar with balsa wood, it’s a type of wood that feels rather flexible. It almost feels like styrofoam.
It’s great when you need a material that’s a little stiffer, and I know a lot of people who have enjoyed using it for different Cricut crafing projects.
It comes in different thicknesses, and it can be rather delicate. When I was trying to cut it down to size the first time I was using it, I just about splintered the piece in half.
I got the thinnest piece I could – 1/32″. Keep that in mind as you read this tutorial, because if you do decide to go up to 1/16″, you may need to make some adjustments.
First off, make sure you cut perpendicular to the grain of the wood. This was the first mistake I made – I got a little lazy and didn’t want to cut it so I would have a horizontal piece. I just put the big vertical piece on my 12×24 mat and called it good.
Because it started cutting with the grain of the wood, it splintered really easily. So definitely make sure you cut the wood to the right size so you can place it on the mat against the grain.
Second, make sure your mat is really sticky! If your mat is losing it’s stick, it will become very easy for the wood to shift. Definitely make sure you use the StrongGrip mat – I tried one of my other mats first, and it did not work out so well.
Third, use a fine point blade. This is advice that may be contrary to what you’ve heard before. I kept trying to use the deep cut blade, and it kept just crushing my Balsa Wood. It would cut some of the edges just fine, but then other sides would have huge chunks taken out of it. I tried tons of different settings with the same results.
Mirror your image. The rollers will make an imprint in the wood, which can cause some unsightly lines you may not want on your project. If you mirror your image before you cut, you can just flip it over and use the other side.
I created a custom material in Design Space 3 for Balsa Wood. Here are the settings I eventually settled on for 1/32″ balsa wood. Always do test cuts though, because balsa wood can vary in it’s texture, and it also can depend on how sharpened your blade is.
- 250 pressure
- 5x cut (start yours a little lower on the test area and then go up to 5x if you need to)
- Fine Point Blade
How to Cut Basswood
- Basswood (1/16″ or thinner)
- Deep Cut Blade
- StrongGrip Mat (Purple)
- Cricut Explore Air (1 or 2) or Cricut Maker
I wasn’t planning on cutting basswood until I stumbled into it when I had gone back to the store to get more balsawood.
It is definitely a lot sturider than balsa wood, so I was a little worried about if it would cut or not. However, it really suited the project I was working on better, so I thought, what the heck…why not?!
The thinnest kind they had was 1/16″, though I have heard there is 1/32″, which may cut a little easier. When I was experimenting with the settings, I started at 240 and ended at 345 (which is about the top end of what you can cut!)
The first few cuts, I did have to run a box cutter along the lines to get them to pop up better. However, once I got over 300, it was easier to just pop them out. Even at 345, they didn’t just come out of the wood with no effort…but at that point, I did not have to use a box cutter.
I just popped the pieces out, and they had pretty clean lines. I was pretty thrilled about this, because I don’t love working with box cutters.
My tips for cutting basswood are pretty similar to balsa wood, with just a few adjustments.
You will need the deep cut blade to cut with basswood. If you don’t already have this, make sure you buy the one with the housing – retail is $29.99, but I often see it on sale. I purchased mine at Jo-Ann’s by price matching with the Cricut website (which was on sale for $20.99 that day).
Use the StrongGrip mat.
Cut perpendicular to the grain of the wood.
Have a box cutter/xacto knife – while I was able to avoid using this at the 345 level, you may want one on hand just in case there are some tight corners or edges that need a little extra help.
Here are the exact settings I used. Again, always do a test area and adjust as needed.
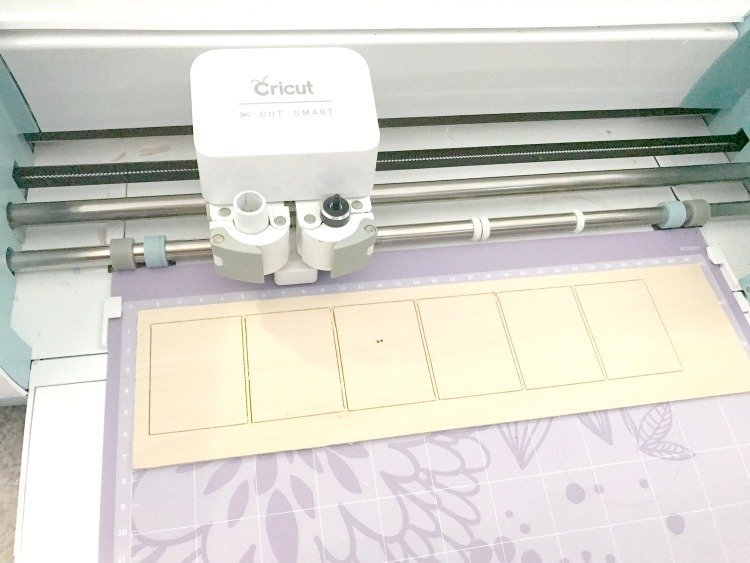
I cut out 48 rectangles that were about 1.5″ wide. The blade was still sharp afterward, so it didn’t put too much stress on it, even with all that cutting.
So I hope that this was helpful and can help you expand your horizons a little bit! Let me know if you have any questions.
- 345 pressure
- 5x cut
- Deep cut blade


Can I make 1:24 scale doors from balsa wood with this circuit machine.
I have an Explore Air 2 and used your settings as well as others in other videos and mine will not cut through at all. I have a brand new Deep Cut Blade too. What am I doing wrong?
Hmm, that’s a hard one. Is it pushed in the all the way? Have you tried adjusting the pressure even further? What thickness is the wood you are using?
Question – how would one go about writing on balsawood with a cricut? Does a thickness need set so the pen doesn’t smoosh down too far? Thanks!
Do you know if the knife blade only works on the maker?
Hi, Haleigh! Yes, it only works with the Maker.
Hi, where did you find the sheets of wood? I have looked online and can on my find the smaller sections. I have the Maker and knife blade. I got what I thought was Balsa wood but it feels and looks like cardboard. I was disappointed.
I found it at Michaels 🙂
Hi Katie,
I enjoy your videos and find them helpful. I tried cutting 1/32 with my deep cut blade on my explorer and did not have the success you did. 🙁 I even went over it a few times… However, I just got my new cricut maker YAY! But I only have the rotary blade at the moment… Do you think I will have success with that blade? I have the knife blade ordered, but need this project done before it is estimated to get here. Any suggestions or tips you have are greatly appreciated!!
Hi, Krystle! I’m sorry that this didn’t work as well for you on the Explore. I think it is hit or miss! You could definitely try using the rotary blade. I haven’t personally used it for wood, but I do think it’s more powerful.
Can you clarify what you mean when you say “Cut perpendicular to the grain.” Are you saying you have different layers and you rotate the wood so that it is always cutting the same direction? What if you have diagonal lines or curves? Thanks for the post!
I just bought the Cricut Maker and can’t wait to cut wood on it. Thank you so much for the wonderful tips!!!
You are so very welcome LInda!
I have Explore, but not air. Will that work for this? Also any experience cutting leather?
I have cut leather with success. However, it was using the rotary blade with the maker. I think that the deep cut blade should work though. And yes, you should be able to do this with the Explore 🙂
At the beginning you state that the tutorial is for 1/32, and if we want to use 1/16 thick material we will need to make adjustments. However, the balance of the tutorial appears to be using 1/16, indeed you state in one place that you have heard 1/32 exists, but that’s not what you’re using. I’m confused.
That was an error. The balsa wood tutorial was done using 1/32″.
However, the line you are referring to was for the bass wood instructions, which I did use 1/6″.
Hi…thank you for this tutorial…I am anxious to try it….I had trouble with poster Board! I am curious if you have experimented with some simple shapes like a heart or a bunny…don’t want to push my luck I’m sure anything with detail would be problematic but how about a bell, heart, you get the idea! Thanks for any advice you may have!
Hi! I haven’t used poster board, but I would imagine it would be a little trickier to do intricate designs. I think a simple design like a heart or bunny should be fine, though, so long as it’s not too small!
Oh man, this is so cool! The possibilities when you can cut wood so easily!!! Ah!!