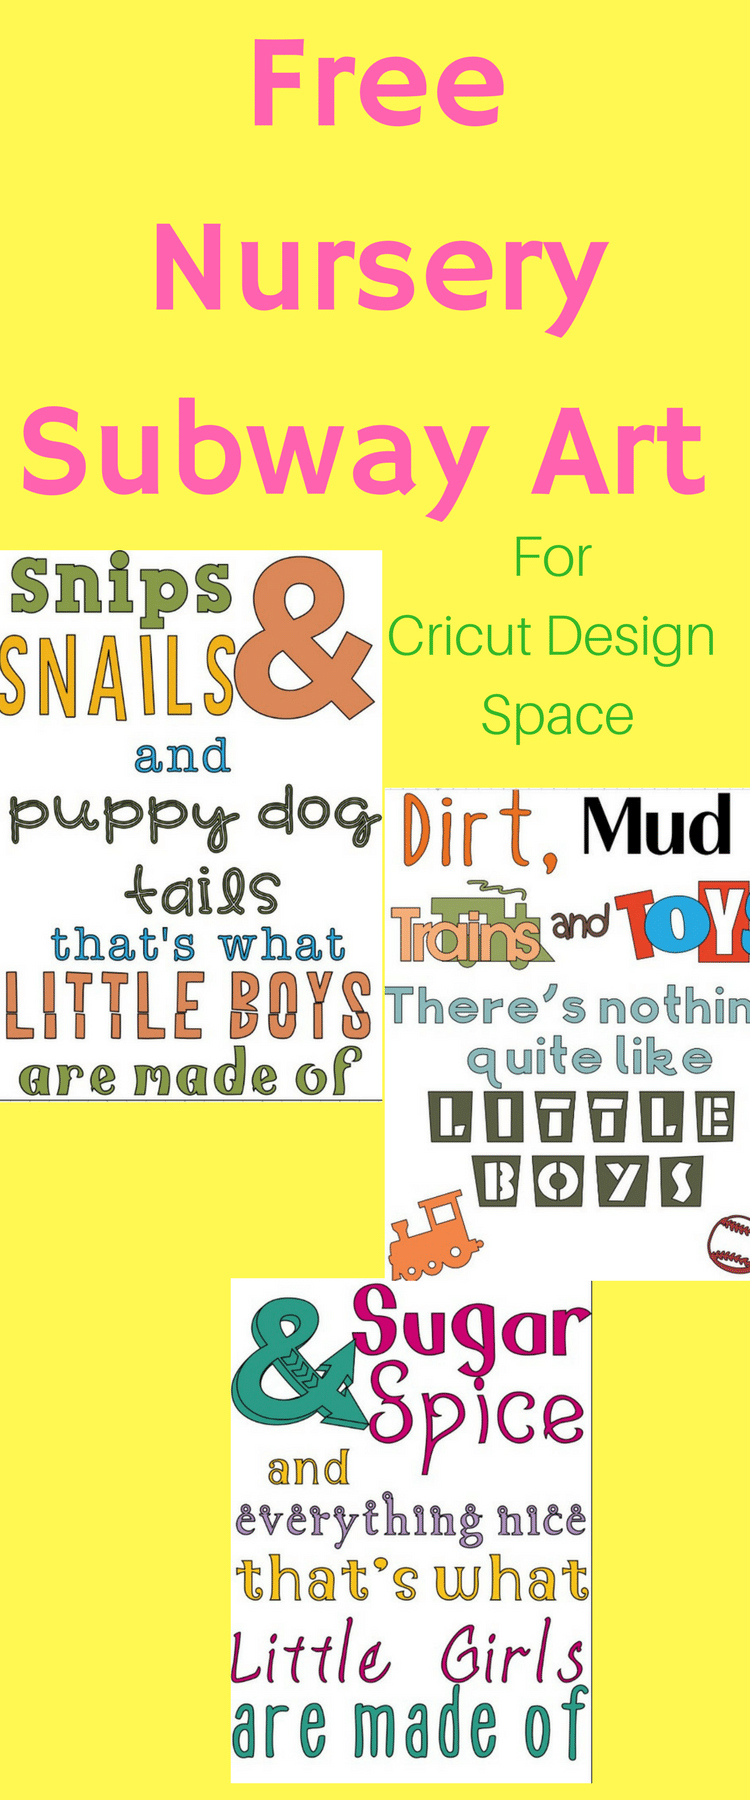
How to Make Subway Art with Cricut Design Space – FREE Nursery Subway Art
How to Make Subway Art with Cricut Design Space – FREE Nursery Subway Art
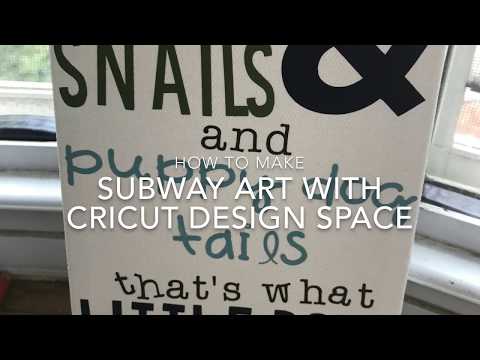
Subway Art is a very popular type of art nowadays – it’s also know as Typography Art.
I often see it as home decor (especially in nurseries), and I just love the idea of it.
If you aren’t familiar with what Subway Art is, to put it simply, it’s just phrases, clusters of related words, songs, poems etc. that are designed with different types, colors and sizes of fonts.
They are typically very fun, bright, and oft times, eclectic.
You can make Subway Art in a variety of different design programs, but I wanted to share with you today how to make subway art with Cricut Design Space. I will also be showing you how to cut it with your Cricut Explore Air!
Materials Needed:
Canvas (or other material to adhere your words to).
Step One:
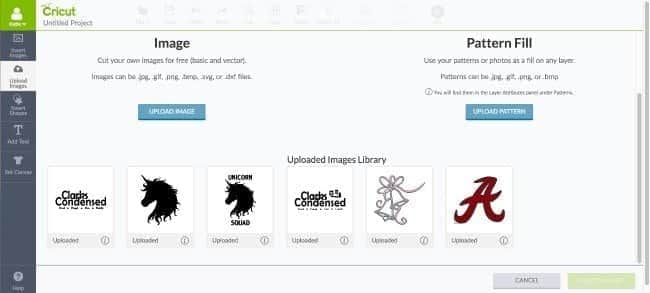
First, open up Cricut Design Space! Then, click on images, type in “rectangle” and select the one that says it is free. This should be free for anyone – even if you don’t have Cricut Access.

Insert the rectangle into your your workspace, and press little padlock on the rectangle to unlock the dimensions.
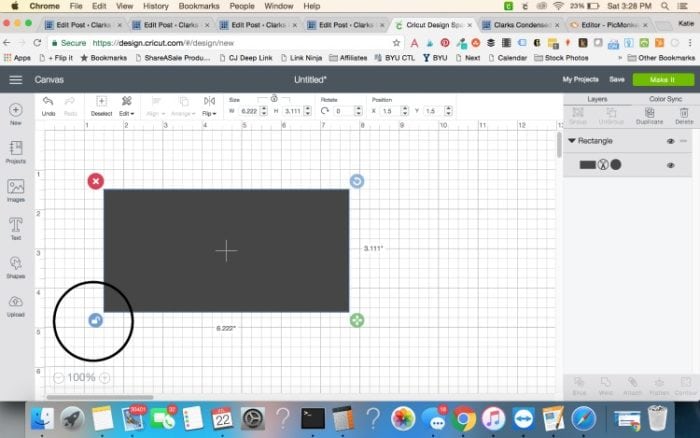
You will now make the rectangle into whatever size you are wanting your art work to be. I mainly just do this to create a template so I can make sure I size everything correctly. You should also change the color of your rectangle to white.
Before you cut your design or print it, make sure you remove the rectangle!
Step Two:
Start making the art! I would start with one word at a time and select the font you want. You just repeat this with all the different words and phrases that you want to use.
I highly recommend having the Cricut Access Fonts subscription, which is $4.99 a month. It gives you access to tons of great fonts – and you can tell pretty easily if the font can be easily cut or not. In the new Design Space, right next to the font, it will say if it’s a writing font, single layer cutting font, etc.
You can also use fonts that are downloaded to your computer. I really like using DaFont.com to find new fonts.
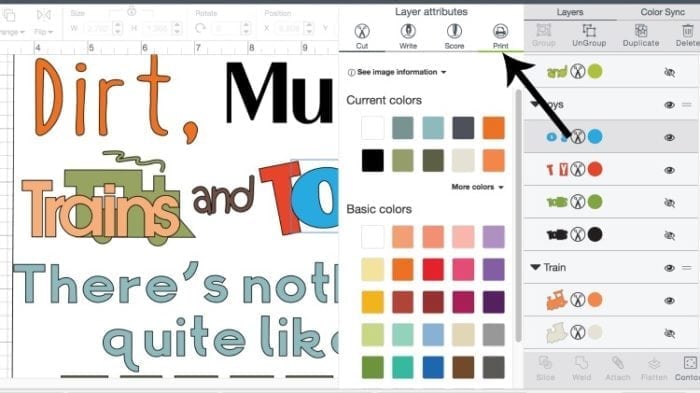
You can also add images or even premade phrases from Cricut’s image center. For instance, I used an ampersand from there, as well as the “Trains” and “Toys” that I used in one of my nursery subway art designs.
Step Three:
At this point, if you are just wanting to print your design, you can go ahead and do that. You just need to make sure all the colors are how you want them, and then you will want to change each element from “cut” to “print”. REMEMBER – this is ONLY if you are printing your design.
You will probably have to make your design smaller in order to print it. For instance, I tried to do an 8×10 print, but when I went to print it, I had to size it down a couple of inches.
If you are wanting to cut your design out with your Cricut, proceed to step four.
Step Four:
You will want to decide if you want certain words to be cut from the same kind of vinyl. I do think this makes things less complicated when you do this.
You can select different phrases/images by holding down CTRL in (windows) or command (in Mac) and the different elements you want to be cut together. After you’ve done this, press “group”. I accidentally said in my video tutorial to press attach, but this makes it so you have to waste some vinyl when you cut 🙂
Step Five:
Now it’s time to cut! Press “Make It” and you will brought to the preview for your cuts. Rearrange anything that you need to.
Step Six:
Make sure your dial is set to the material you are using, load your materials into your machine, and cut all the elements out!
Step Seven:
Once everything is cut, weed out the excess and apply to transfer tape.
Step Eight:
Now it’s time to assemble! Make sure you have your design up in Design Space for reference, and carefully transfer each word/phrase to your canvas!
Enjoy!
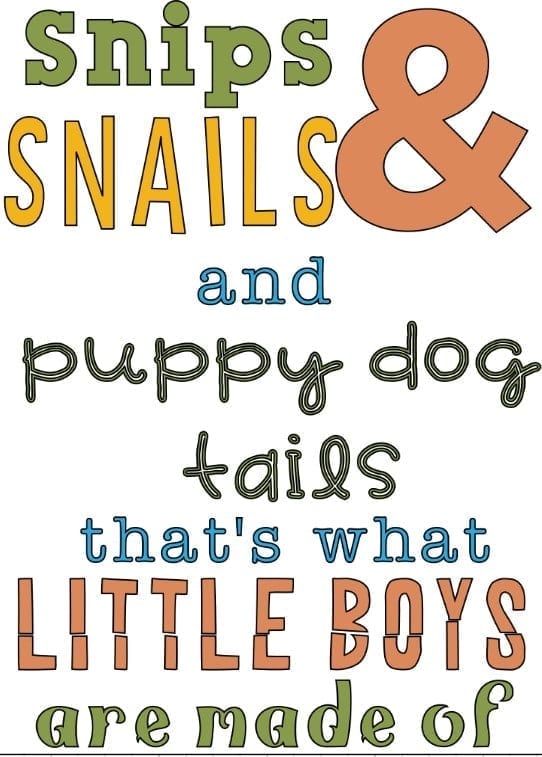
Here are a few designs that you are free to cut – please note that they may have premium elements or fonts in them that you may have to pay for if you don’t have a Cricut Access subscription – however, you are welcome to use these for any purposes. Please don’t edit them – if you need it in a different size, just look at these for reference to create your own 🙂
Even if you don’t have a Cricut machine, you can create a Cricut Design Space account and print these from there!

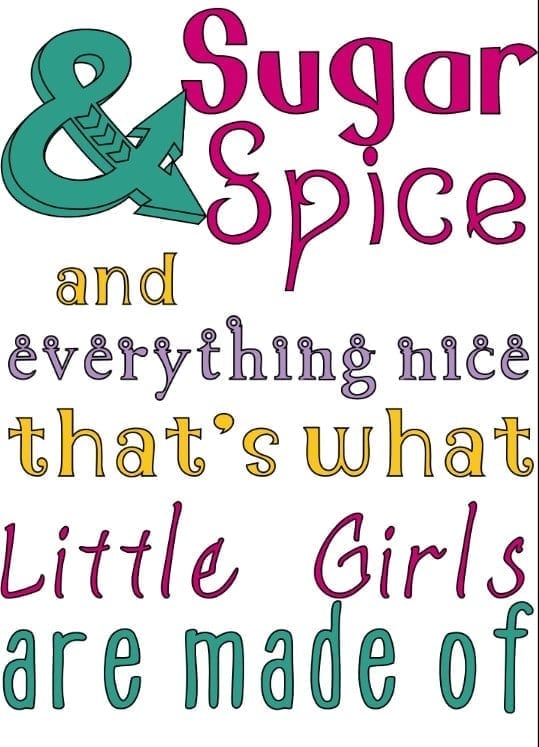
Get Sugar and Spice Subway Art
This is a sponsored conversation written by me on behalf of Cricut. The opinions and text are all mine.