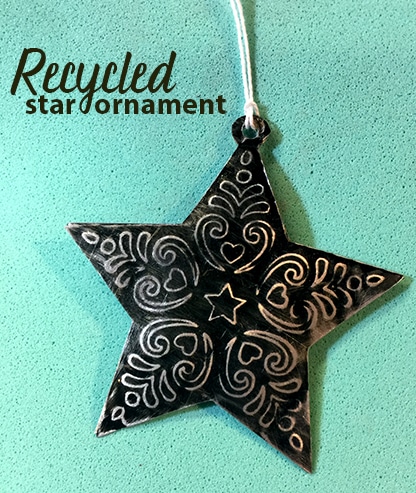
Recycled Star Ornament with Cricut Maker
This is Janet from Try it – Like it – Create it with a guest Cricut post.
Today I am making a recycled star ornament that has the look of an old tin ornament.
The recycled material is actually a soda can, making this a very inexpensive project.
The can is debossed and cut using a Cricut Maker.
I’ll take you through the entire process along with some changes from my initial idea to reach the final ornament.
The following links are affiliates. Please consider using them to help support future projects.
Materials:
- Black Alcohol Ink Marker
- Star Design
- Aluminum soda can
- scissors
- sandpaper
- craft foam
- twine
- Cricut Maker with deboss tool and fine point tool
- masking tape
- Xyron
Directions:
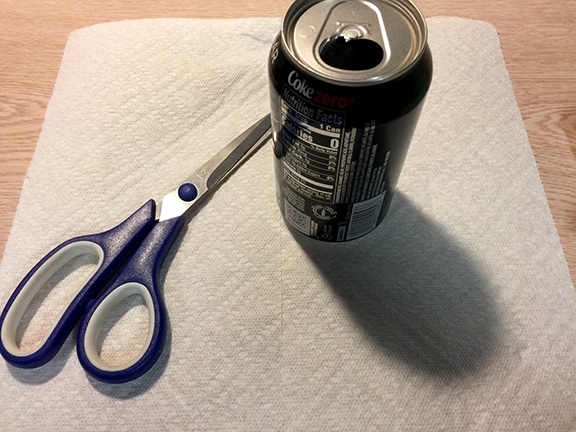
To begin you need to cut a soda can down to a flat piece. If you need directions on how to do so, here is a quick YouTube video showing how to do it.
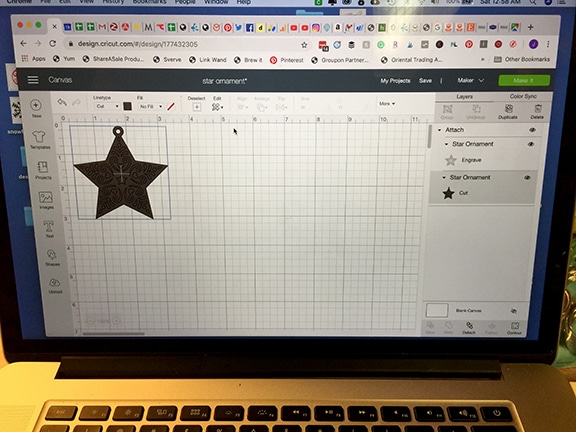
Open the star ornament in Design Space and check the width to fit your aluminum piece. (about 3″ wide)
Because I wanted both sides of the ornament to be the silver of the aluminum can, I sanded the printing off one side of the can.
I placed a sheet of sandpaper around a heavy box shape to give weight to the sanding, a sanding sponge or block would work equally as well.
I found working on a craft foam sheet to make the project more manageable.
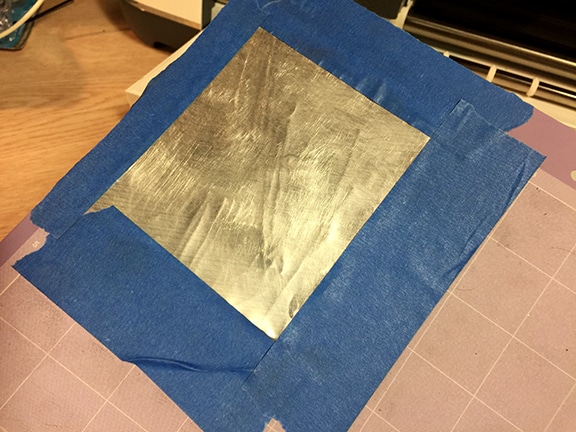
Tape the sanded aluminum to a Strong Grip mat on all four sides.
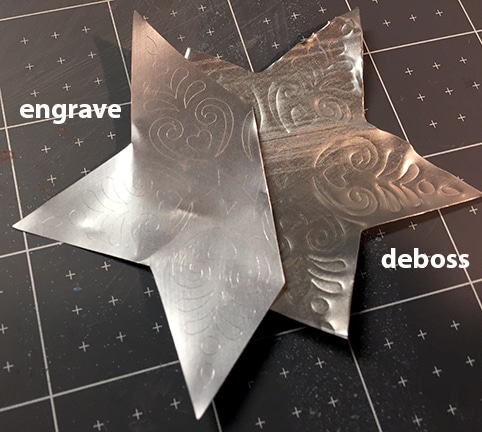
I wanted to take a moment here and show the difference between engraving and debossing on the aluminum.
I originally thought I wanted the engraving but it was too fine detail for the design. I am glad I tested both out.
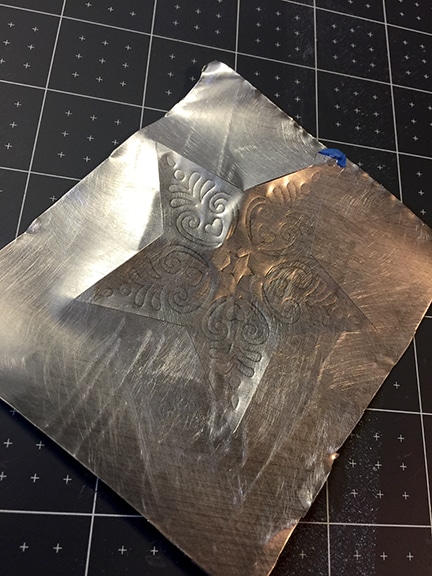
I chose the Foil Posterboard setting to Deboss and Cut the aluminum.
You can see that it doesn’t appear to be cut out.
The shape will easily release with a bit of bending and manipulating the aluminum.
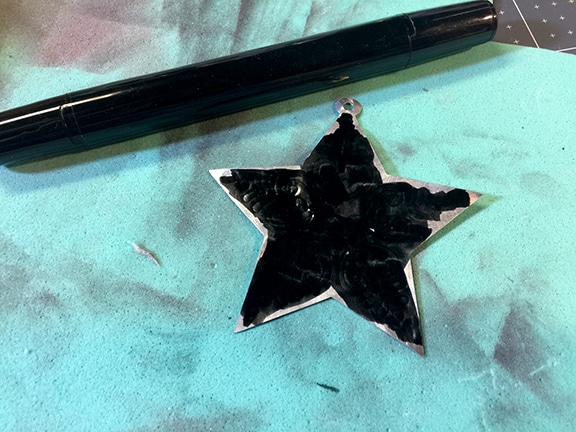
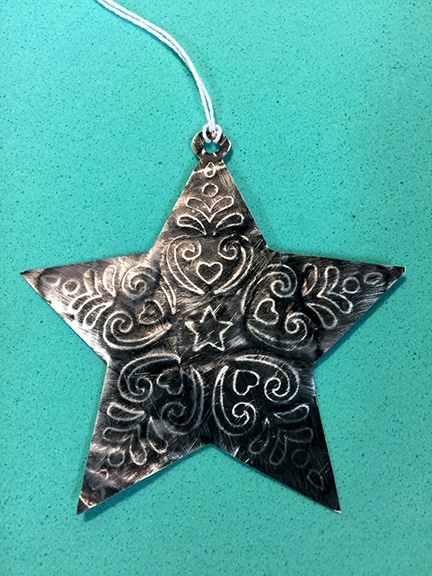
To antique the aluminum, I used an alcohol ink marker and then sanded off the unwanted ink.
Leaving the ink only in the debossed design.
(A black Sharpie would work equally as well.)
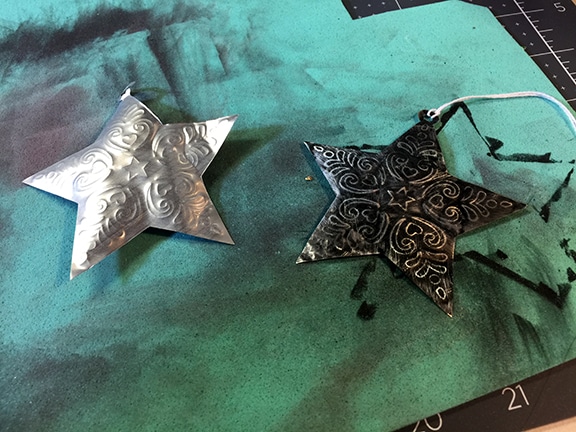
Here it is finished with the ink removed from the flat surface of the ornament.
This is actually the side I originally thought I was attempting to create.
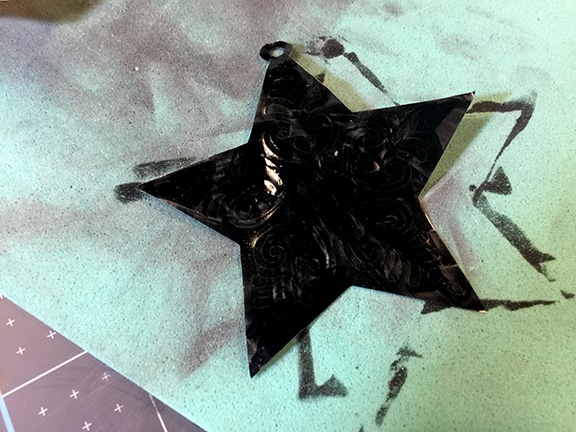
On the other side, I used the marker again covering the entire surface because the raised design is the area that will be sanded off.
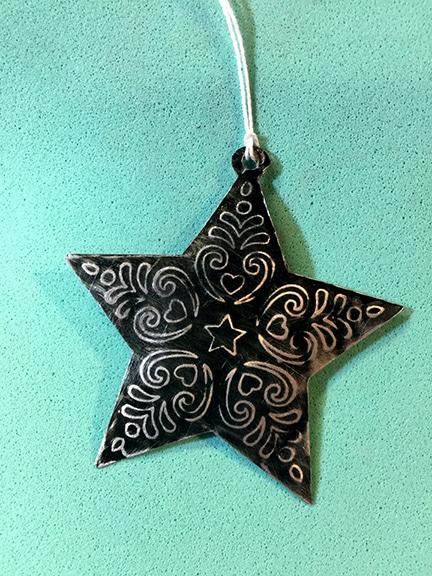
Here is the second side after sanding.
Once done, I realized I really liked this look better.
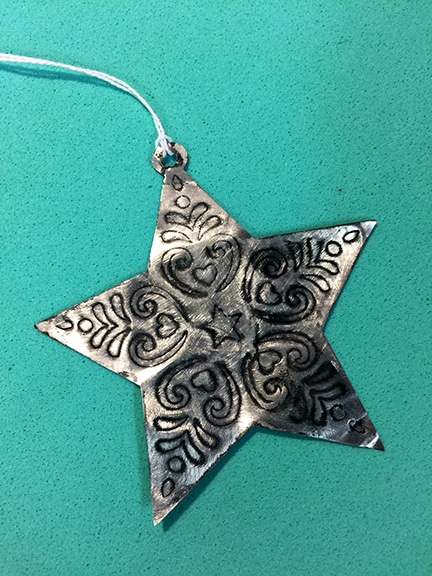
So, I decided to cut another star and finish it the same way.
I didn’t need to sand the printing off the soda can because it with be adhered to the other star and hidden in the middle.
This actually saved a lot of work from the process.
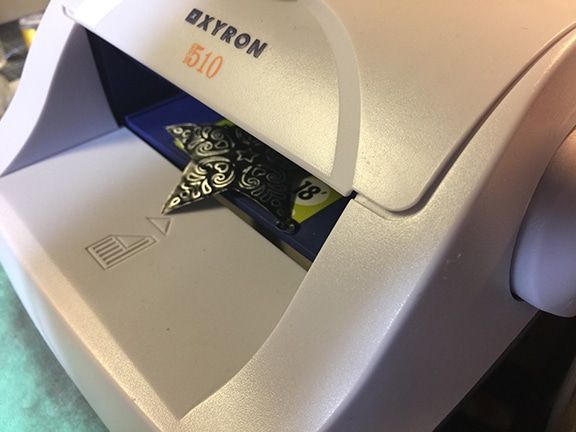
To adhere to the two stars together, I decided to send one through the Xyron.
Here the adhesive has been applied to the entire star and I just need to peel it off the paper.
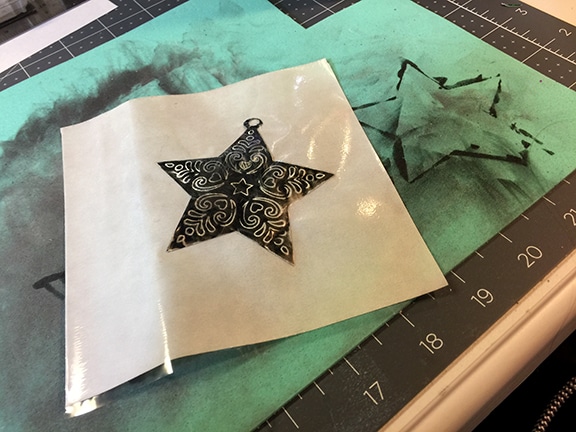
Once the two stars are placed together, the aluminum is much more sturdy.
Both sides of the design match.
I cut the twine and fed it through the opening, tying a knot at the ends to make it able to hang from the tree.
It is always interesting to me how an idea can be started and then change during the process of creating. I originally thought the design would be engraved but after experimenting, I found debossing actually gave a more bold and appropriate look to the design. Then the design filled with ink was my original attempt to make the design stand out better and I applied the same technique to the other side. This led to the “other side” actually being the better-finished look.
I only used one grit of sandpaper but you could change that or even use a variety of different grits to achieve a different look.
I wanted to thank Cricut for providing materials used in this project. I am a member of the Cricut blogging program.