
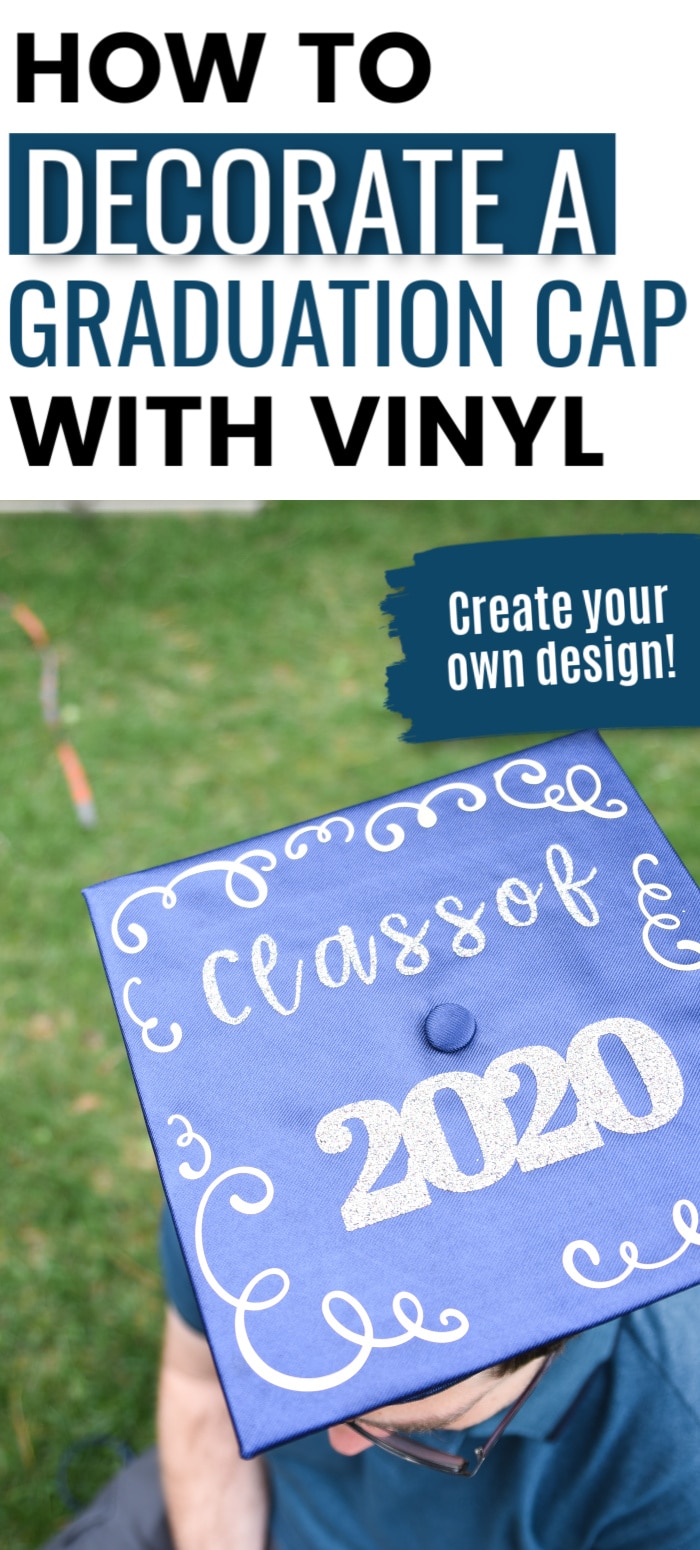
How to Decorate a Graduation Cap with Vinyl – Cricut Tutorial
Learn how to decorate your graduation cap with vinyl and make a graduation cap design in Cricut Design Space! This is a great way to make a fun momento for this important time in your life!
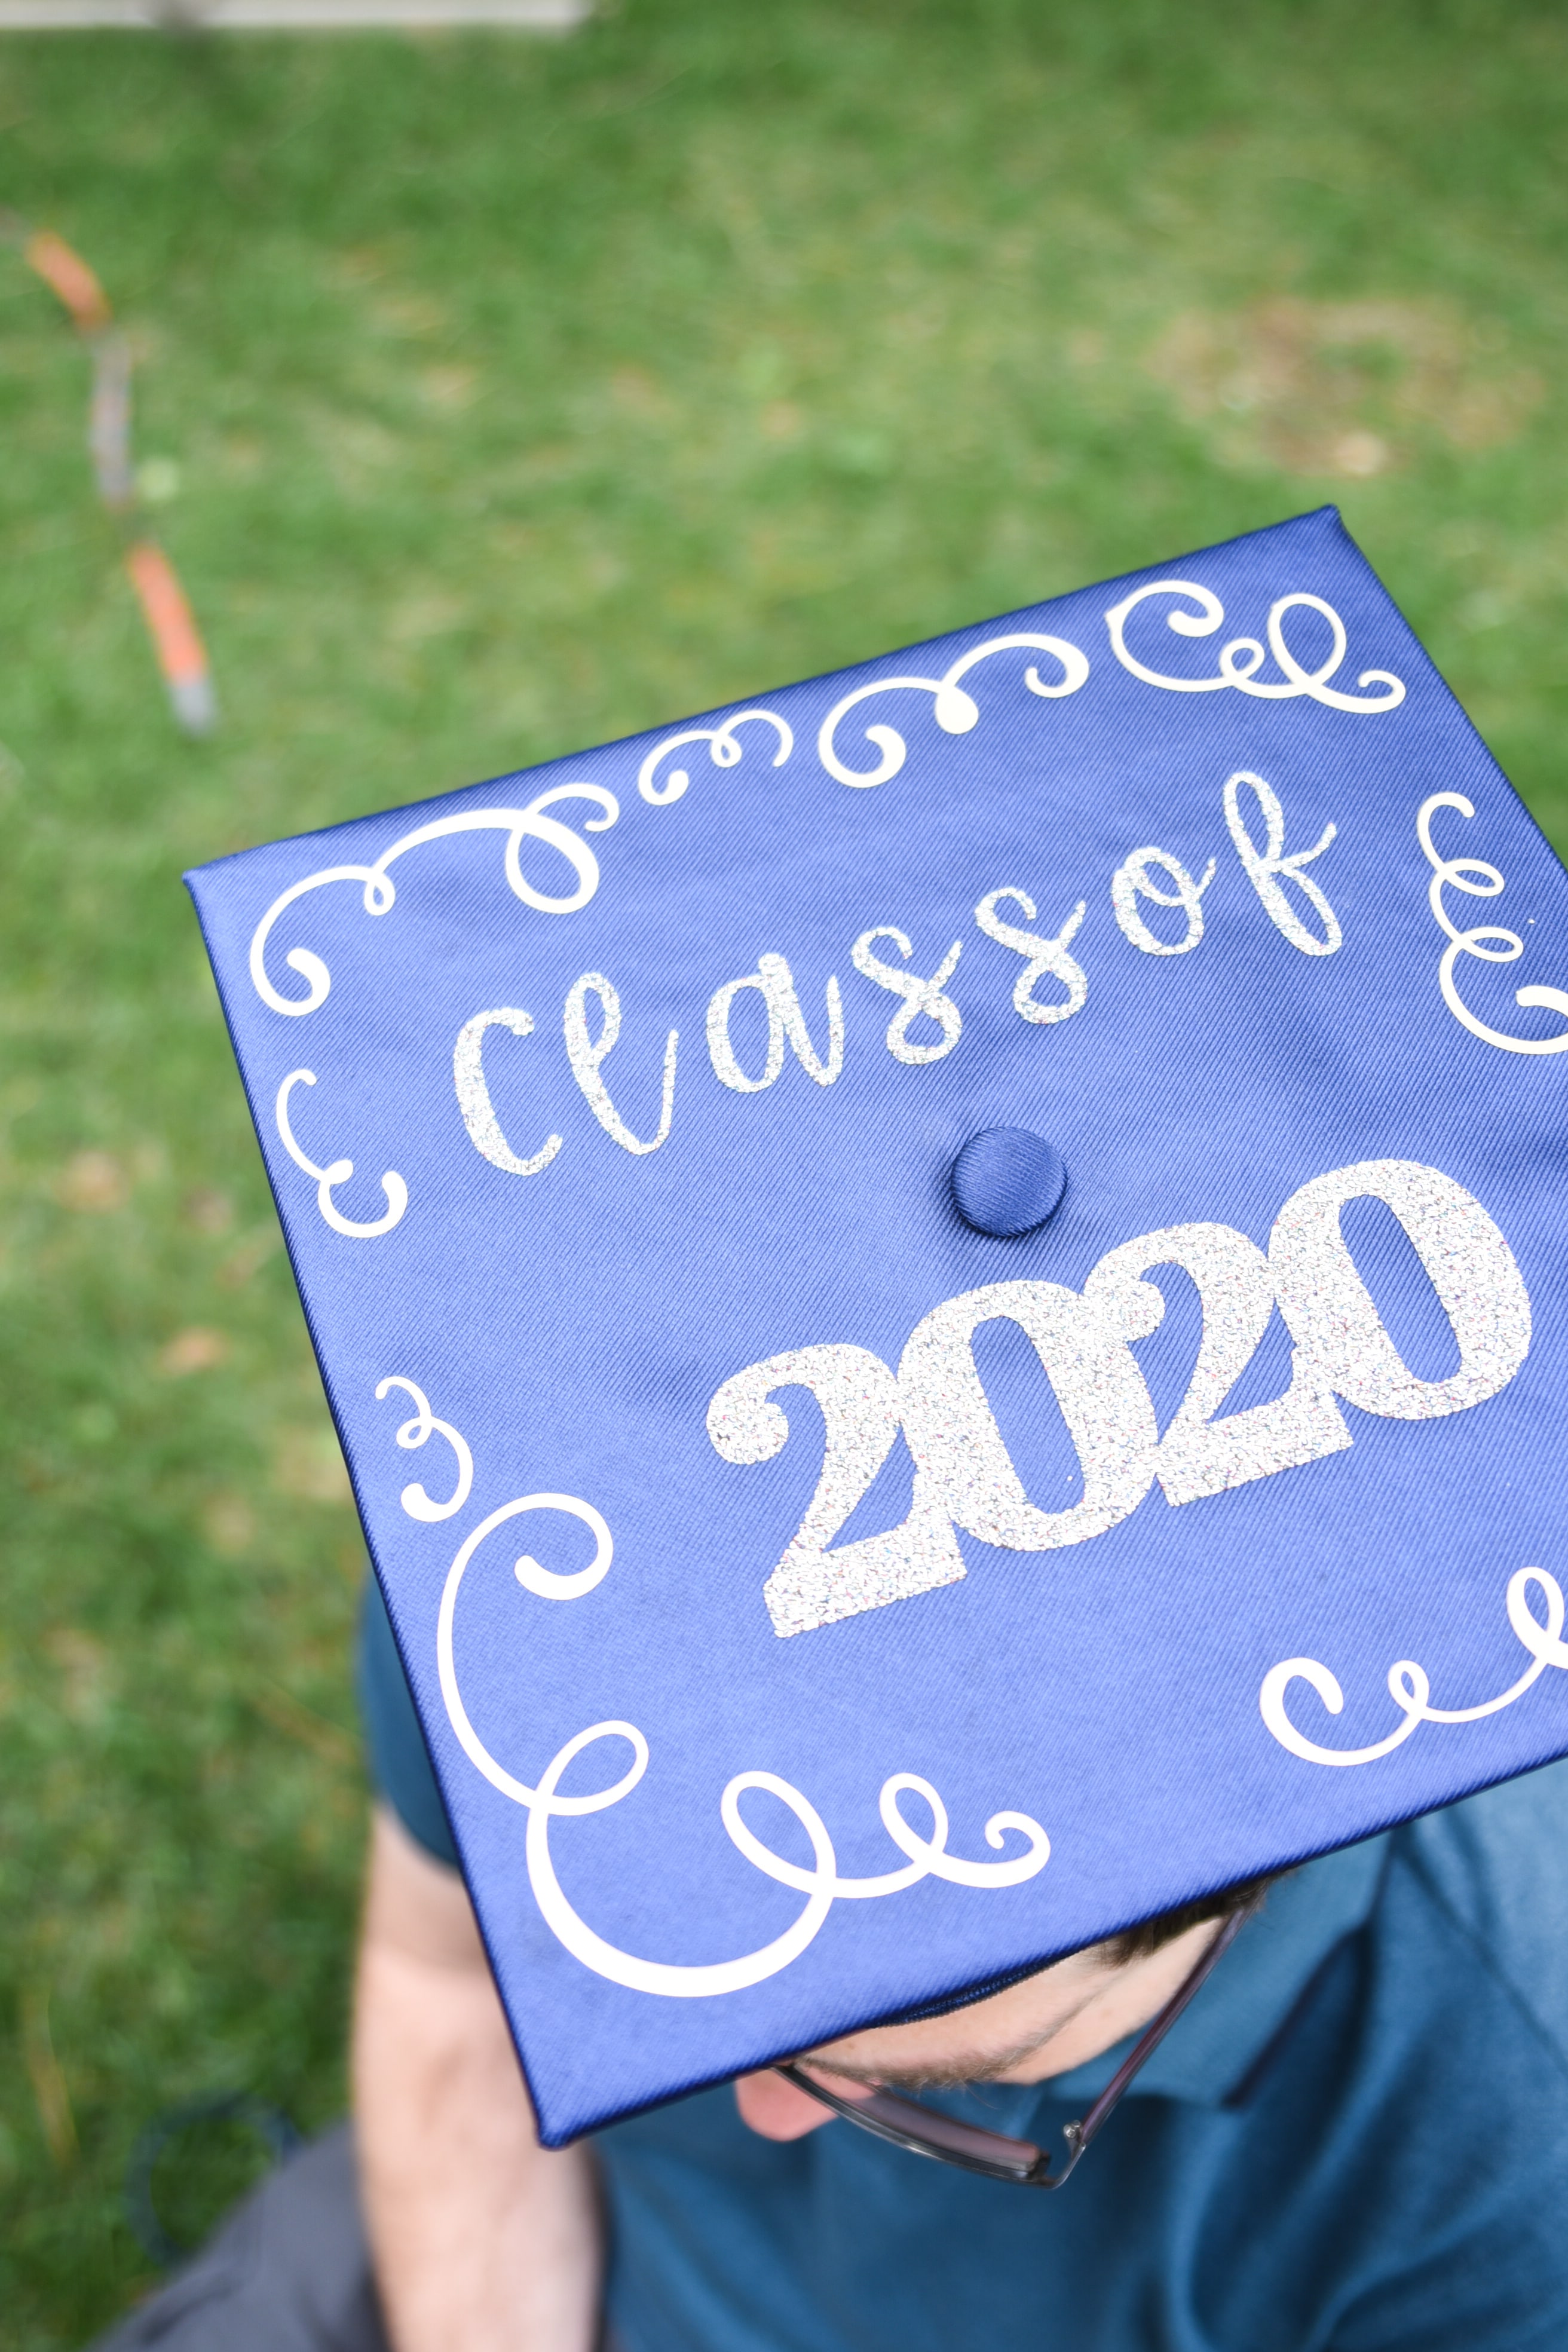
Decorate Graduation Cap
Can you use heat transfer vinyl on a graduation cap?
It’s probably a good thing Pinterest wasn’t really a thing until after I got married and had my first baby.
I probably would have spent way too much time doing crafts and DIY projects!
I remember seeing some kids decorate their graduation caps when I graduated, but it wasn’t really something most people did.
However, I see a lot more graduates doing it these days, and I think it’s so fun. It’s a great way to make your graduation cap more of a memento and less likely to be thrown at the bottom of a box never to be seen again.
I know a lot of people have already had their graduations, but I thought I would share a tutorial on how to use vinyl to decorate a graduation cap – and specifically how to make a design in Cricut Design Space! Even if you’ve already graduated, it might be a fun way for you to remember your graduation (especially in a crazy year like this year where most graduates haven’t been able to properly celebrate).
It’s really easy, so I hope that this will help your make your graduation cap into something you will always remember.
Cricut Graduation Cap
Materials
Below is what you will need to put iron on vinyl on your graduation cap
- Graduation Cap
- Iron-on Vinyl
- Weeding tool
- EasyPress 2 (I used my 6×7 size) or iron
- Iron on Protective Sheet or 4 sheets of parchment paper
- Here is the design I featured in this project – you can easily edit it for the year you are graduating!
Design A Graduation Cap Design in Design Space
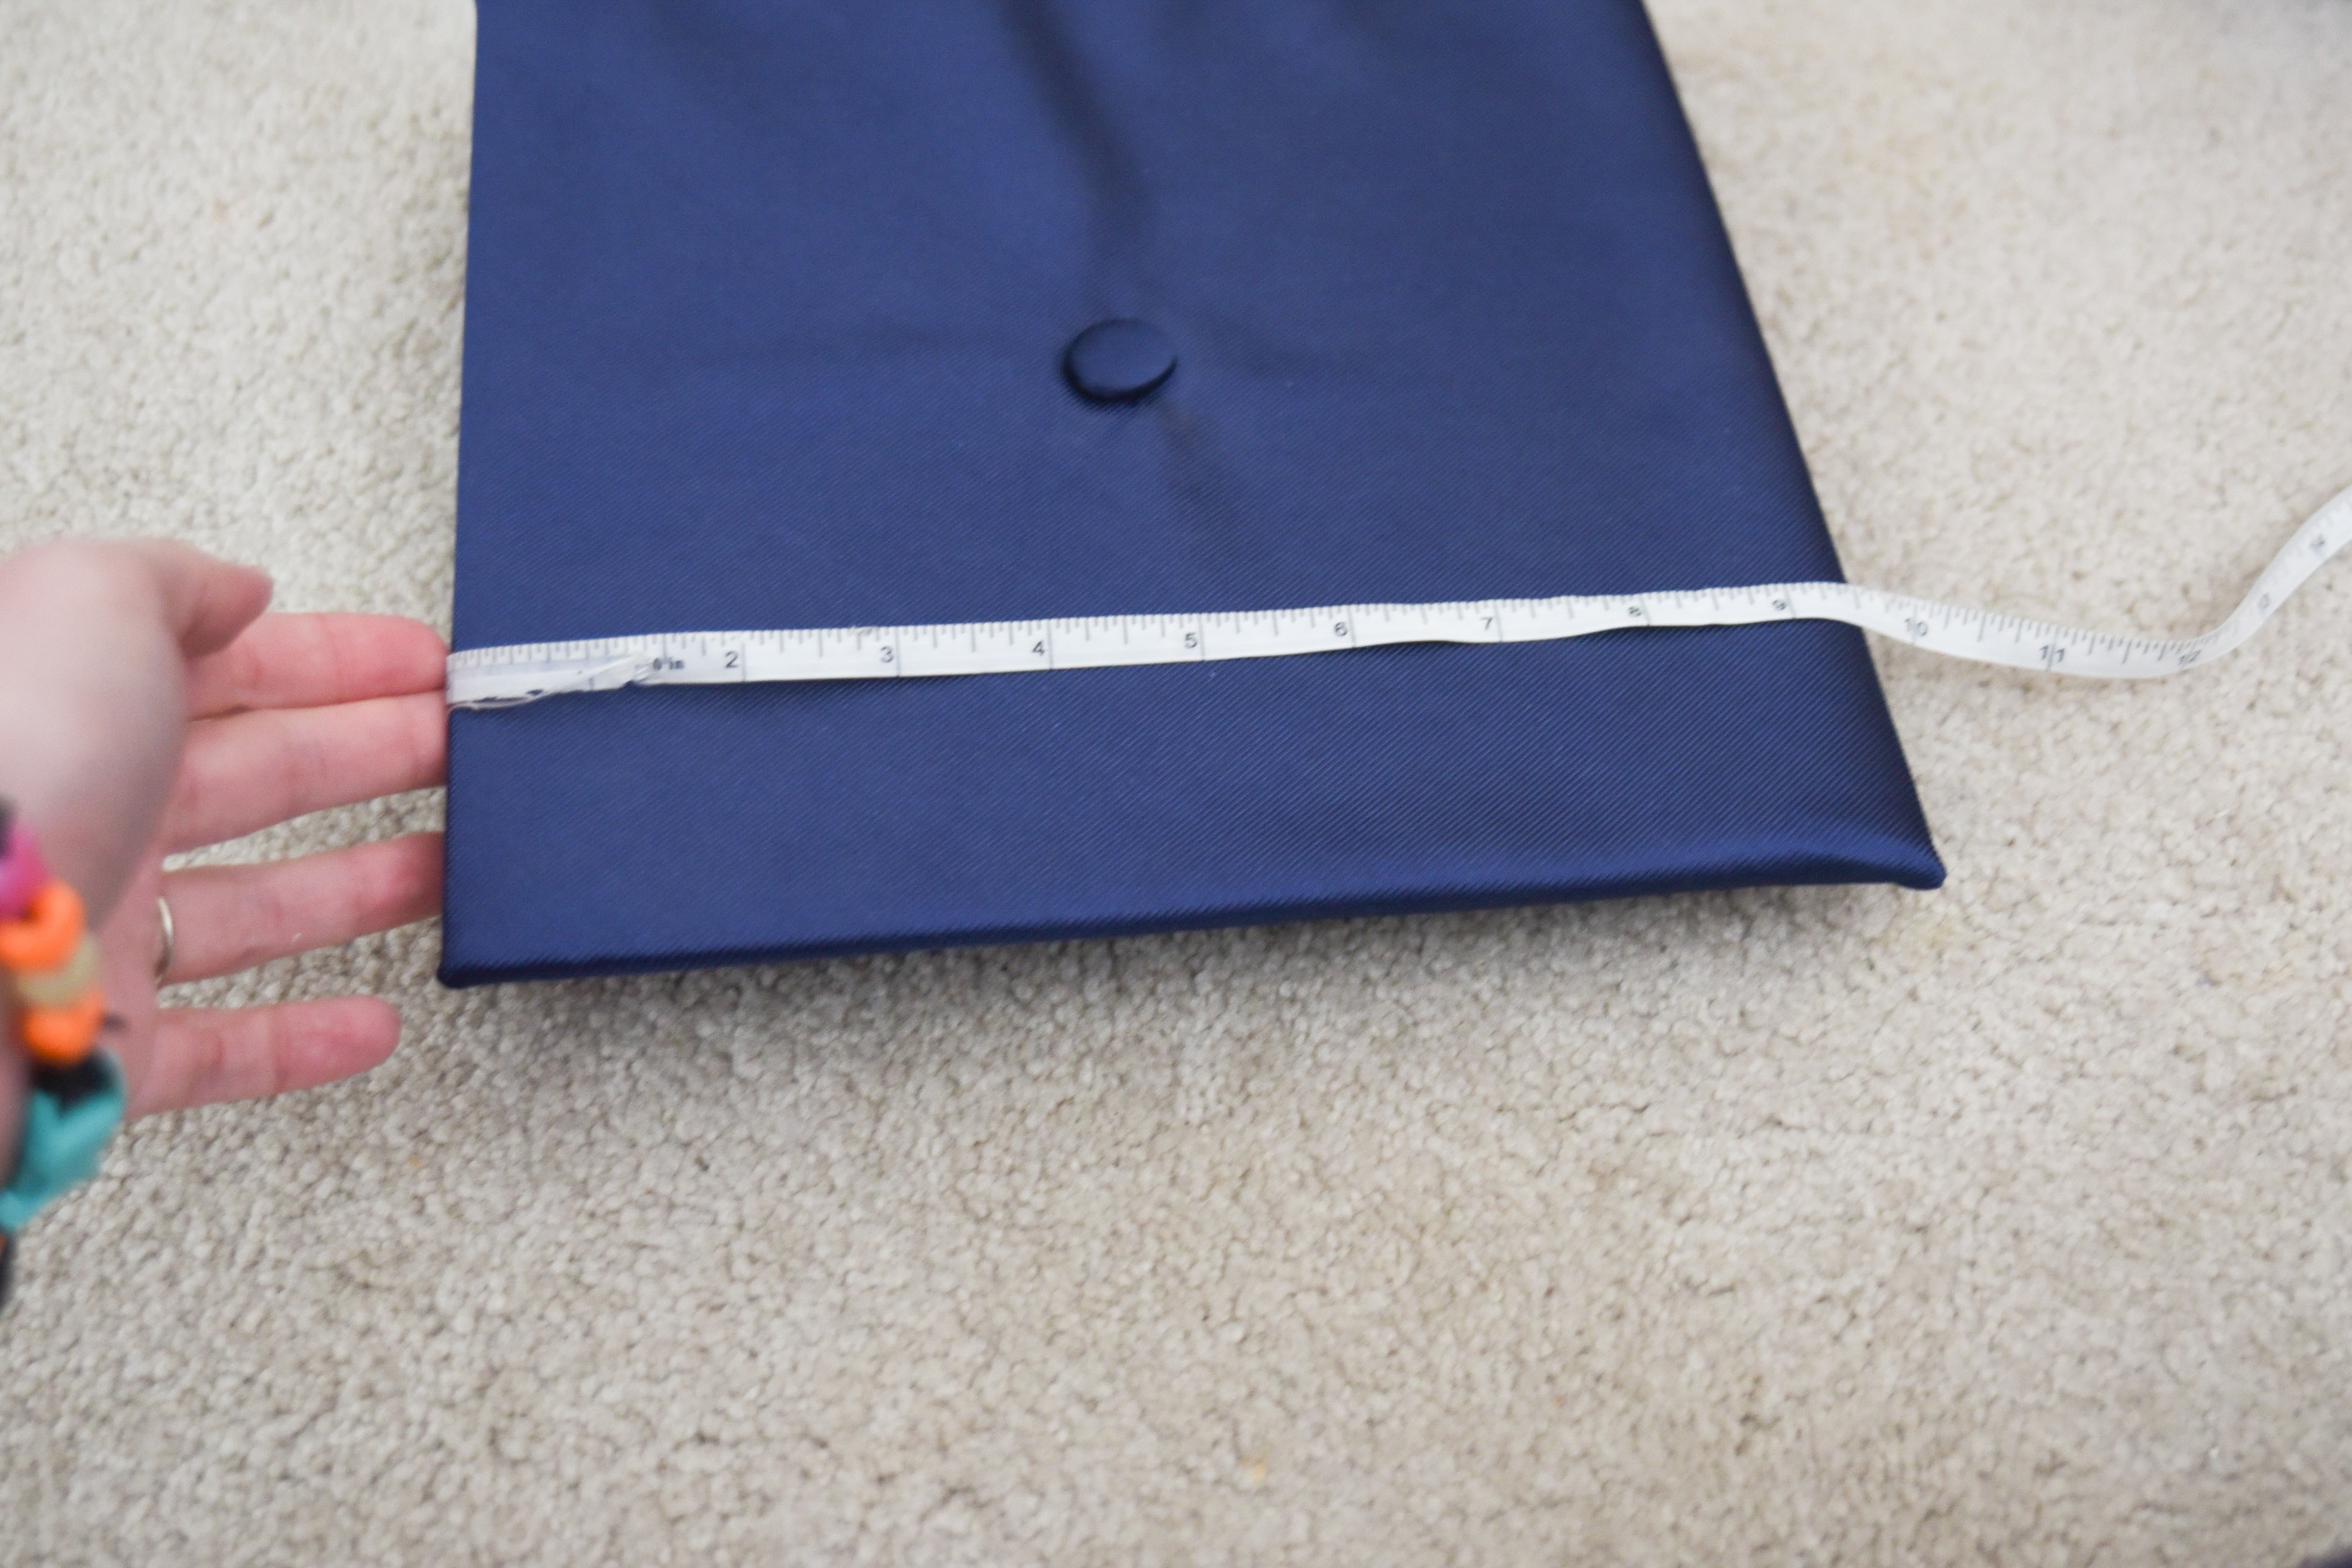
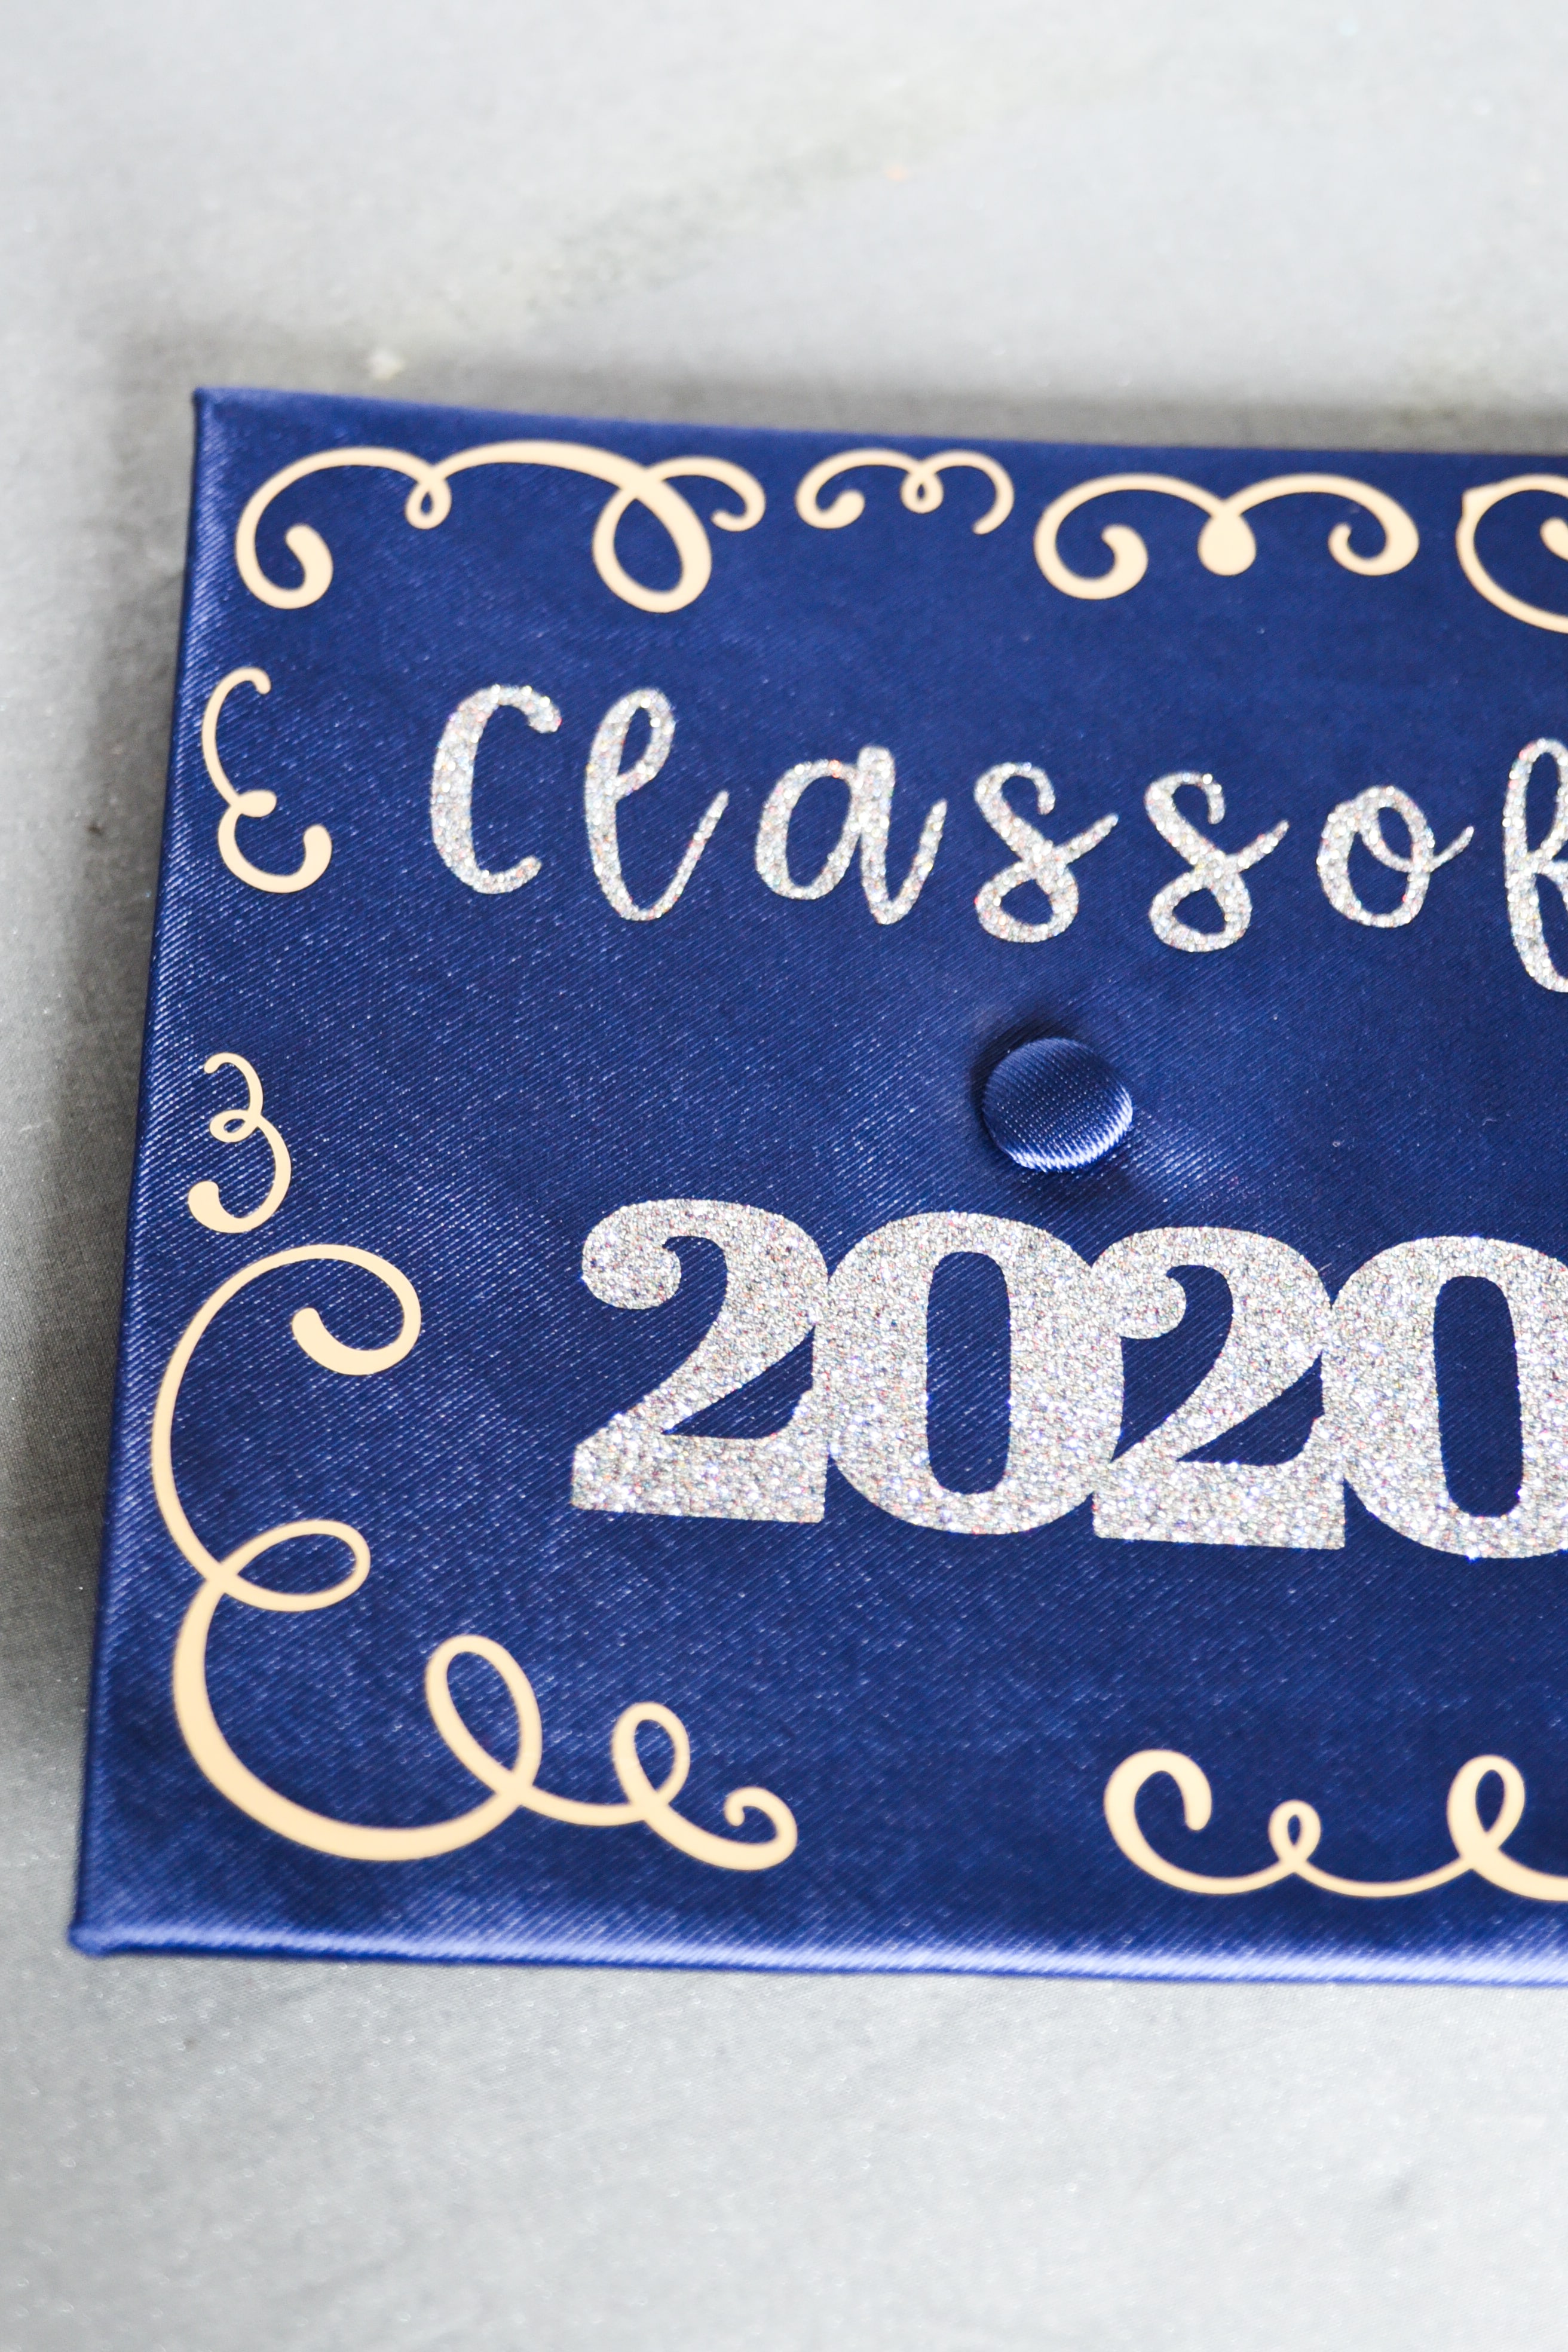
Measure the dimensions of your graduation cap. I would imagine most are what mine was – 9.5”x9.5”.
Open up a new canvas in Design Space.
Make a square and set the dimensions to that of your graduation cap.
Add the decals or phrases to the square. Make sure to not put something in the very center of the cap, as this is usually a button on most graduation caps. You can’t really put the vinyl in this.
Once the design is arranged how you like, delete the square. Press make it.
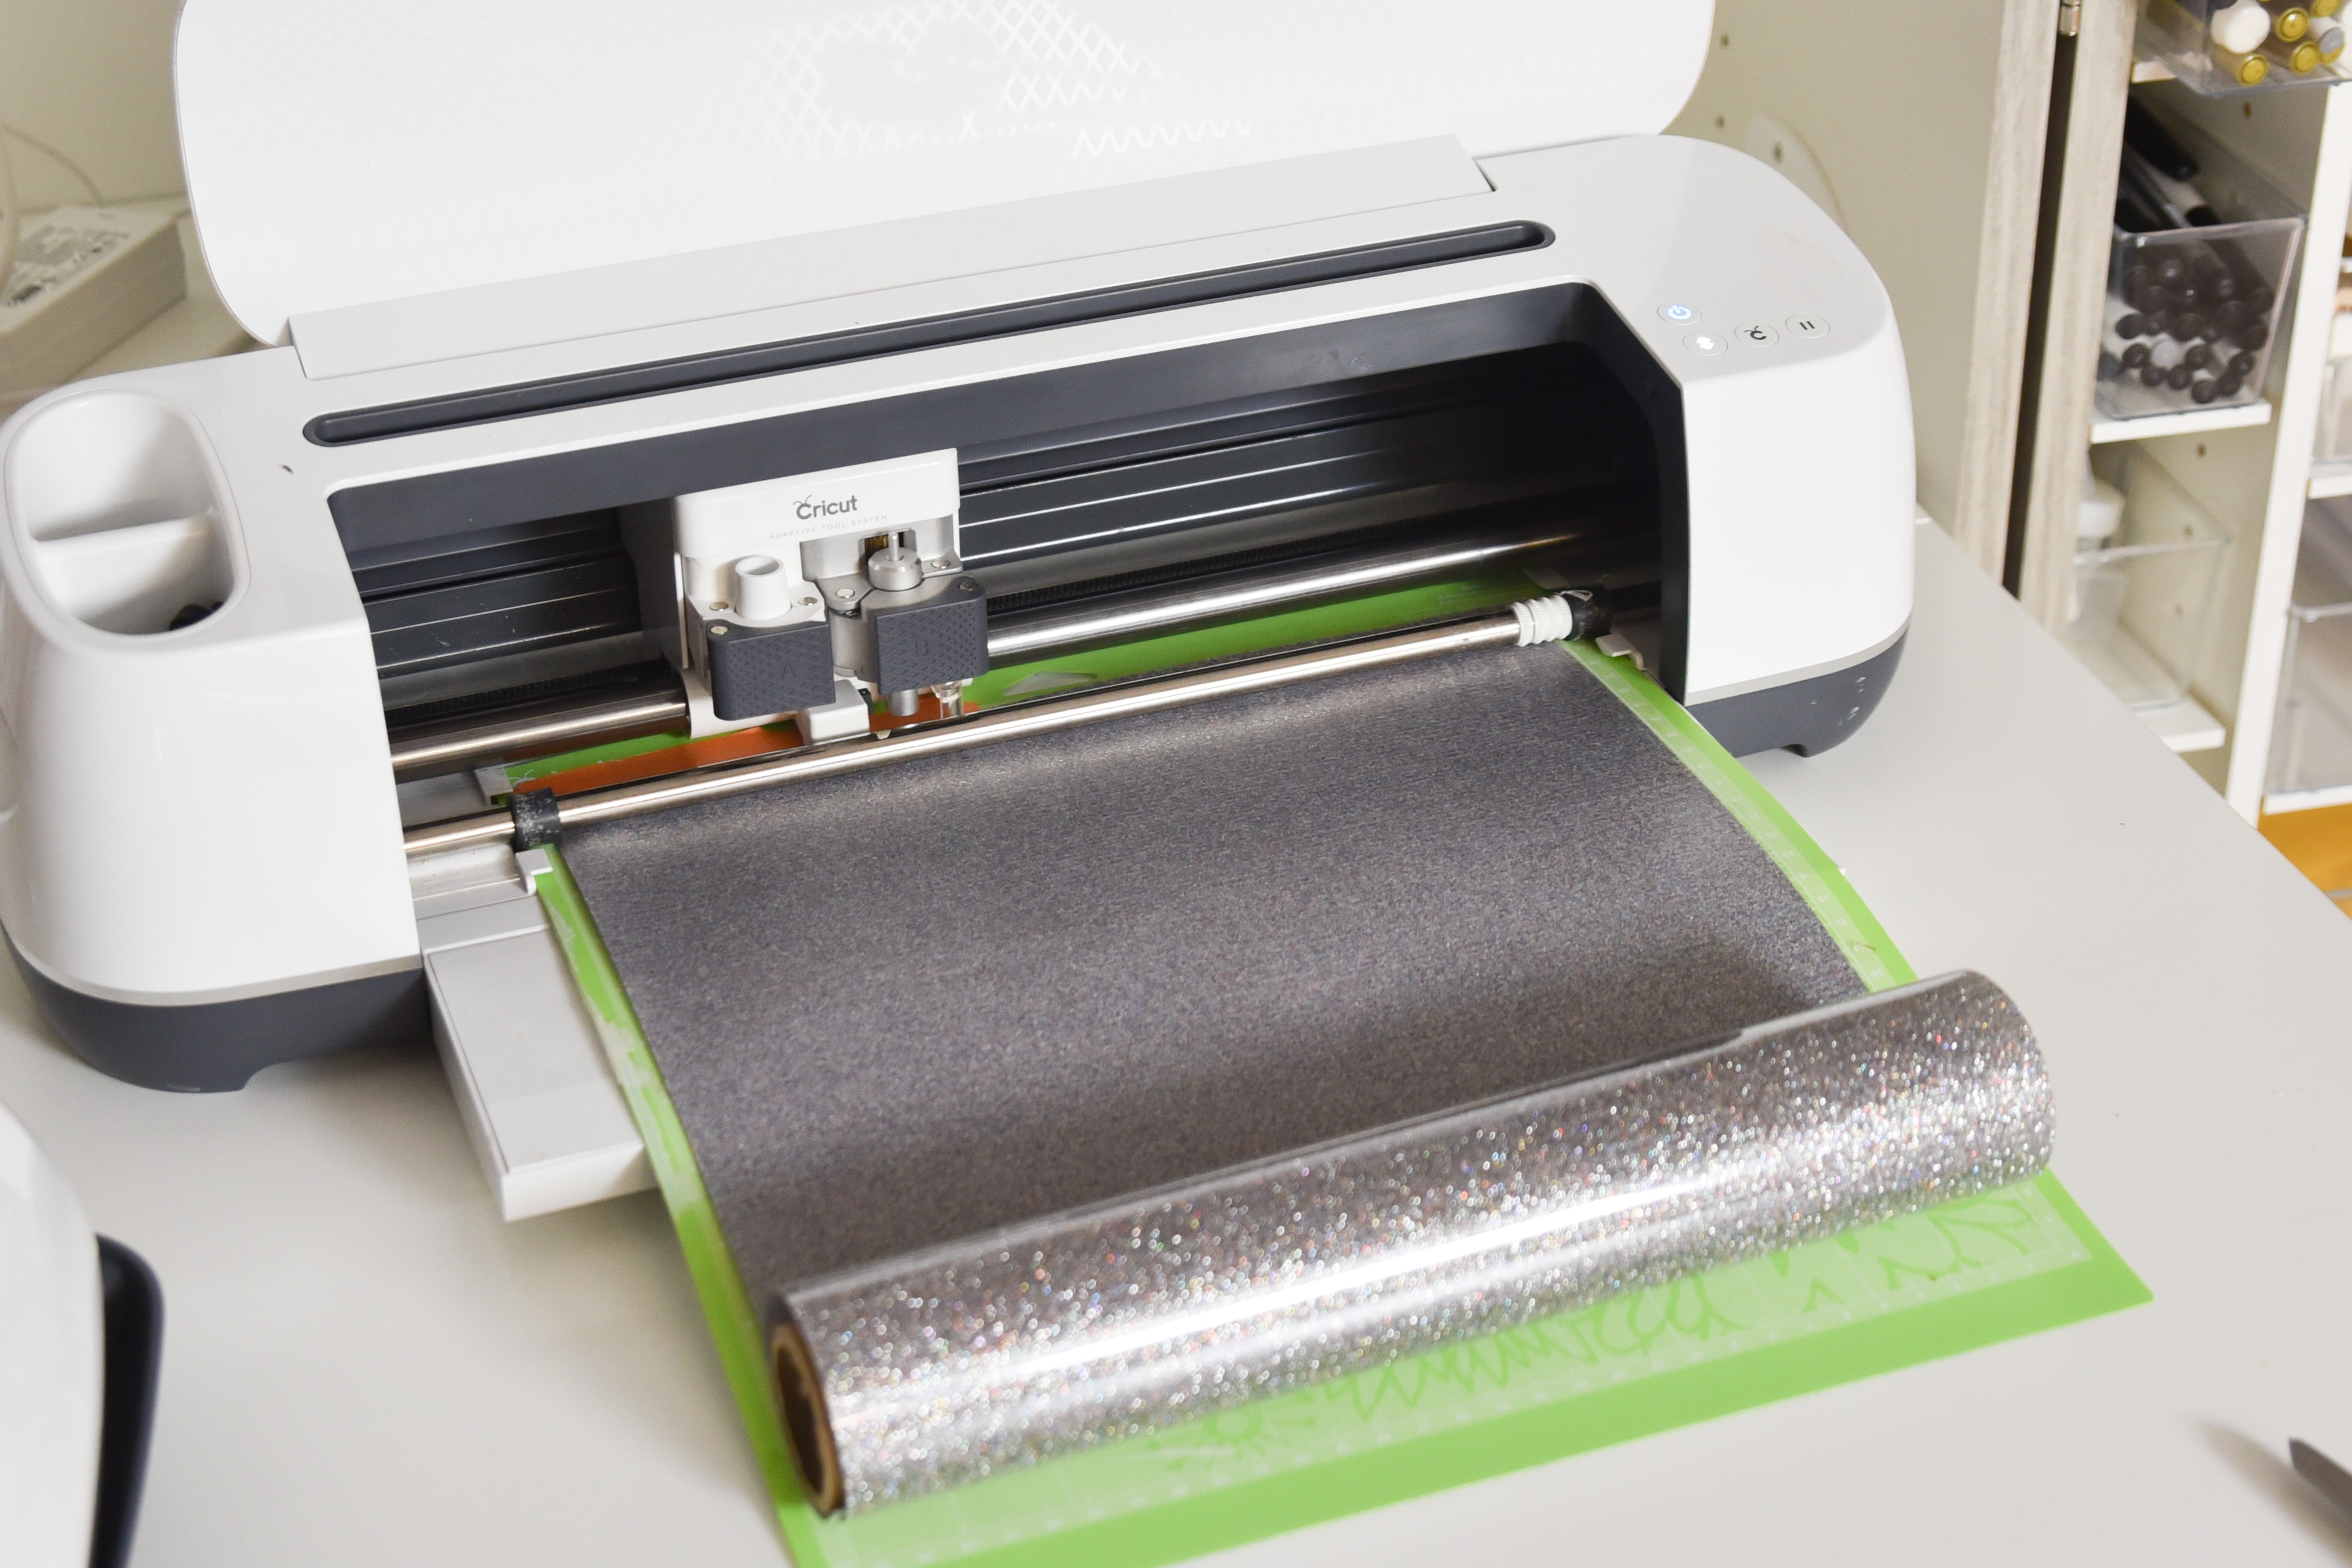
Make sure to mirror your images and follow the prompts to cut your design out!
How to Put Vinyl on a Graduation Cap
Once you have cut out your vinyl, weed out the excess.
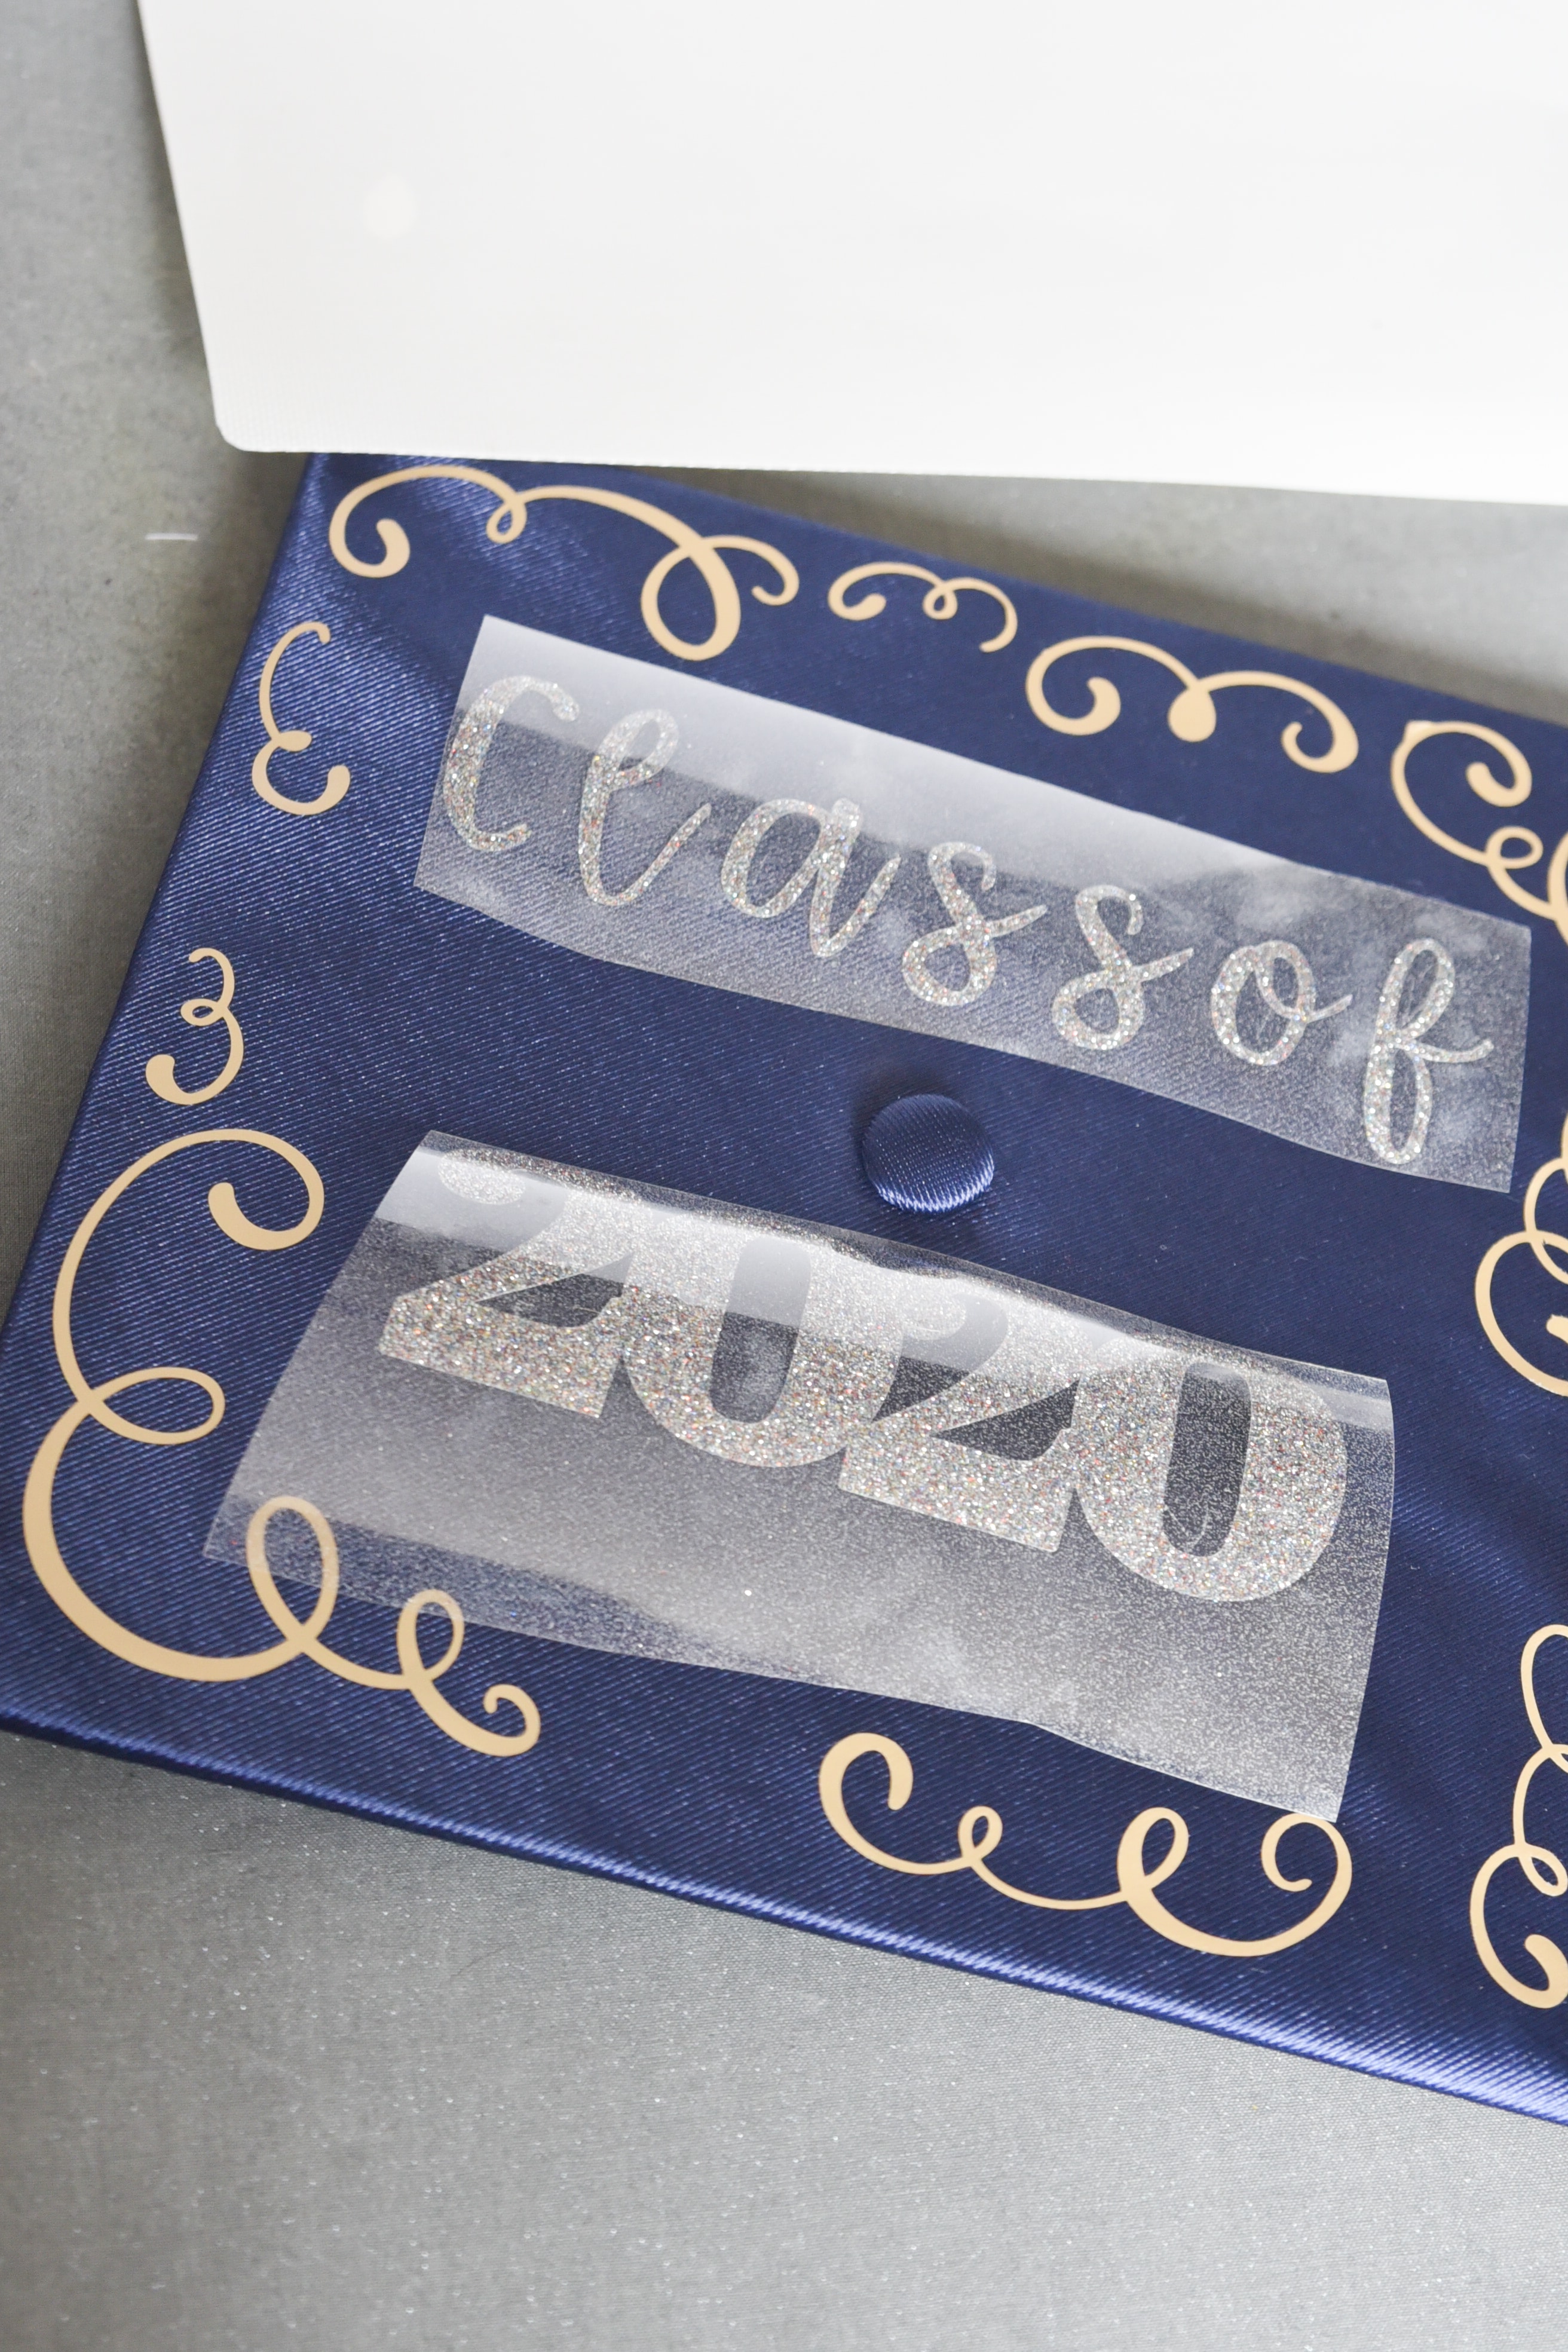
Arrange your design on the cap top to make sure it all fits how you want.
If you are using an EasyPress 2, check the settings in the EasyPress 2 guide. Use polyester as the material.
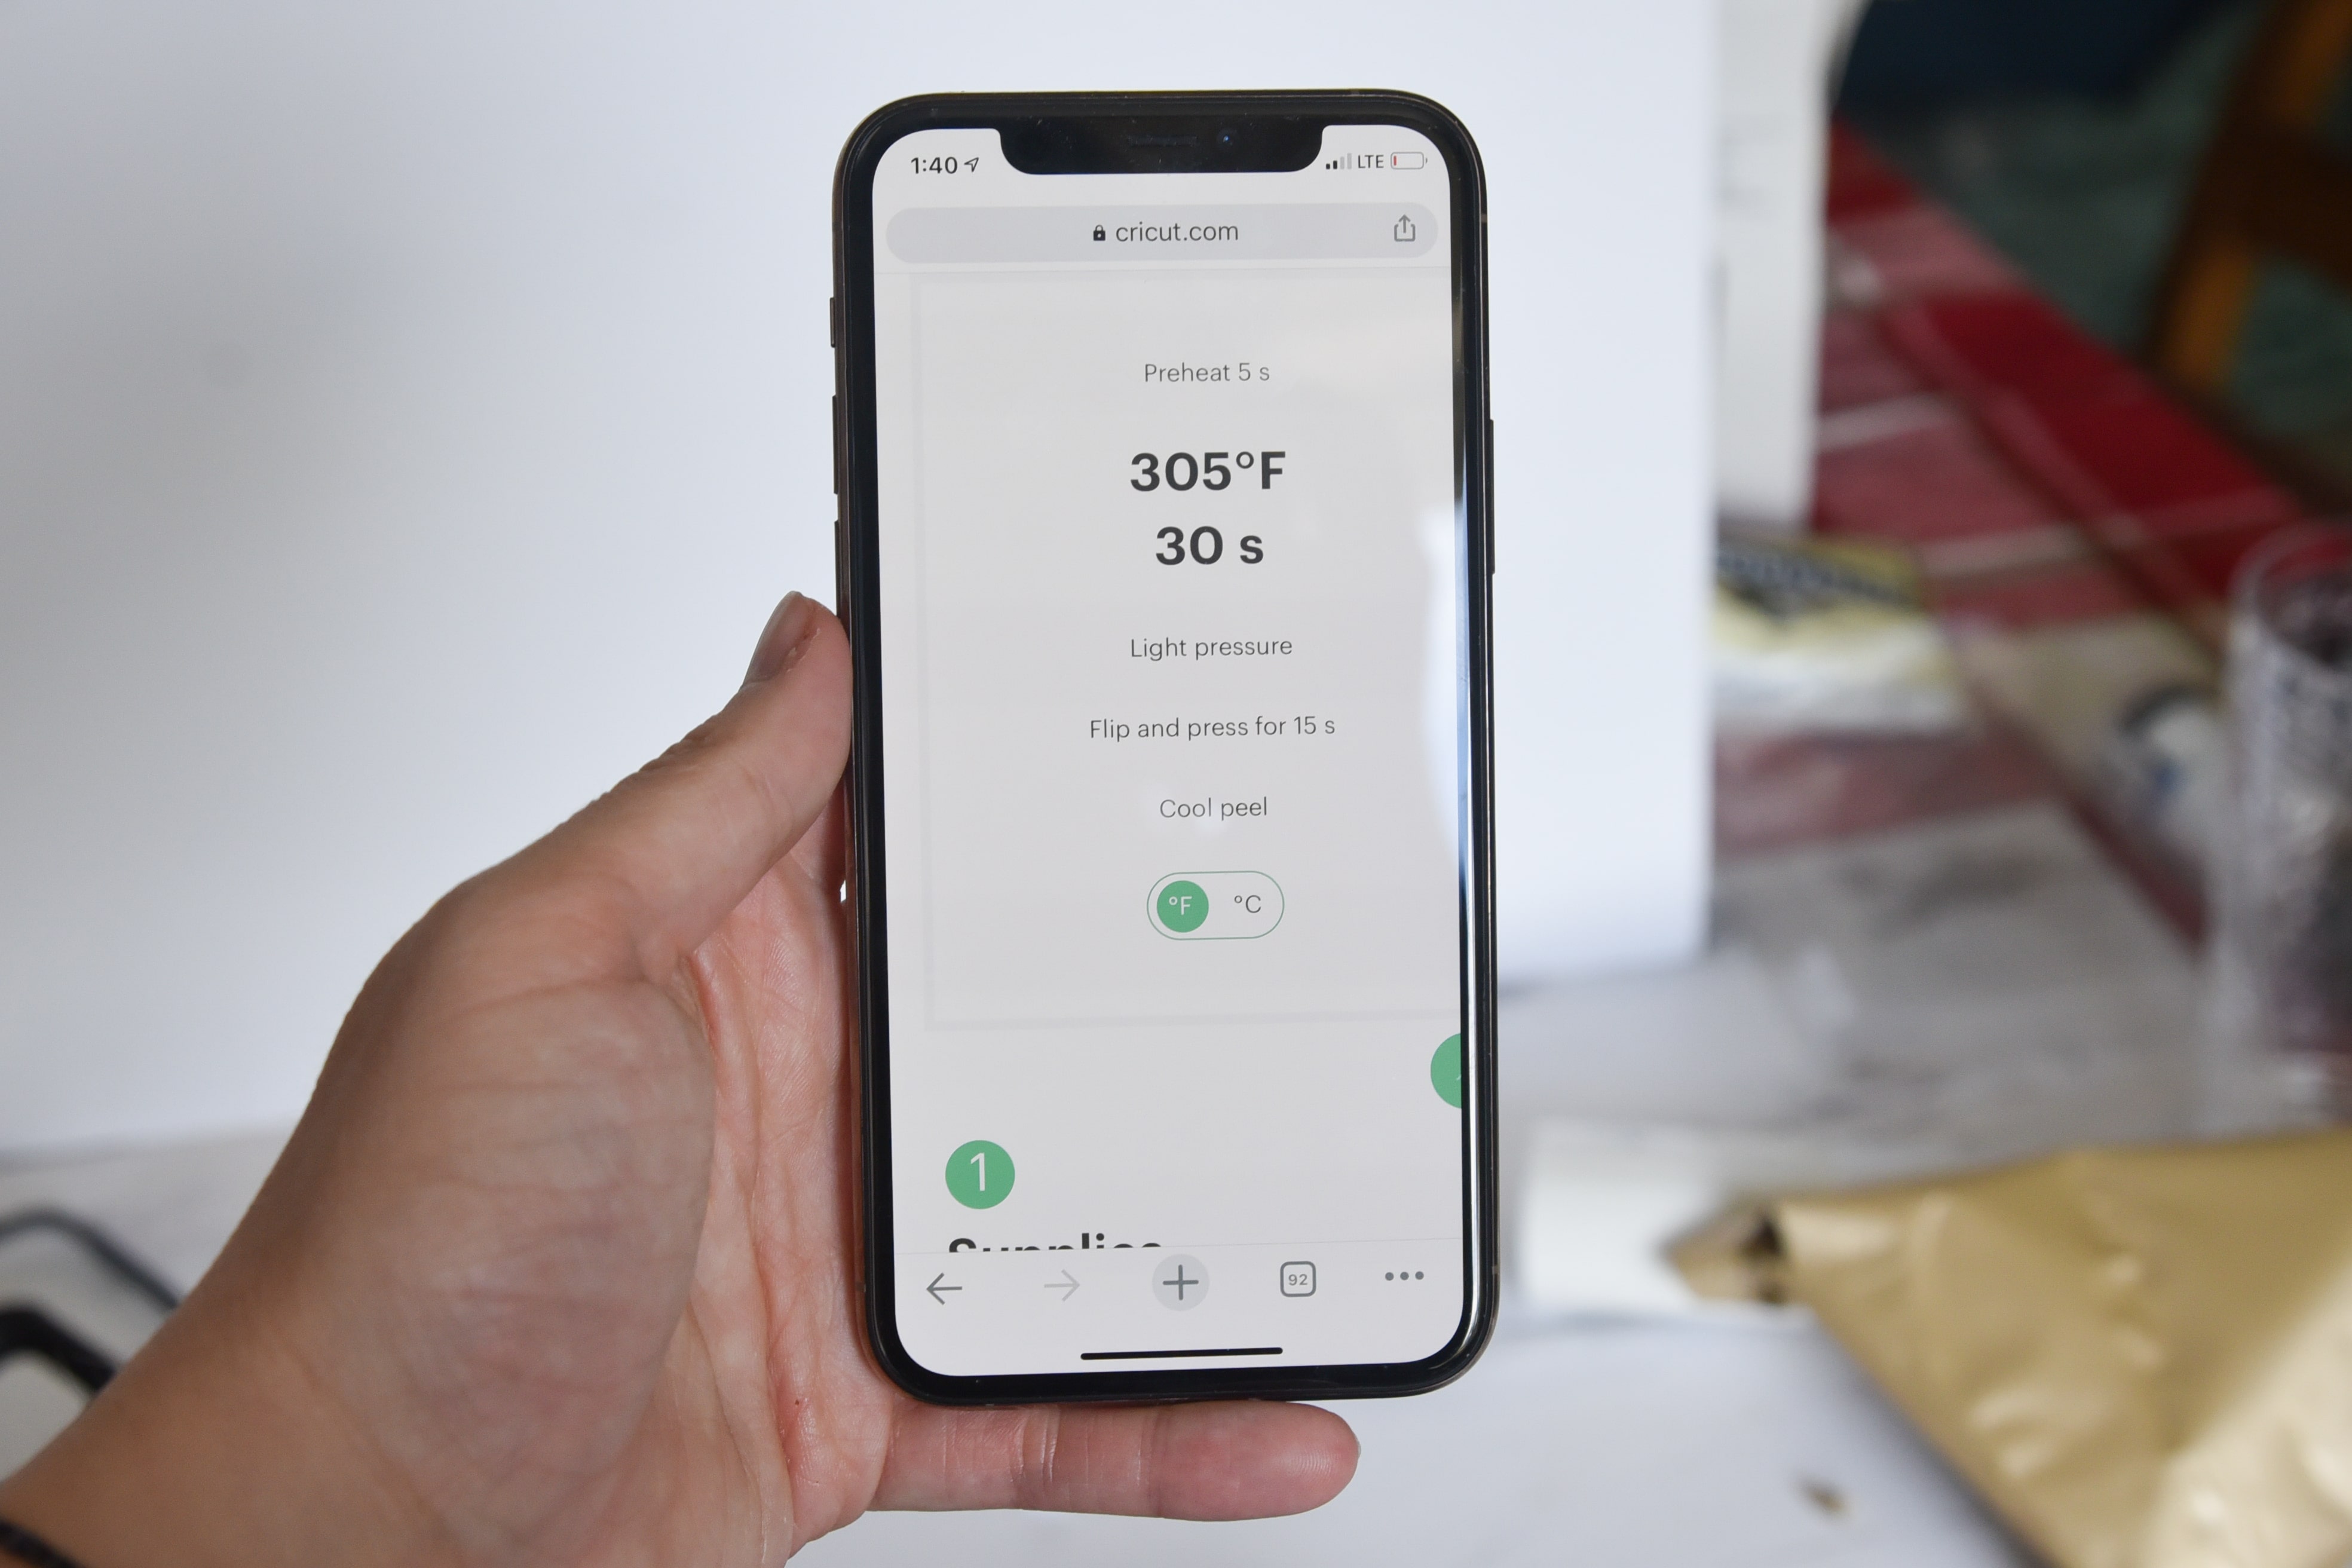
Here are some common temps and times for iron on material I would suggest using:
- Everyday Iron on – 315 degrees for 30 seconds
- Glitter Iron on – 330 degrees for 30 seconds
- Holographic – 330 degrees for 30 seconds
- SportFlex Iron on – 305 degrees for 30 seconds
If you are using an iron, set it to the setting for polyester. You will likely need to press for 45 seconds to one minute.
In order to protect the graduation hat, make sure you use a protective sheet or four pieces of parchment paper between your heat press/iron and the iron on plastic liner.
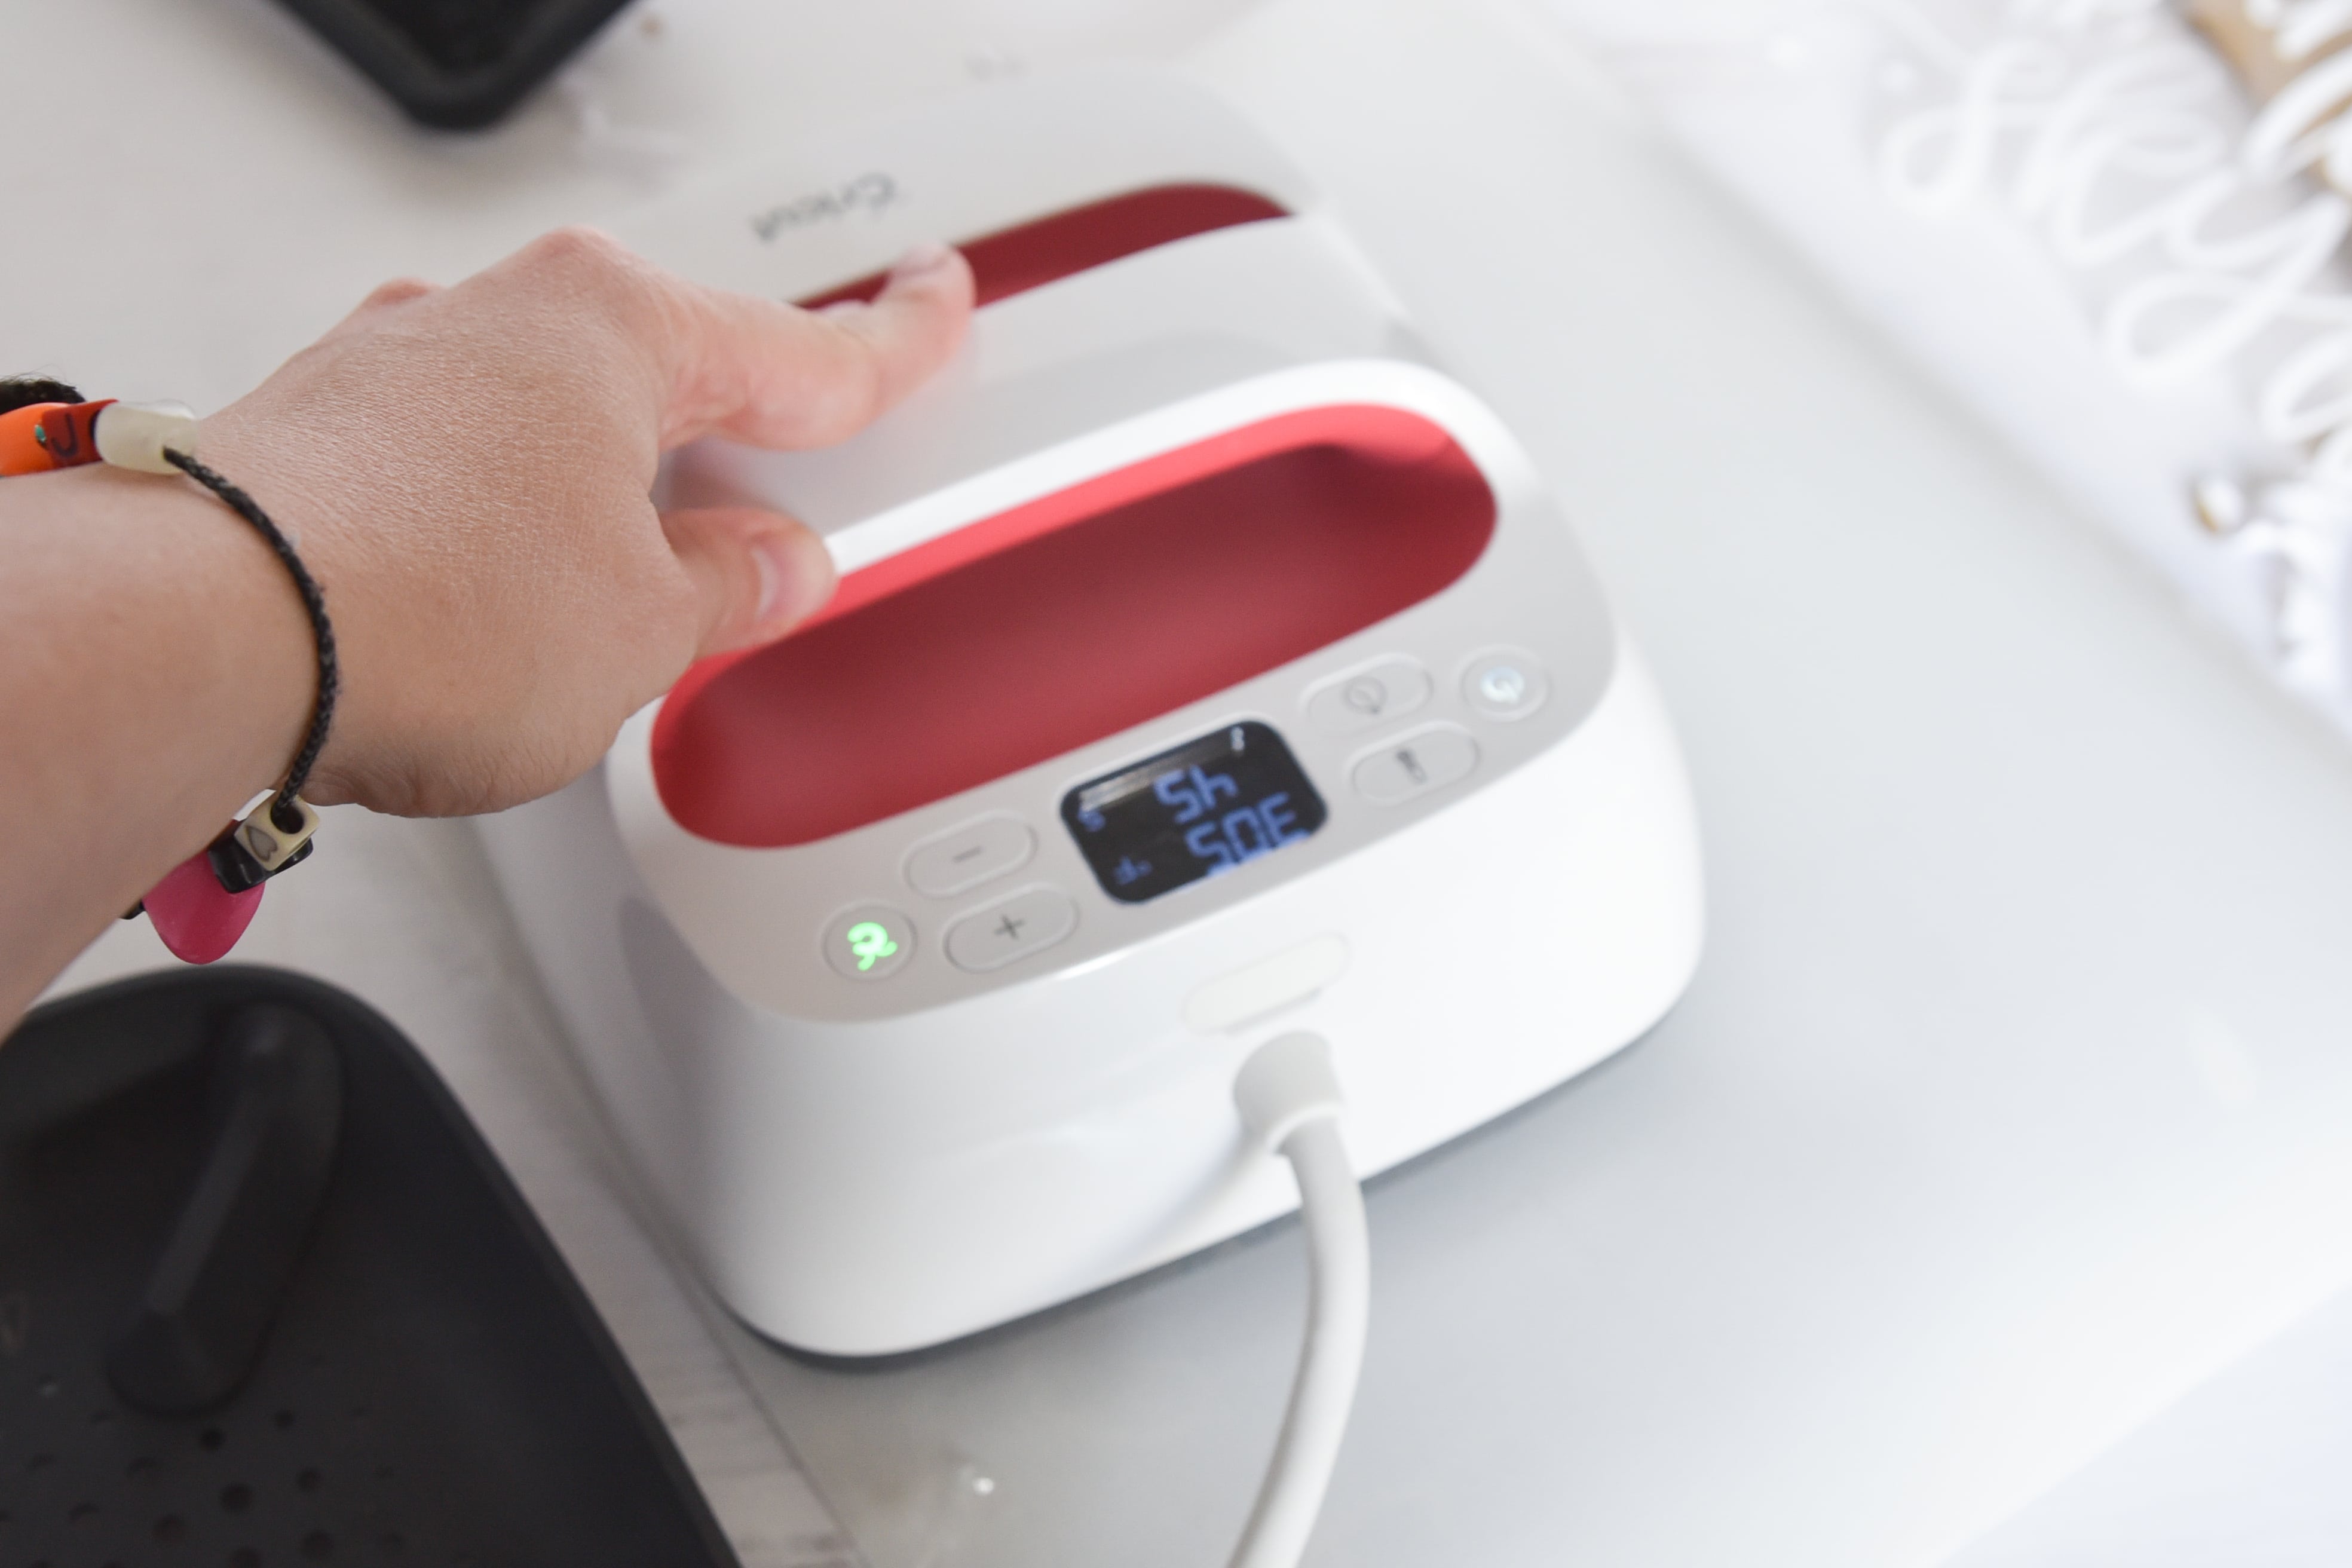
Make sure you work in small sections to do the ironing/pressing.
Press down lightly for the time listed above. Let the design cool completely.
Peel up the plastic liner.
Voila!
Graduation Cap Decorated
Can you use adhesive vinyl on a graduation cap?
This would be vinyl referred to as:
- Oracal 631
- Oracal 651
- Cricut Everyday Vinyl
- Cricut Permanent Vinyl
While this vinyl will stick on top of a tradition graduation cap, it also comes up very easily – so if you want something very temporary, it might be the best option. However, it may come up before you want it to. But in my tests, it did at least stick temporarily to the cap.
Can you use heat transfer vinyl/iron on vinyl with a Graduation Cap
Yes! This is what what I would use on a graduation cap – and it’s the tutorial I share in this post.
It’s just a much more permanent finish, and you won’t have to worry about it coming up prematurely.
Cricut Graduation Cartridges
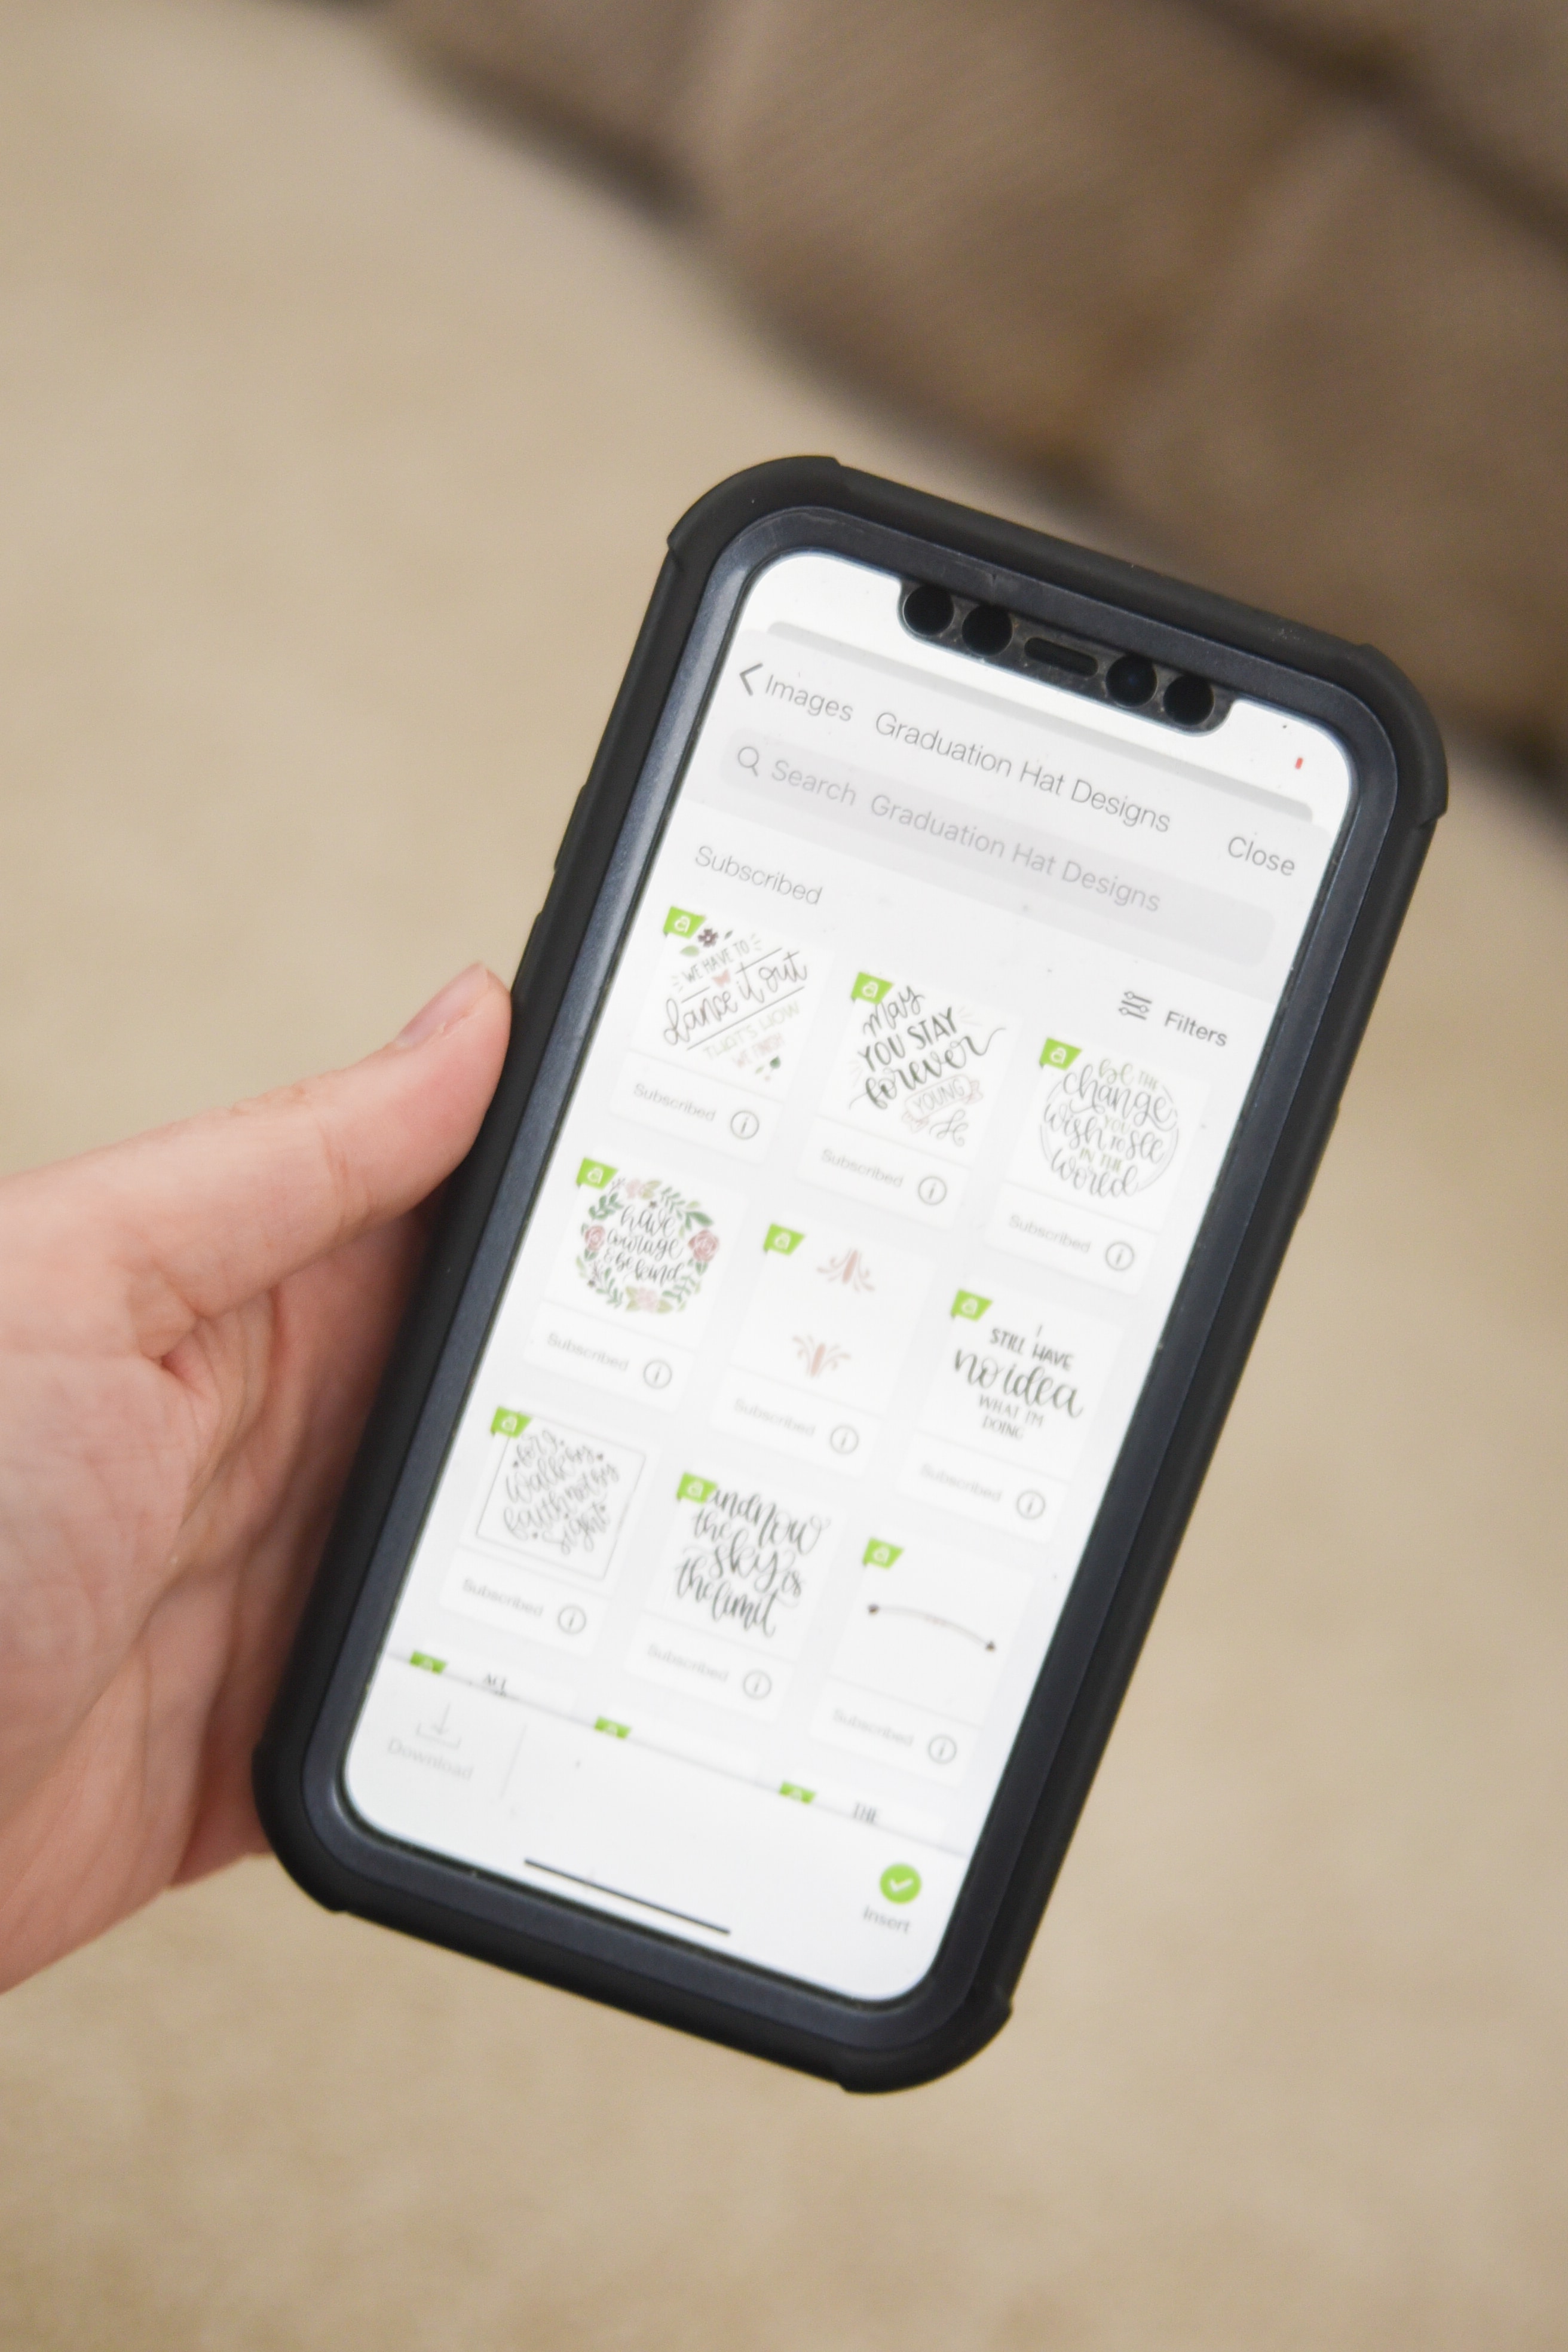
So what design do you want for your cap? If you search on Pinterest, there are LOTS of great ideas – I’m sure you could see some ideas on Instagram as well.
When you are making your design in Design Space, you can either create your own design – just make sure it’s square – or you could use something from the Cricut Design Space library.
You can just search for motivational phrases or square borders, but here are a few collections that you might be interested in. I can’t find a good way to search for them, but if you search phrases like “Graduation” you should be able to click on the little “i” in the corner of an image, and then click on “image set” to find the rest of the designs. I’ll share the exact number for one image from each of the sets below so you can hopefully find it easier.
Graduation Hat Designs
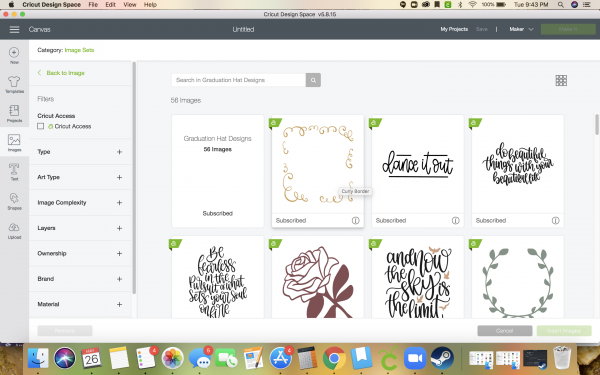
I think this has the most options, and they are already designed for a graduation hat. Though I did find some didn’t really take into account the button in the middle of the hat.
Search #MB6E7886 in Design Space, and then you should be able to find this image set from that particular image.
Graduation Phrases
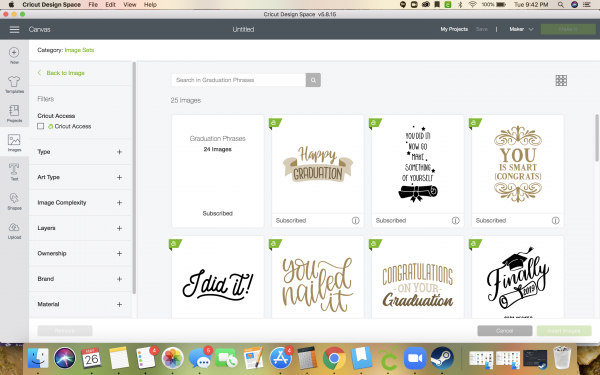
Search #MD0B2FB9 in Design Space to be able to access this image set.
Senior Vibes
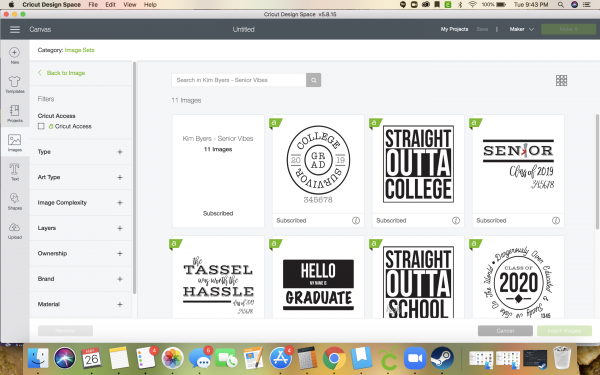
Search #MC20C3D4 in Design Space to be able to access this image set.
The Tassel is Worth the Hassle
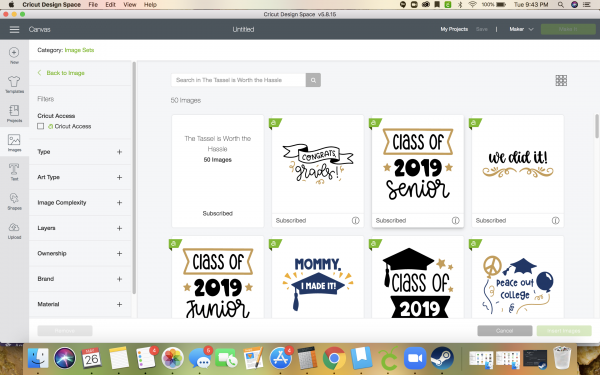
Search #M9AE5485 in Design Space to be able to access this image set.
Decorating a Graduation Cap with Vinyl


Katie, what Cricut machine do you use?
Hi, Debbie! I have the Maker, Maker 3, Explore Air 2, and Cricut Joy 🙂
How cool! Makes me wish I had done this for my daughter’s preschool graduation pictures!