
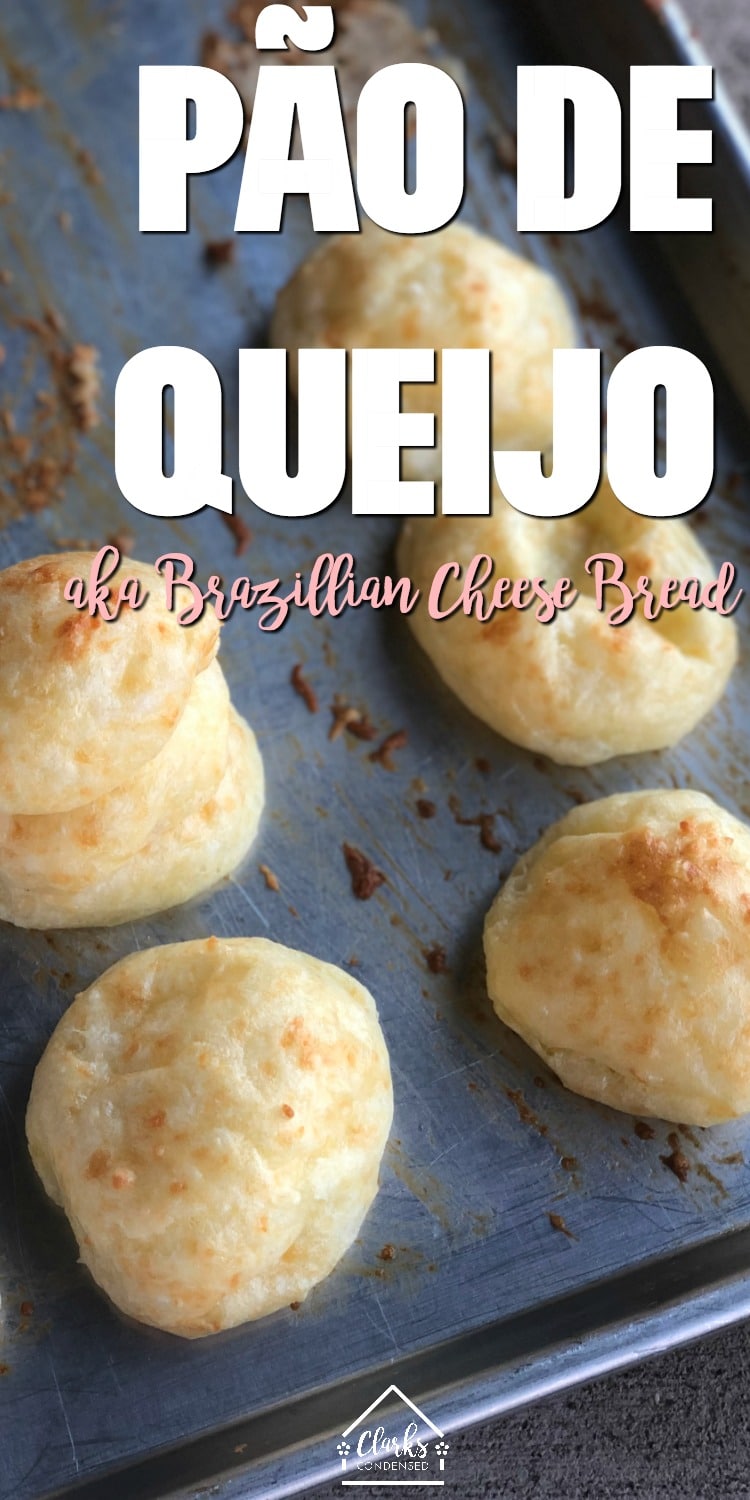
Easy and Foolproof Pão de Queijo Recipe (aka Brazilian Cheese Bread)
Pão de Queijo is a popular Brazillian cheese bread that people around the world love. Here is our easy and foolproof recipe, with tips for success!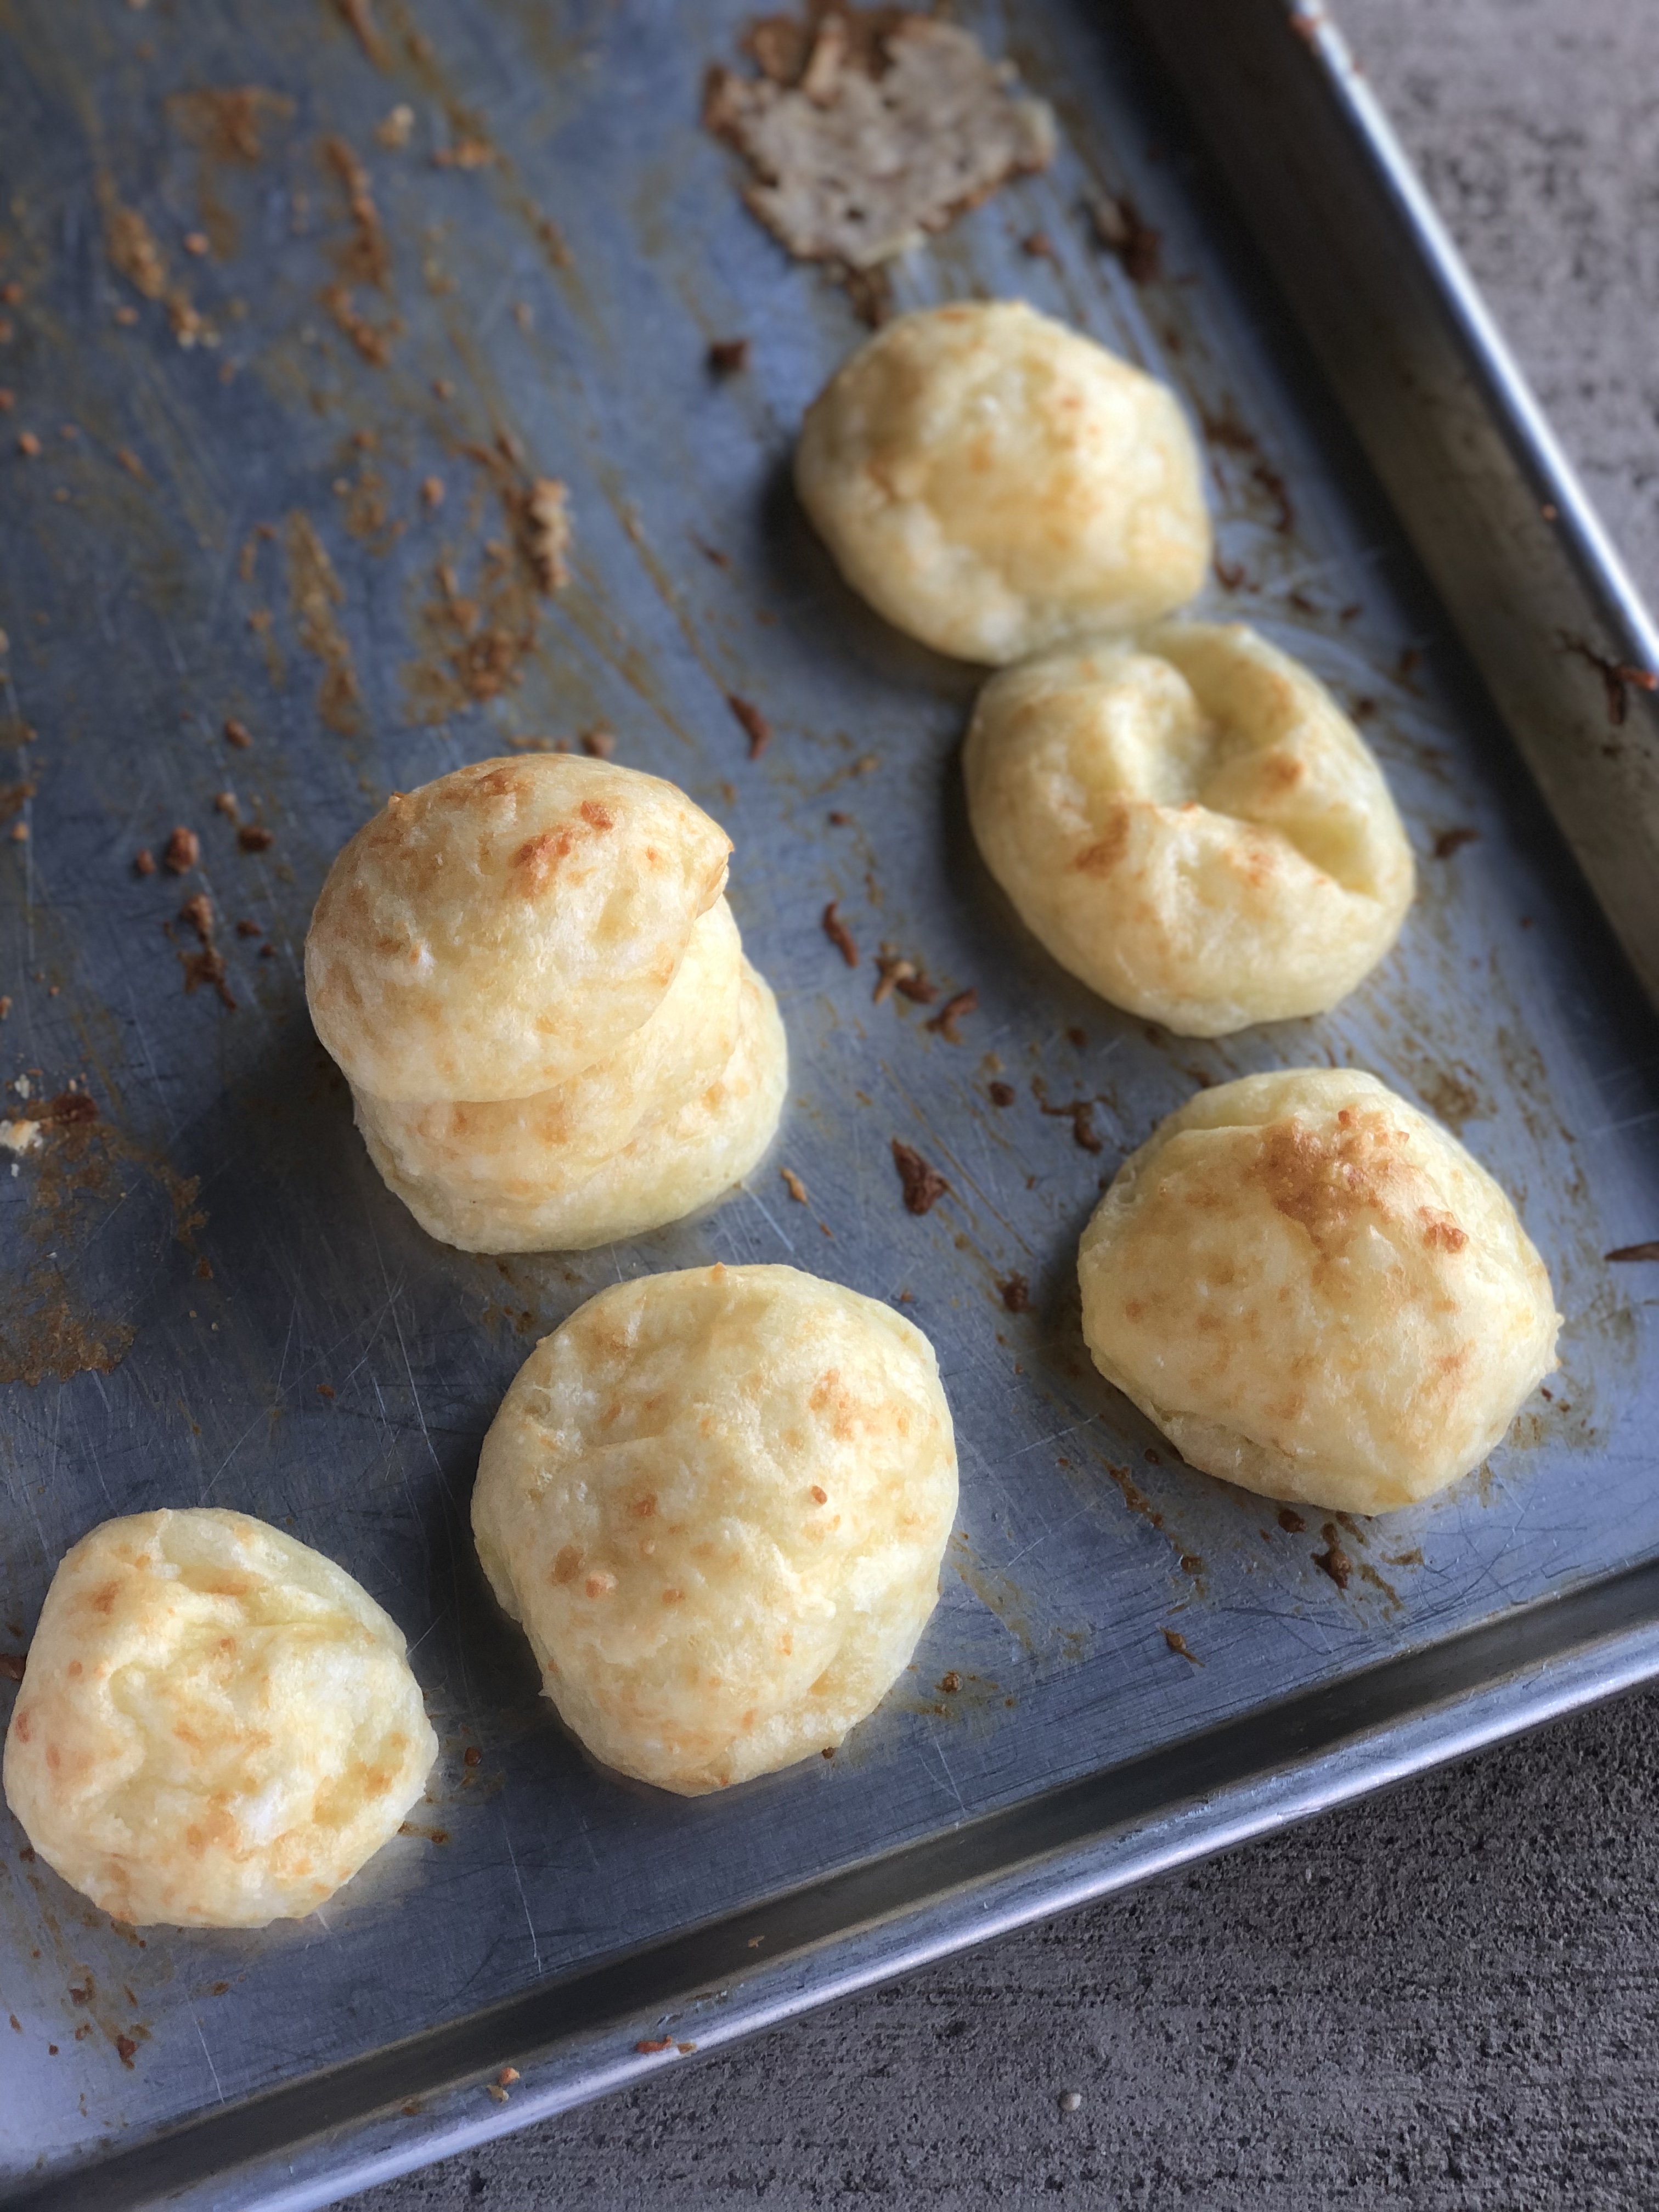
Receita de Pão de Queijo
After living in Portugal for two years, I have gained a deeper appreciation for other cultures. One cultural element that I particularly enjoy is food! The Portuguese people are masters at preparing their food.
I have many fond memories of sitting at a Portuguese person’s dinner table, watching them prepare dinner completely from scratch.
I especially loved homemade Portuguese bread! It is very common to see a legitimate brick bread oven in their backyards, and even more frequent to see hot, fresh bread at every meal.
However, as much as I loved eating Portuguese food, I would have to say that my favorite bread to eat over there was actually originally from Brazil–Pão de Queijo.
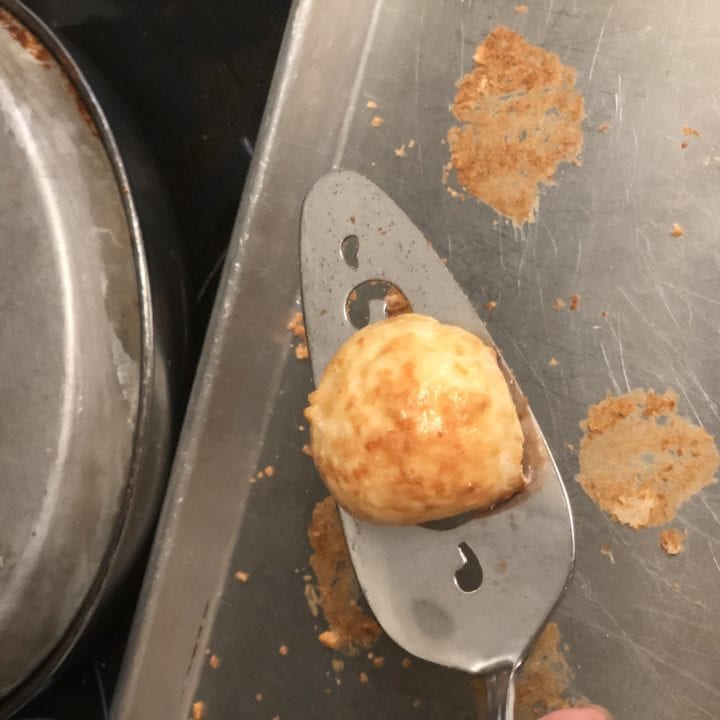
These are basically little crispy balls of cheese bread.

My Brazilian friends over there in Portugal always talked very highly of these delectable cheese bites, but they weren’t very common to find at the Portuguese bakeries, so it was almost a year until I tried one.
But when I did, I was hooked.
I discovered that one of the main supermercados sold them in little bags.
Let’s just say that there was always room for a bag of Pão de Queijo in the budget when I went grocery shopping after that point.
I’ve now been home from Portugal for six months, and just recently my sister and I had the idea to make these cheese bites from scratch.

This was one of the best decisions I’ve made in my life! The recipe was surprisingly simple, and the end result was even better than I remembered!

You can find most of the ingredients laying around your kitchen:
- Milk
- Vegetable Oil
- Eggs
- Grated Parmesan Cheese
- Salt
- Tapioca Flour (ok, maybe this isn’t always in the average kitchen, but it’s sold at most grocery stores)
We used a recipe that was sent to me from a friend in Portugal, and we made a few adjustments based on other recipes we found.
How to Make Pão de Queijo
Printable recipe at the bottom of the post
Ingredients
- 1 cup canola oil
- 2 cup cow’s milk (we used 2%)
- 2 teaspoon salt
- 1 3/4 cup tapioca flour
- 2 cups grated parmesan cheese
- 3 whole eggs eggs
You’ll first want to boil the milk, oil, and salt all together in a sauce pan.
After it comes to a boil, immediately take it off the stove and add in the Tapioca flour.
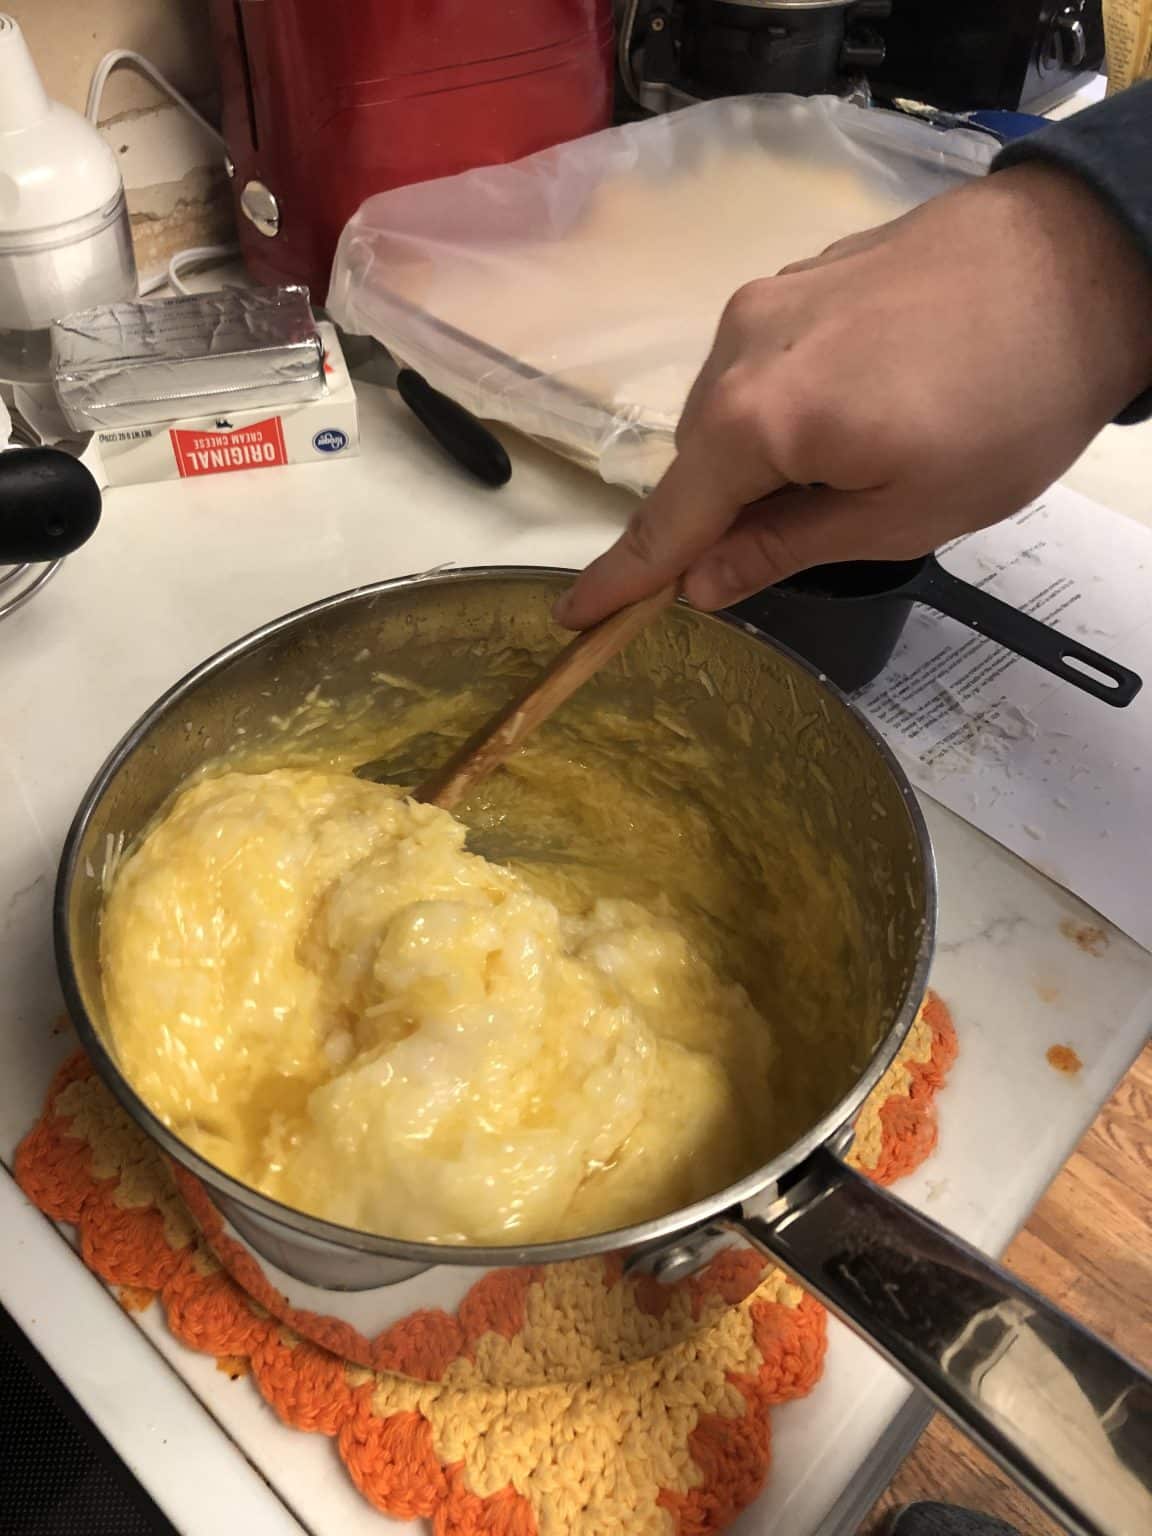
Let the above mixture cool down for about 10-15 minutes.
Add the eggs and grated Parmesan Cheese and mix everything all together. It may look like cottage cheese.
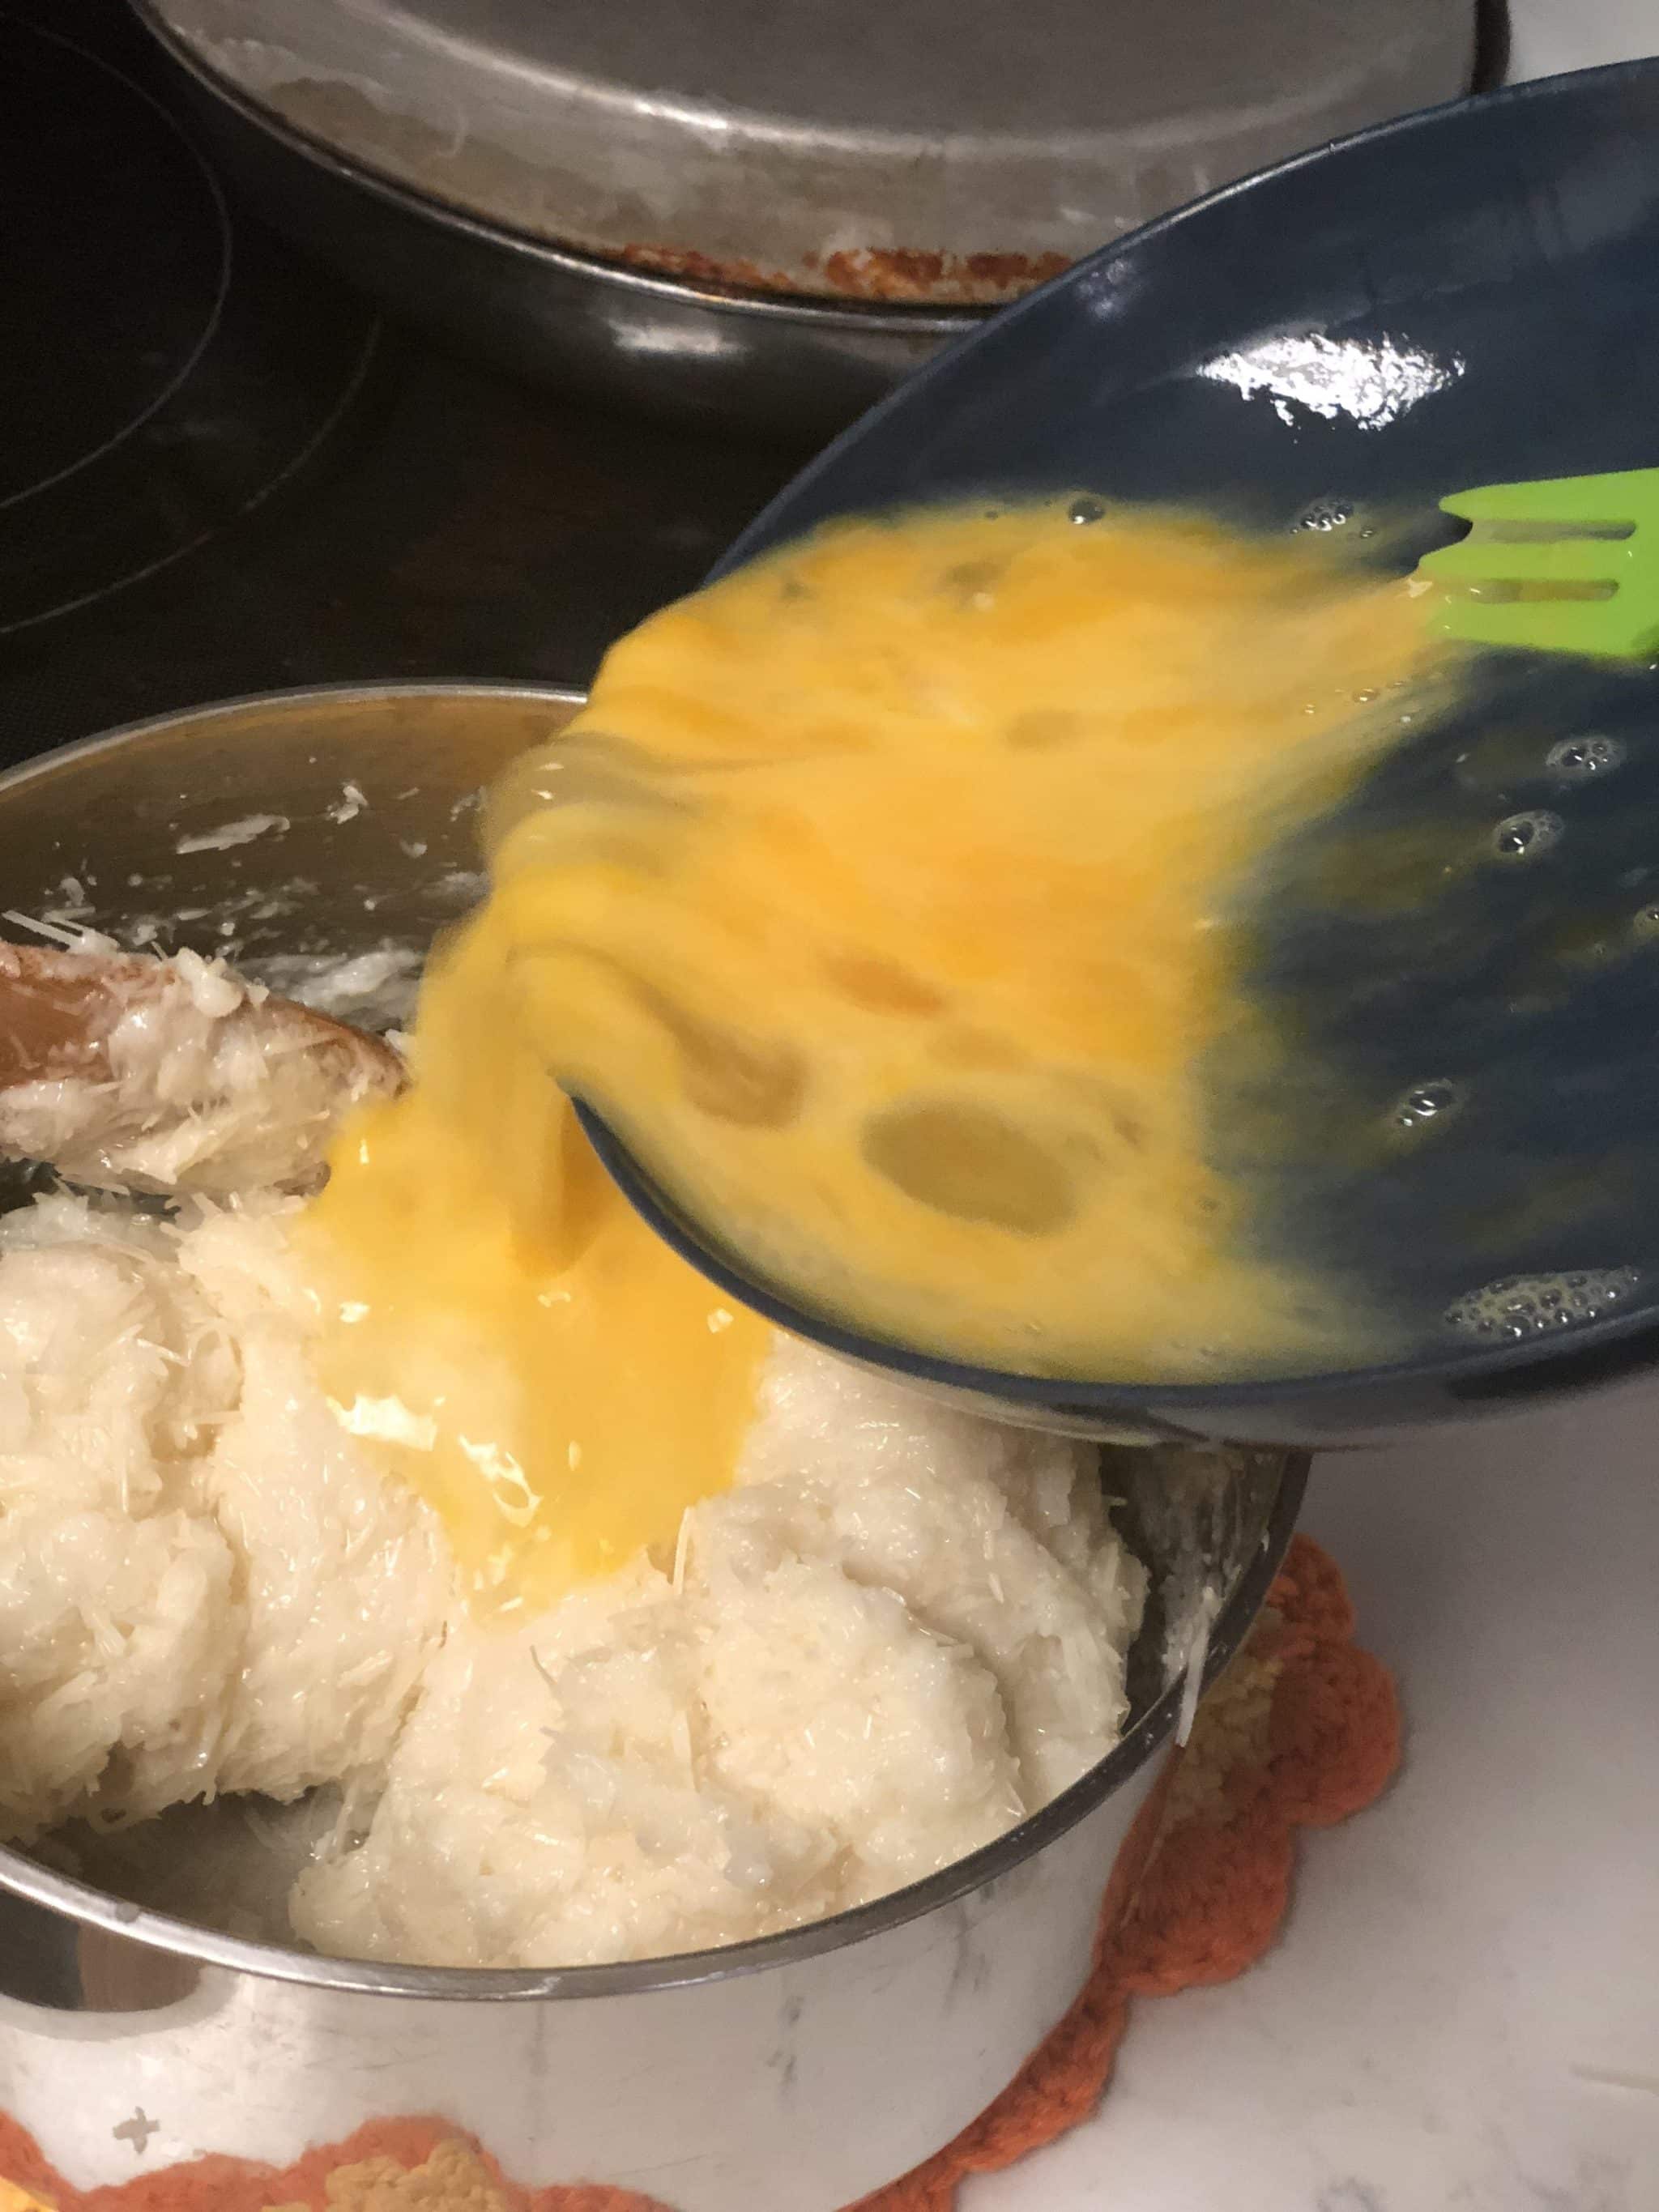
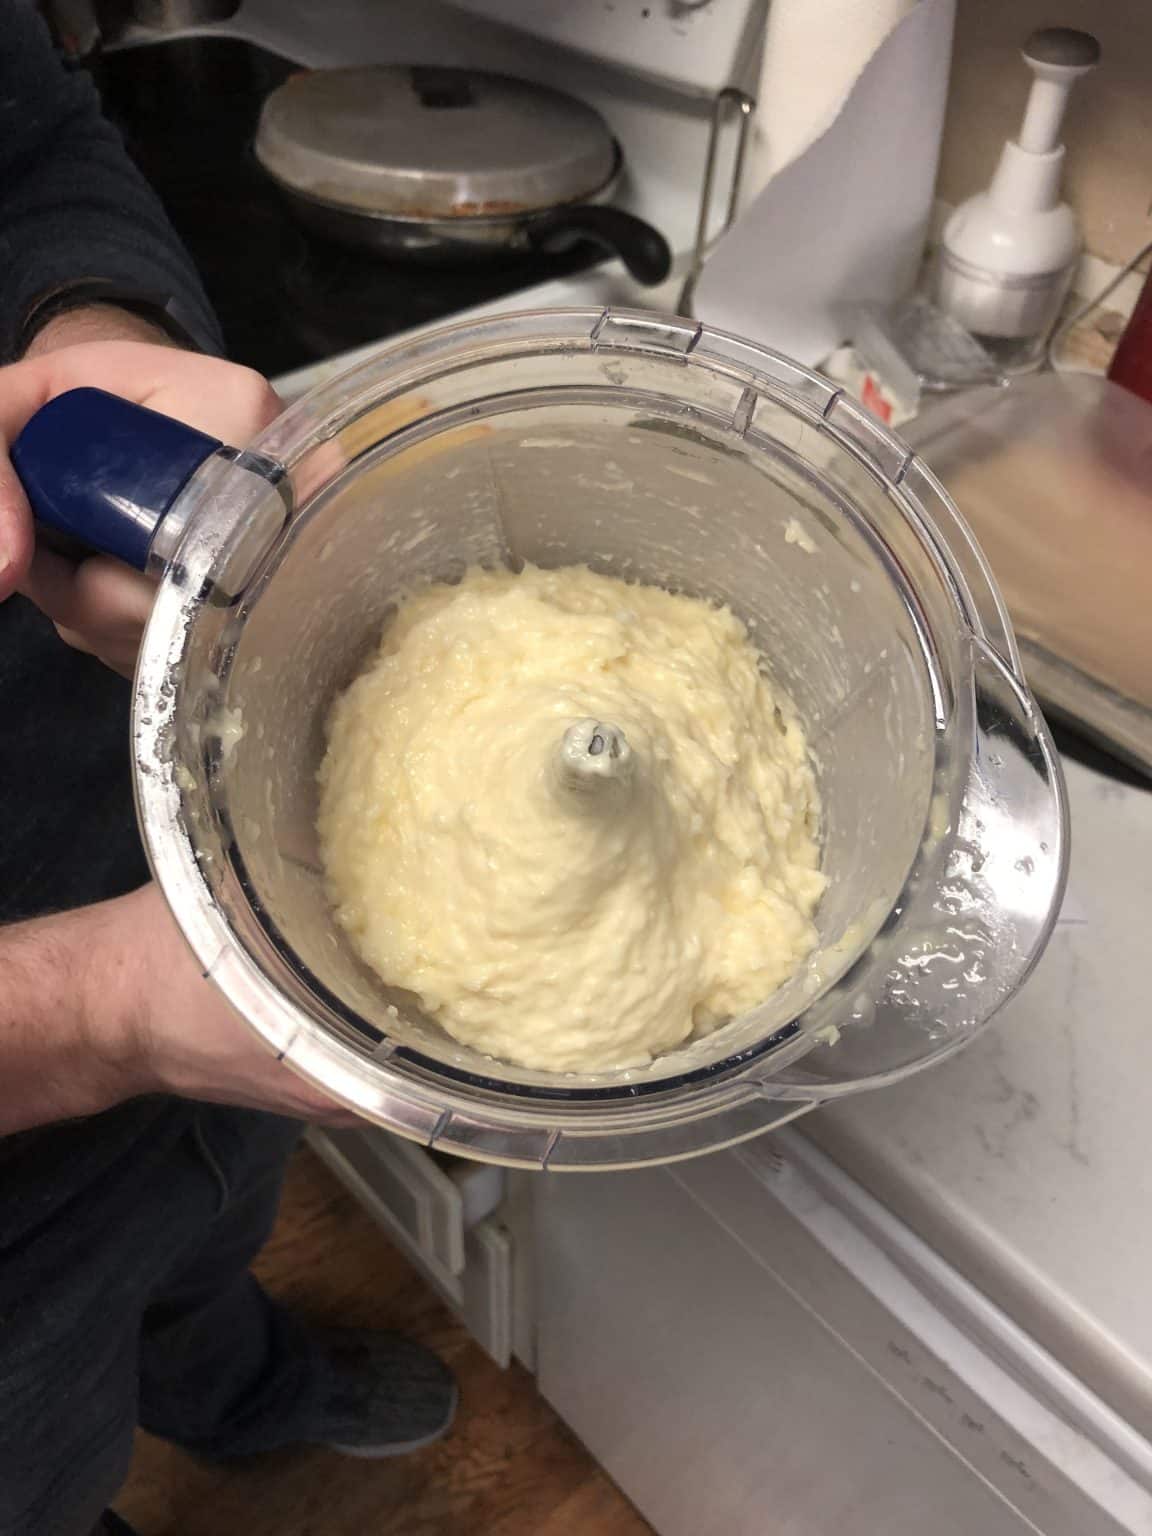
This is optional, but it will yield a much better result – place all the ingredients in a blender or food processor and pulse until smooth. It is easier to work with, and we found it spread a lot less.
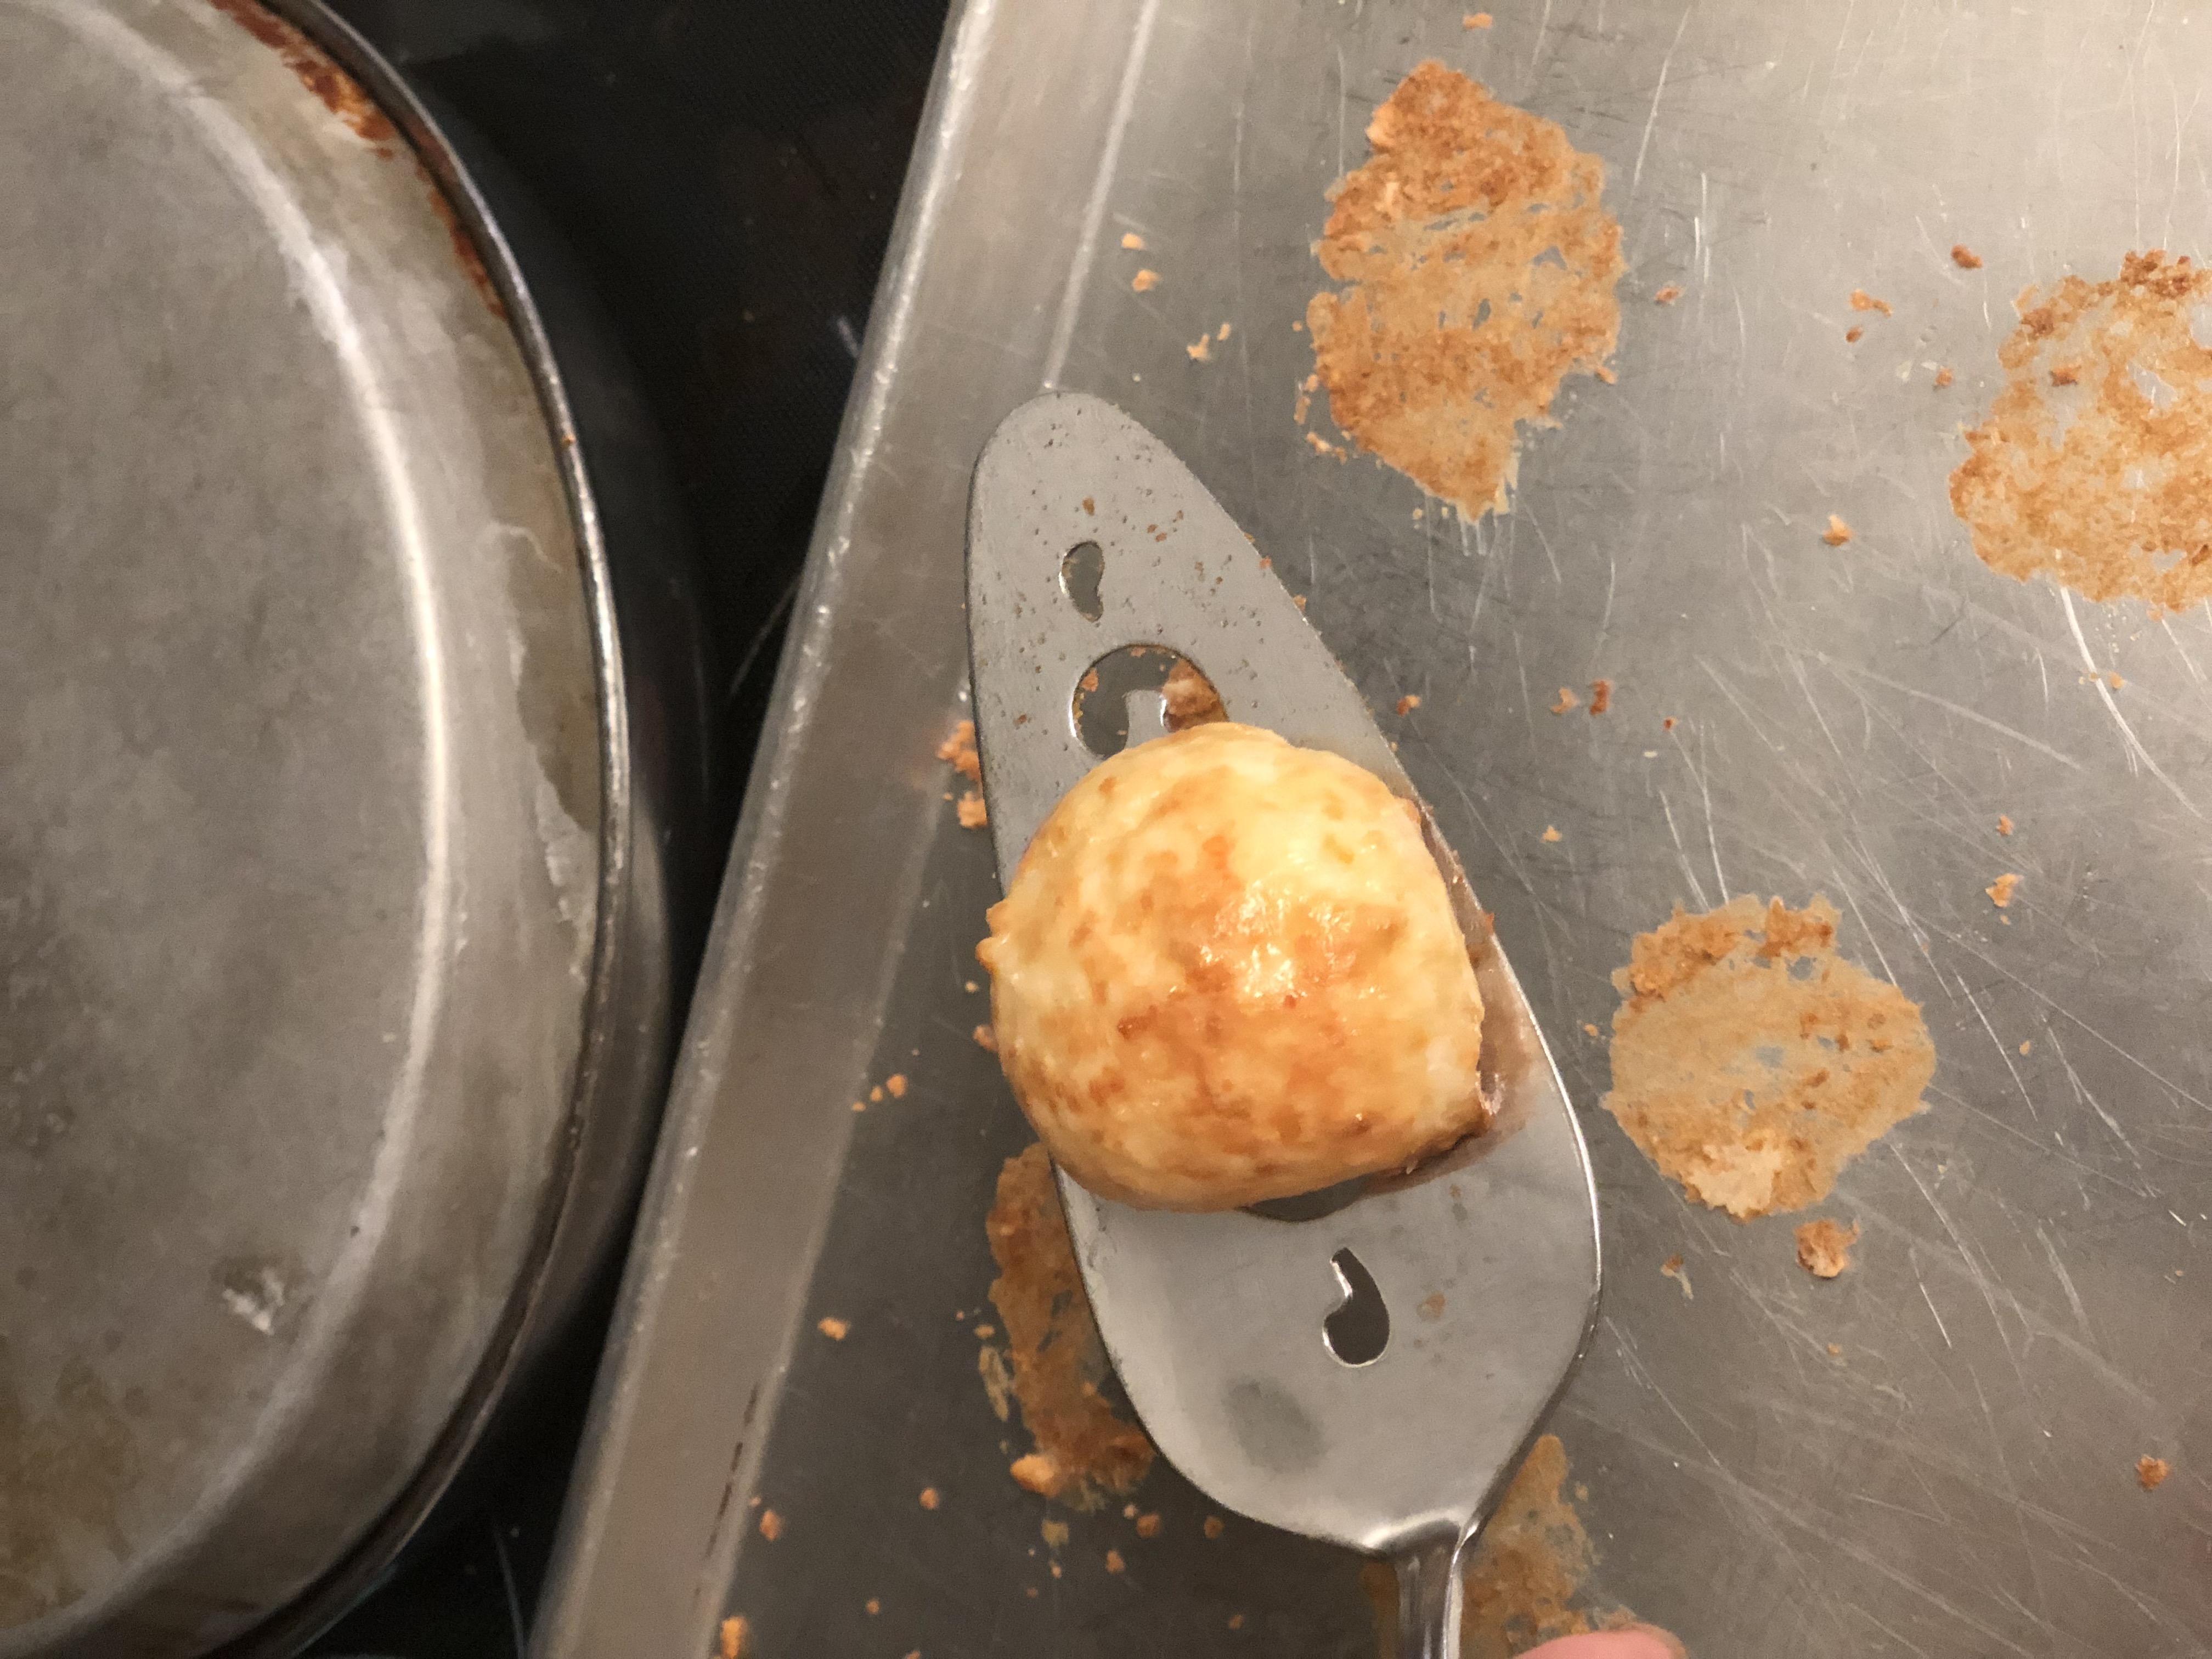
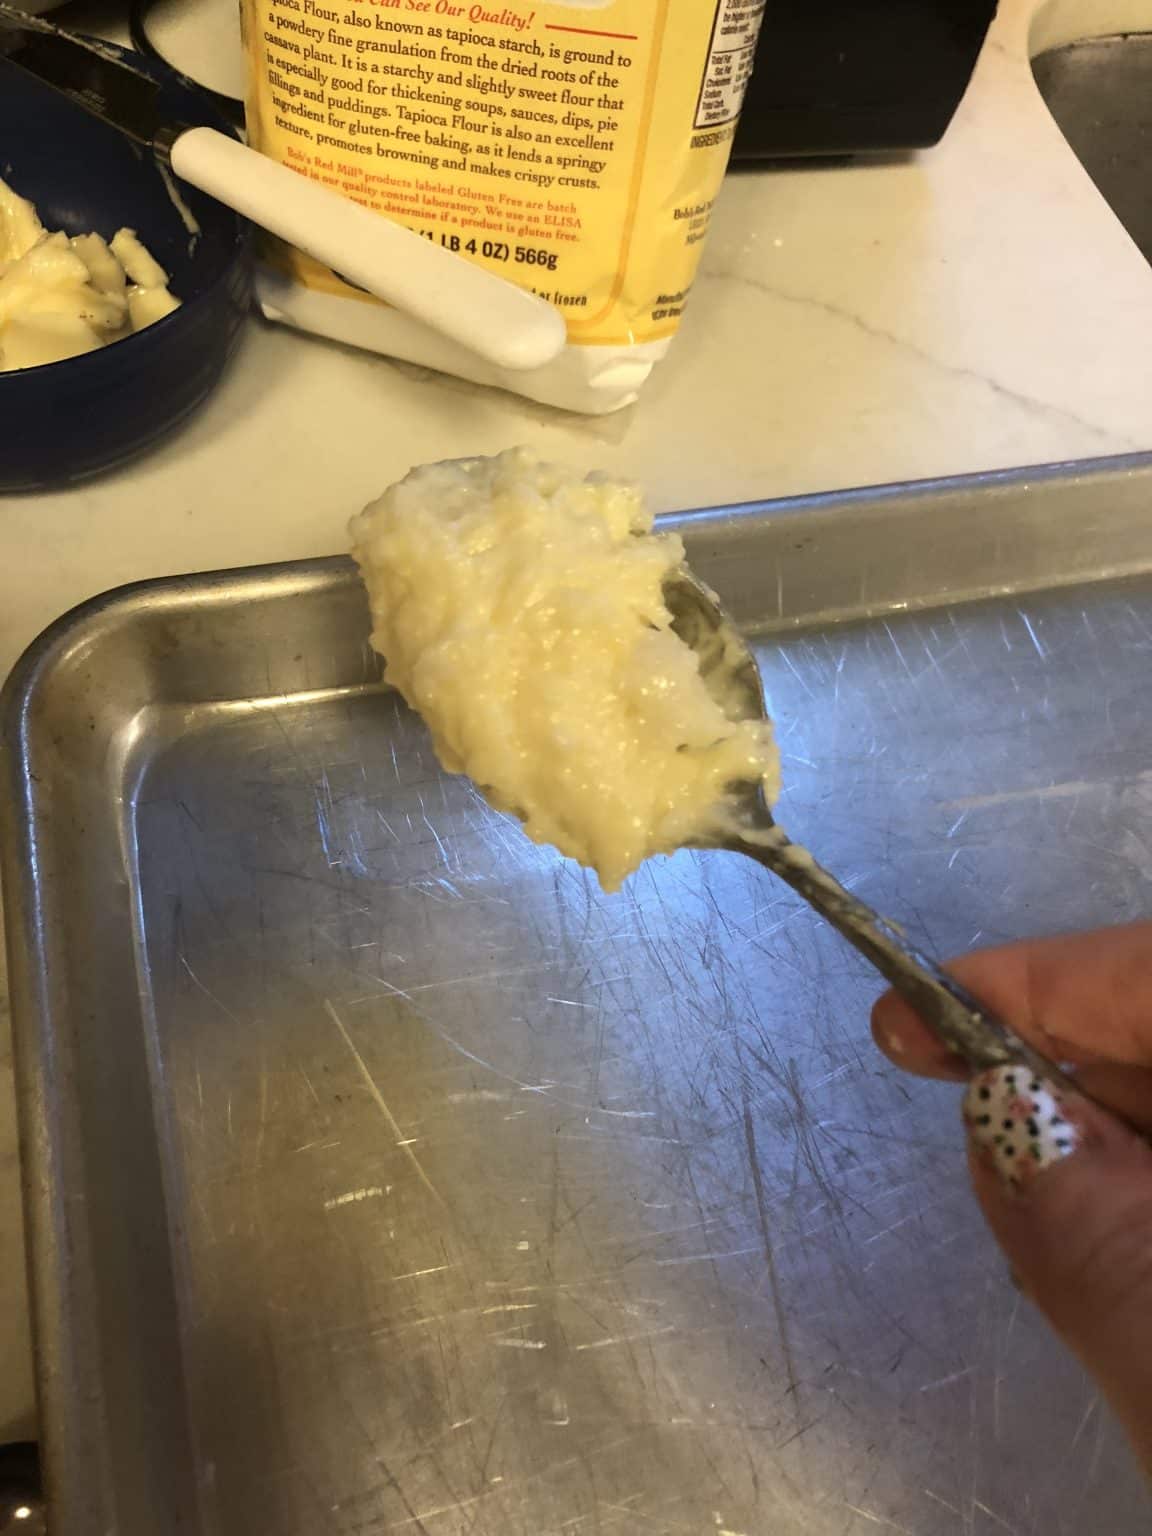
Finally, make little balls using a soup spoon. It’s the same way that you would place cookies onto a cookie pan.
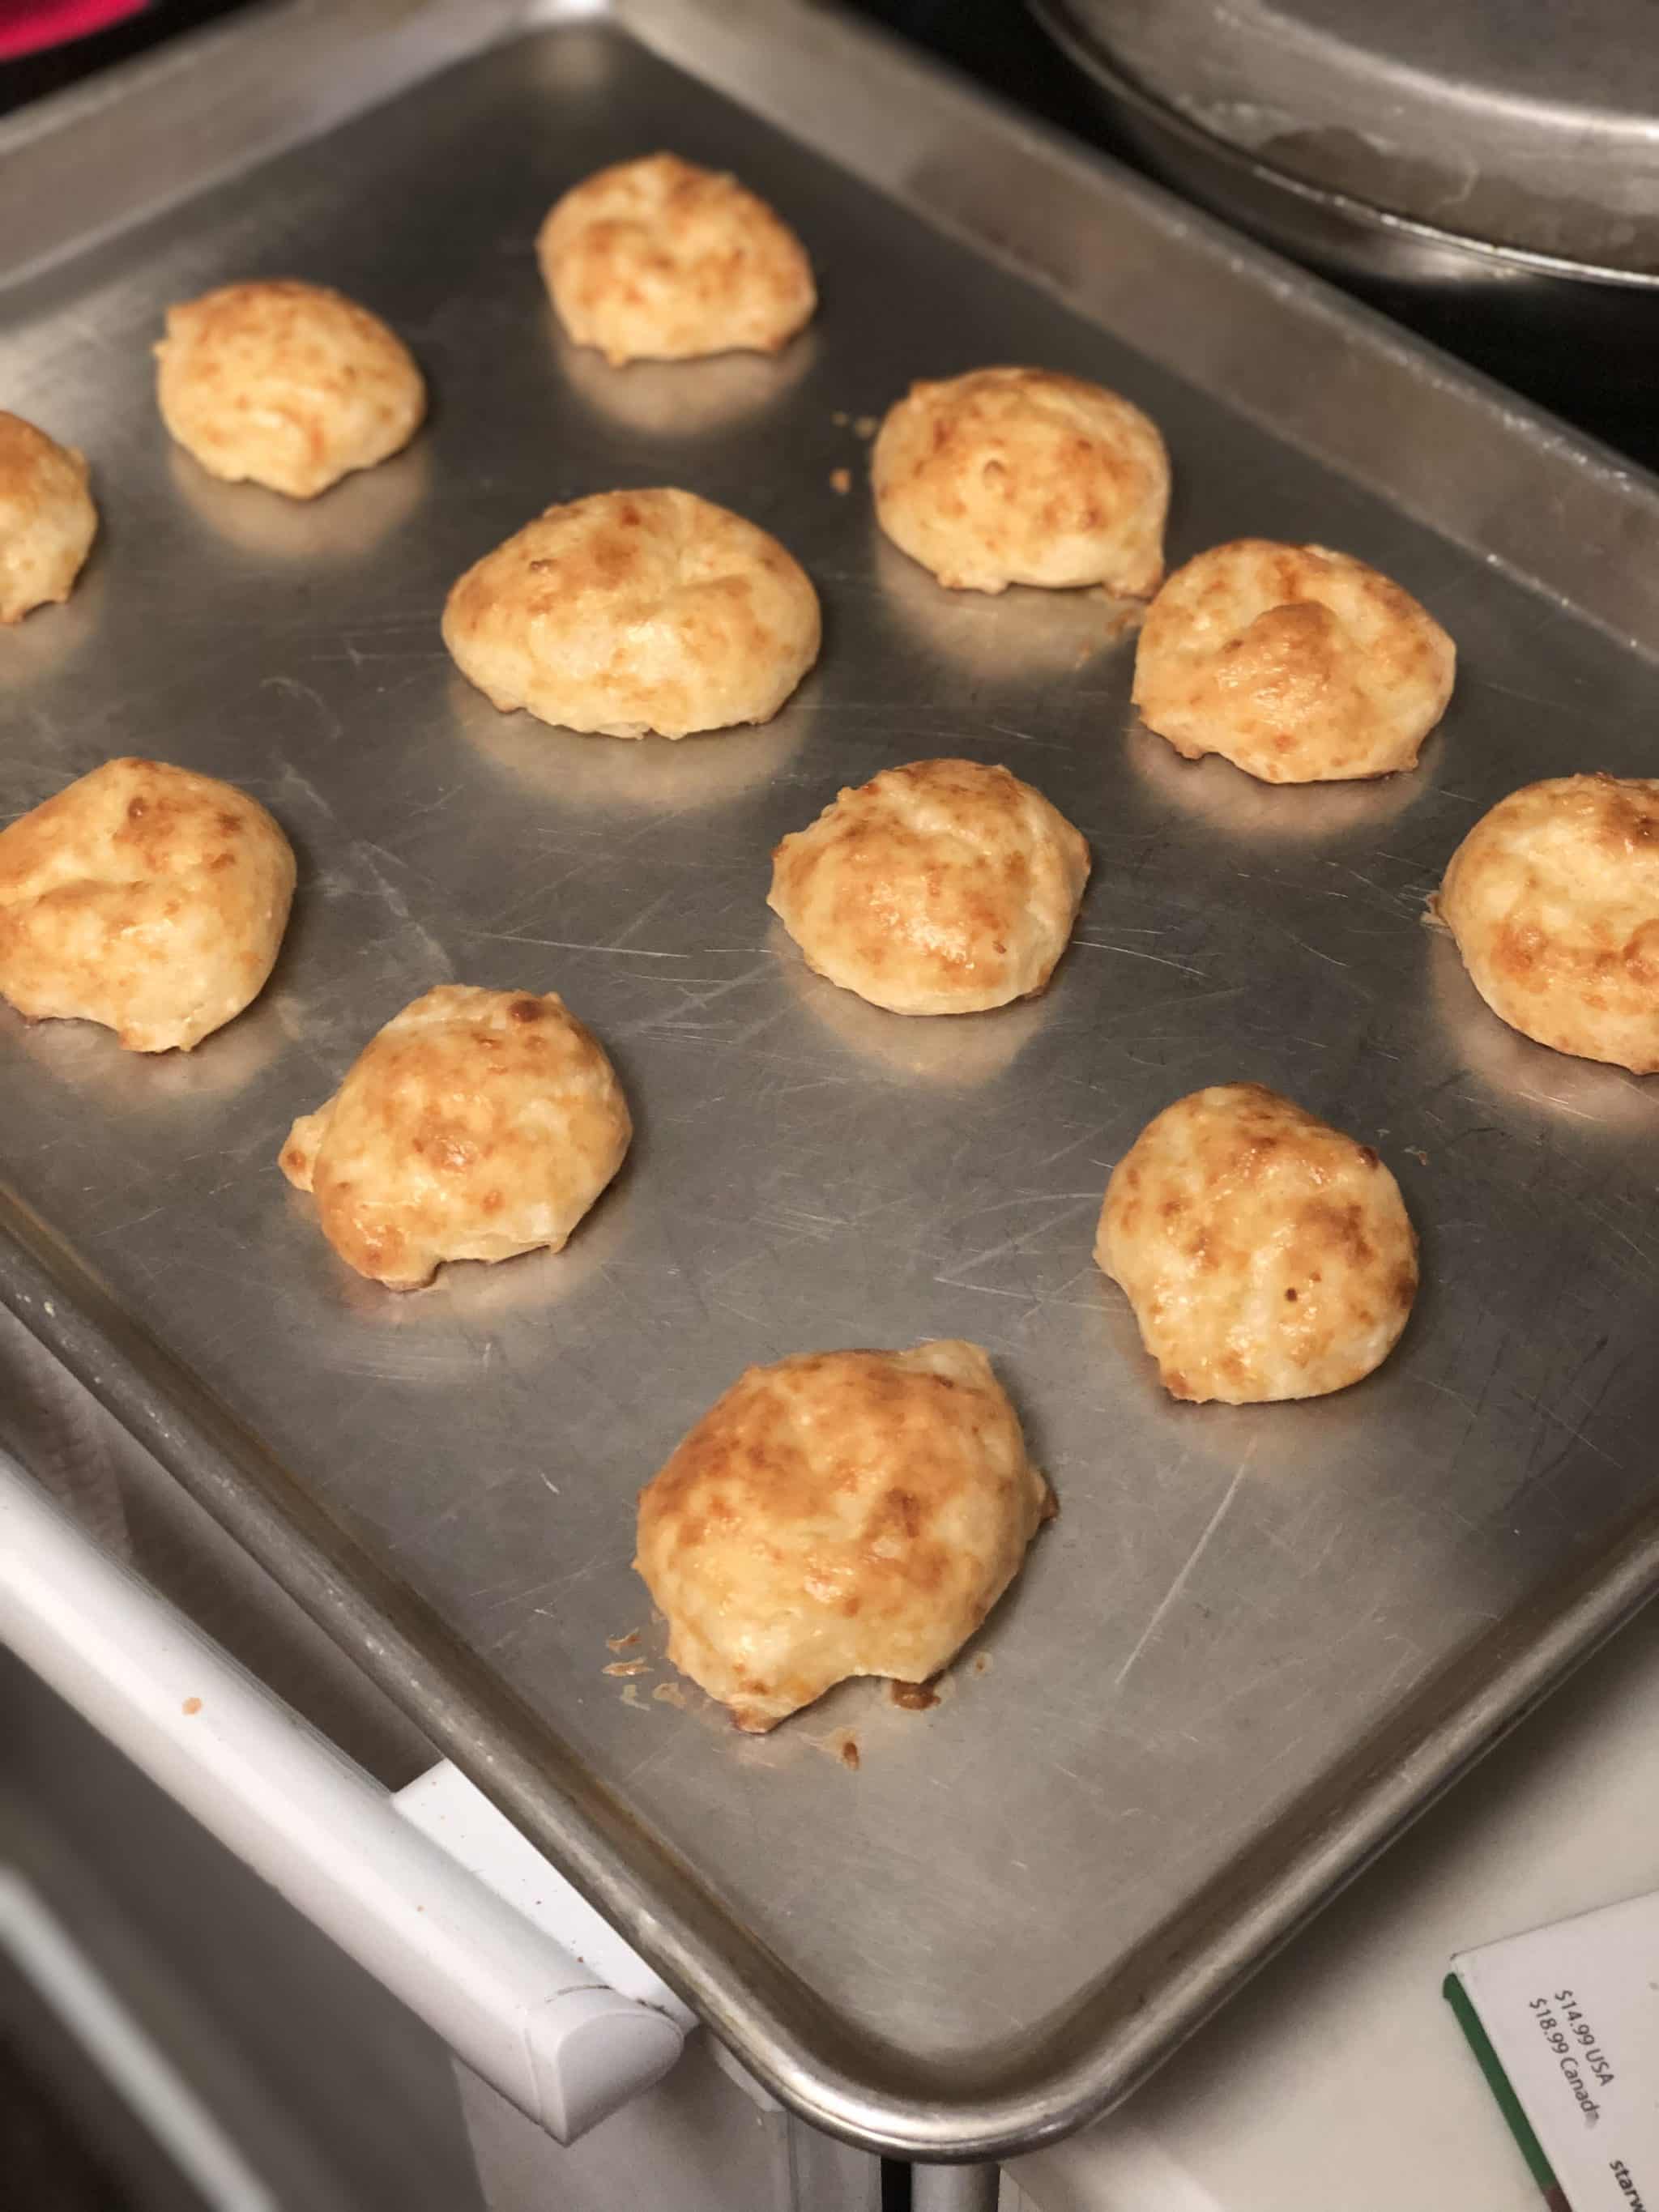
Put the tray into a preheated oven of 370°F and set the timer to 15 minutes.
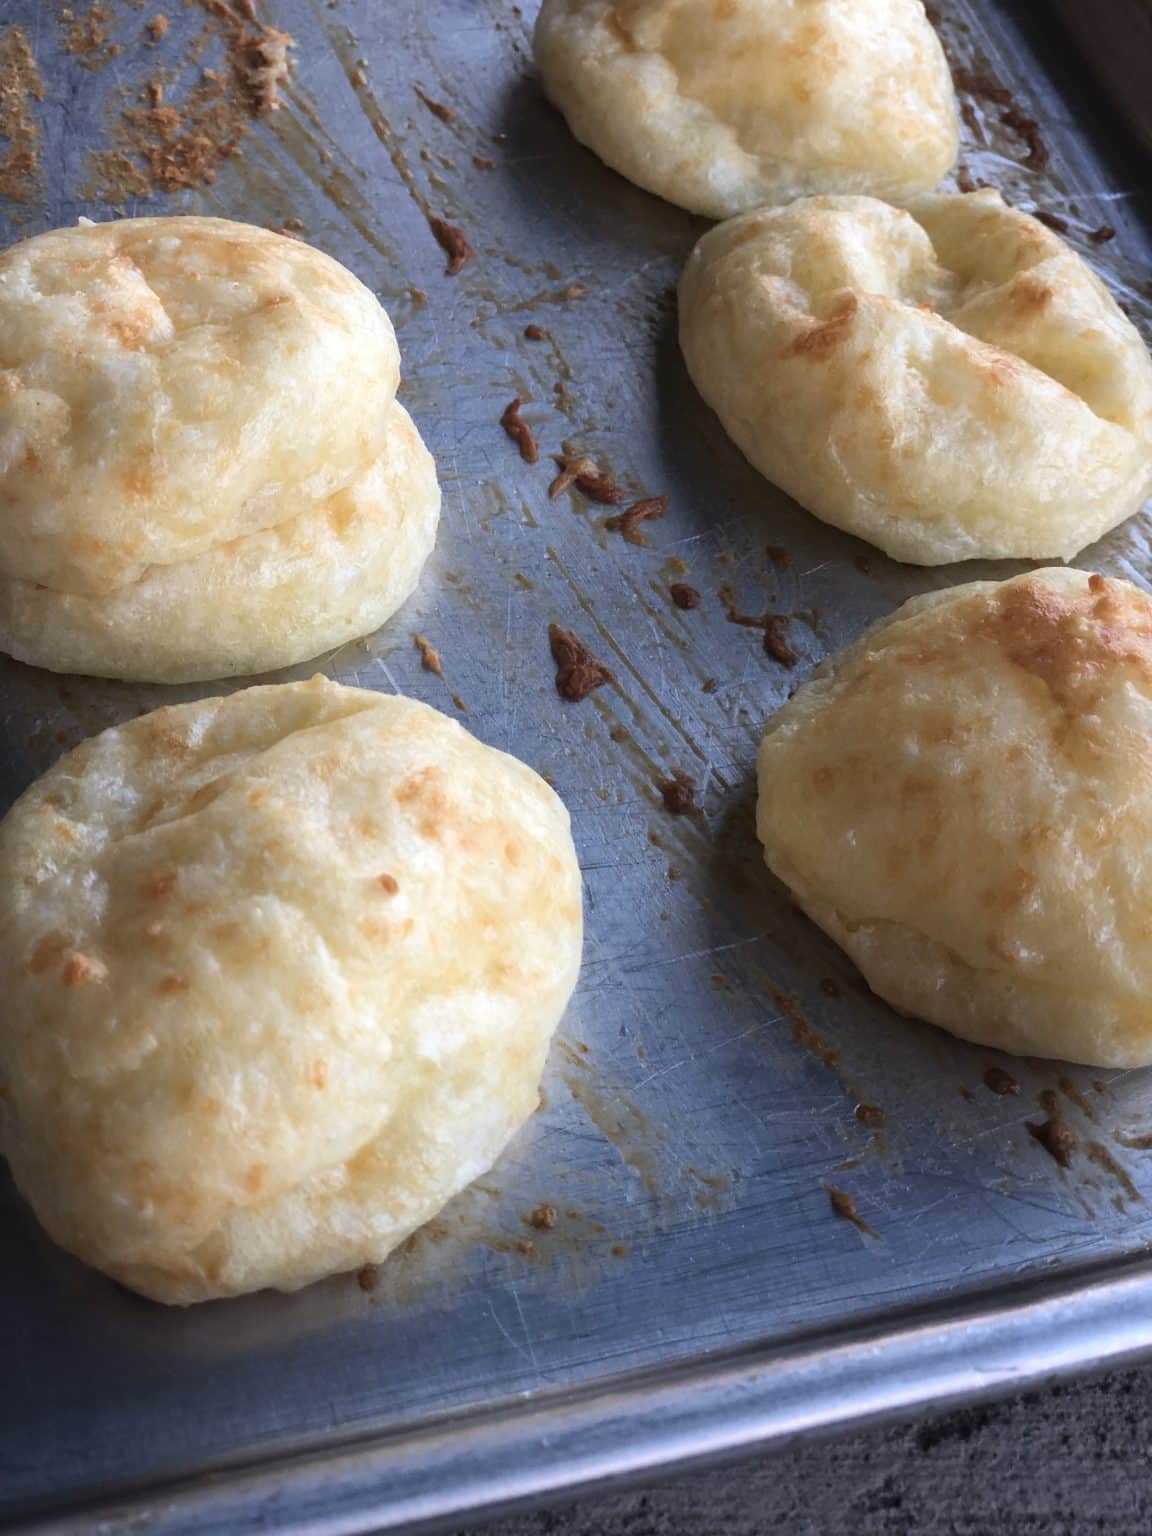
Take them out and enjoy!
Pão de Queijo Tips

- When we mixed everything together, we found that it looked like mac-and-cheese or cottage cheese. This is normal to see, but it makes it hard to make into little balls. We ended up throwing the mixture into a blender until it got to be smooth and creamy. This made it a lot easier to place on the cookie sheet.
- Use a non-stick pan, or else they will stick. You could also use a silicone baking sheet.
- The cooler the mixture the easier it is to shape the little balls. We ended up putting it in the fridge to speed up the process
- Pão de Queijo is delicious either hot or cold. Personally, I loved snacking on them after they had been sitting out for a few hours.
- When you put the balls of dough onto your baking sheet, they will likely not look very round and may spread slightly – this is normal. They will puff up and become round in the oven. We were shocked, too!
- Use a soup spoon. One recipe we saw said to use a 1/4 measuring cup…which was WAY too much batter.
- They should be browned on top before you take them out.
FAQ
- How come my batter is spreading? This is normal – to an extent. Make sure you don’t make the balls too big, or else they will spread out a lot. They amazingly round out while they bake.
- Can I use a different cheese? You can experiment with different cheeses, but it is recommended to use a hard cheese, like parmesan.
- What is Pão de Queijo? It is a Brazillian bread that is made with cheese. The inside isn’t gooey, but it’s delicious.
- Where can I get Tapioca Flour? It is available at most stores – we bought ours at Target, and it was the Bob’s Red Mill brand. You will definitely be able to find it at health food stores or on Amazon.
Pão de Queijo
A delicious, traditional Brazilian cheese bread recipe.
Ingredients
- 1 cup canola oil
- 2 cup cow's milk, we used 2%
- 2 teaspoon salt
- 1 3/4 cup tapioca flour
- 2 cups grated parmesan cheese
- 3 whole eggs eggs
Instructions
- Boil the milk, oil, and salt all together in a sauce pan. After it comes to a boil, immediately take it off the stove and add in the Tapioca flour.
- Let the above mixture cool down for about 10-15 minutes.
- Add the eggs and grated Parmesan Cheese and mix everything all together. It may look like cottage cheese.
- This is optional, but it will yield a much better result - place all the ingredients in a blender or food processor and pulse until smooth.
- Finally, make little balls using a soup spoon. It's the same way that you would place cookies onto a cookie pan.
- Put the tray into a preheated oven of 370°F and set the timer to 15 minutes.
- Take them out and enjoy!
Notes
When we mixed everything together, we found that it looked like mac-and-cheese or cottage cheese. This is normal to see, but it makes it hard to make into little balls. We ended up throwing the mixture into a blender until it got to be smooth and creamy. This made it a lot easier to place on the cookie sheet. The cooler the mixture the easier it is to shape the little balls. We ended up putting it in the fridge to speed up the process Pão de Queijo is delicious either hot or cold. Personally, I loved snacking on them after they had been sitting out for a few hours. When you put the balls of dough onto your baking sheet, they will likely not look very round and may spread slightly - this is normal. They will puff up and become round in the oven. We were shocked, too! Use a soup soon. One recipe we saw said to use a 1/4 measuring cup...which was WAY too much batter. They should be browned on top before you take them out.
Nutrition Information:
Yield: 36 Serving Size: pieceAmount Per Serving: Calories: 58Saturated Fat: 1gCholesterol: 15mgSodium: 223mgCarbohydrates: 5gProtein: 2g
Other Recipes You May Enjoy:


I LOVE pao de queijo! I worked at Tucanos for a while in college so I got quite accustomed to it 🙂 Thanks for sharing this recipe! Can’t wait to try it!
You’re welcome! I am sure you are very familiar with this if you worked at Tucanos 🙂