How to Make Gifts Tags with Cricut (Design Space Tutorial!)
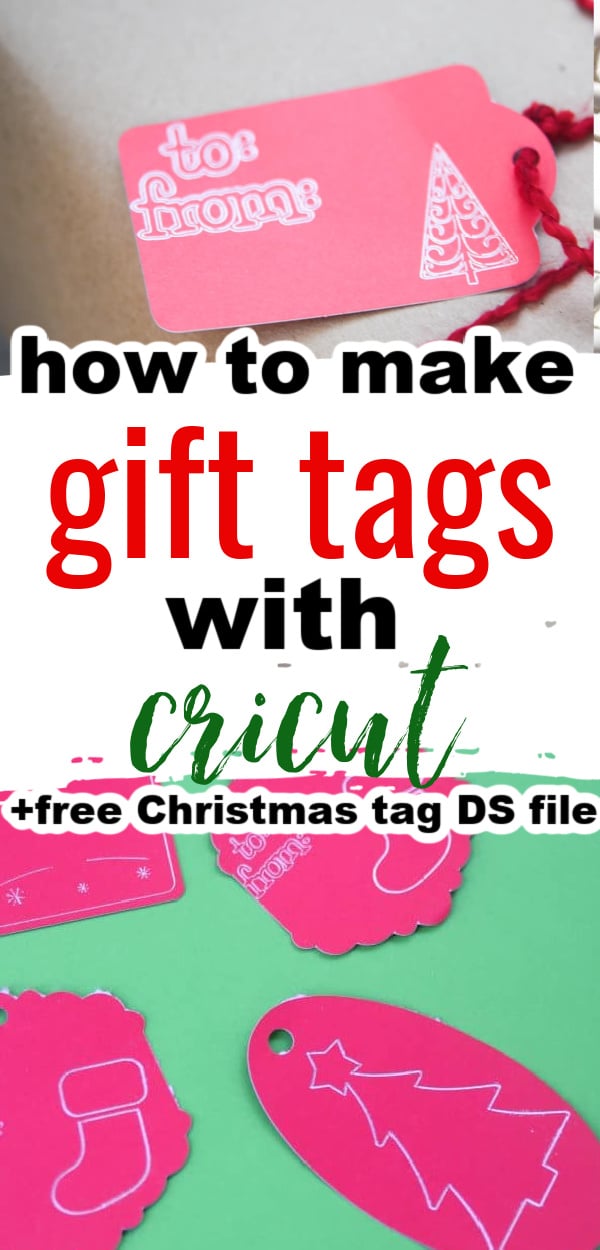
Make your gifts more custom than ever with a homemade Cricut gift tag! This tutorial shares how to make a gift tag in Design Space, and it includes five ready-to-make Christmas gift tags!

This is a sponsored post written by me on behalf of Cricut. All opinions are 100% mine.
I know we aren’t even into October yet – but I’d be lying if Christmas wasn’t already on my mind!
I just think I need something to really look forward to this year – anyone else in that boat?!
Last week, I introduced the The Cricut Foil Transfer Tool Kit. It’s such an awesome new tool, and my mind has been bubbling with new ideas of what to make with it.
I don’t know about you, but I feel like foil is the material of the holidays, so it only makes sense that I would make some fun foiling projects surrounding that.

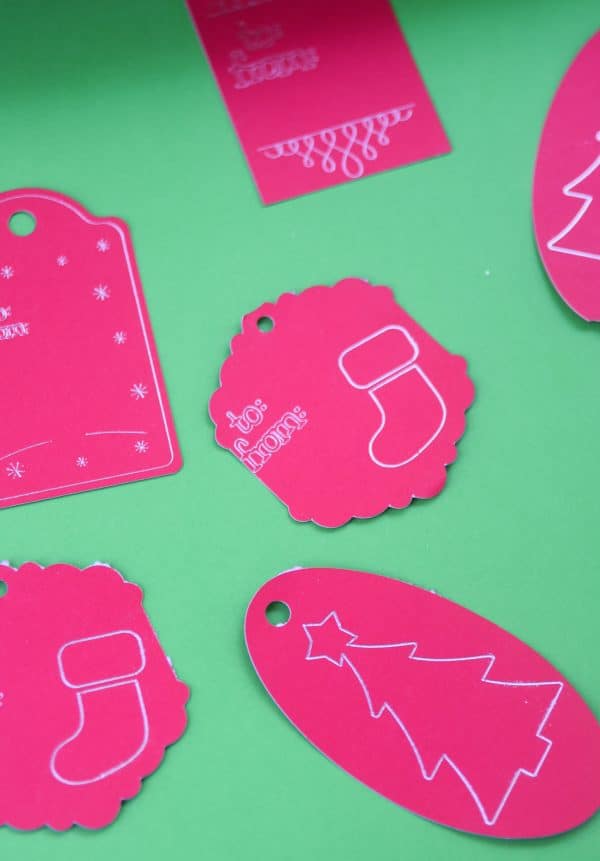
I thought it would be fun to make gift tags with my Cricut Maker. While you can easily do this with pens instead if you don’t have the foil transfer tool, this tutorial will be using the foil.
The professional finish was so fun, and I was so excited to have these tags made.
You can make gift tags for any occasion, but the ones featured in this tutorial are specifically for Christmas. However, you can use this method to create your own custom gift guides for any occasion!
I have included the Design Space file for your use for the following tags. Just open this link on your device that has Design Space installed, and you should be able to edit and cut as you please:
Materials:
- Cricut Machine
- Foil Transfer Tool or Cricut Pens
- Silver or Gold Foil Transfer Sheets (12×12)
- Cardstock in the desired color
- Fine Point Blade
- StandardGrip Mat
- This Design Space File (or create your own using instructions below)
Instructions:
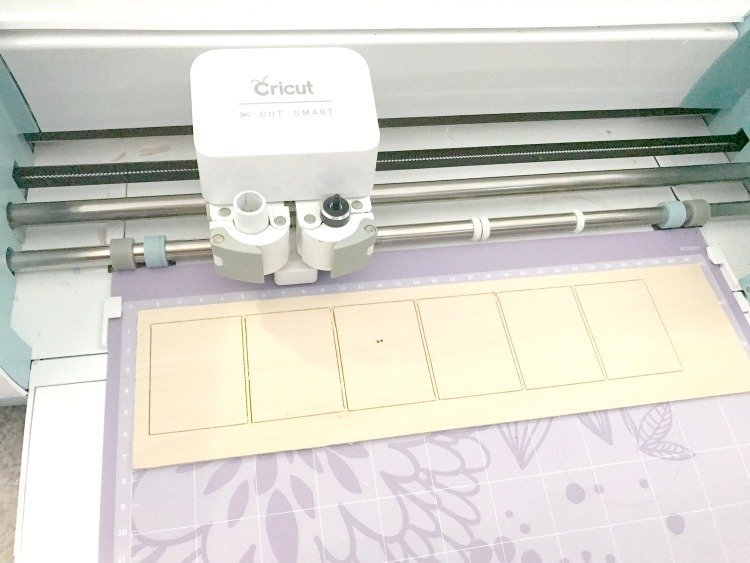
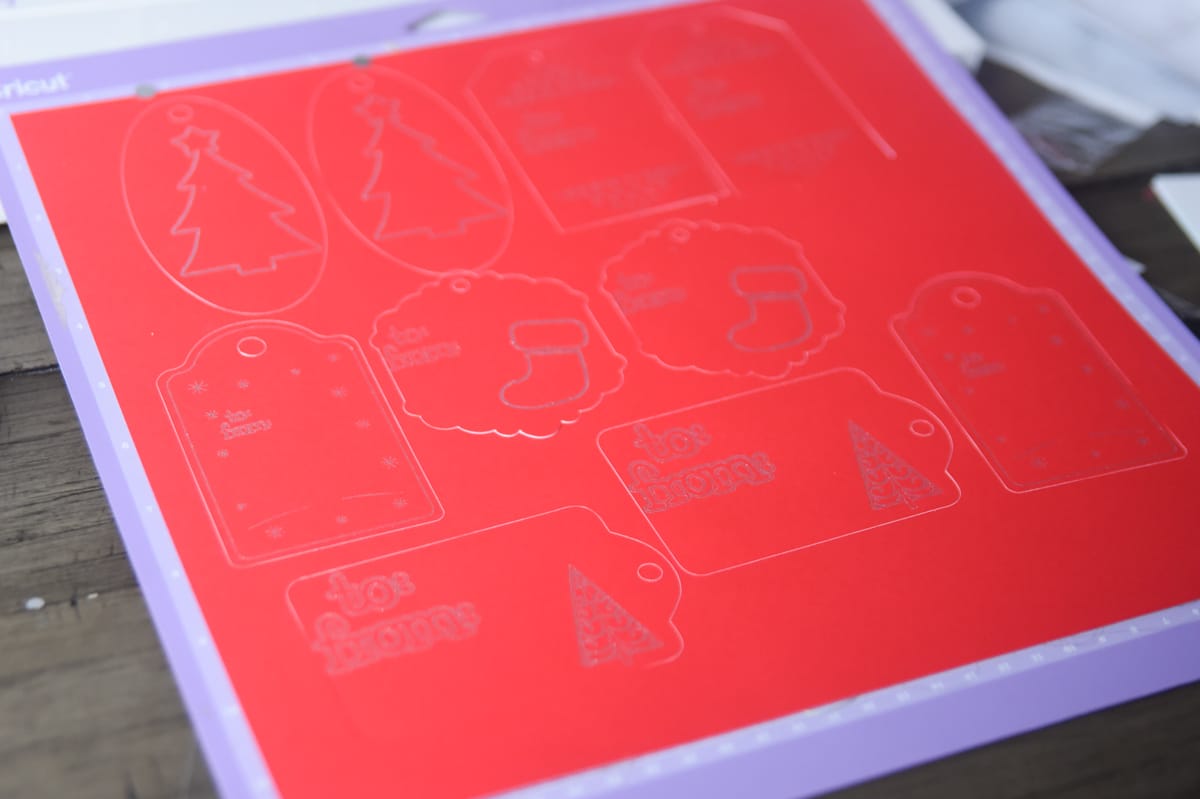
Open up this Design Space file.
Size the files to make sure they are the right size for cutting and foiling.
If you are foiling, the foil linetype should already be selected. If you are using a Cricut pen, you will need to detach the image from the tag and change the linetype to writing.
Press make it. Make sure everything looks correct on your mat and position the images so that there is enough space around them to tape the foil down
Place your cardstock on your StandardGrip Mat
Put your foil into the cardstock and secure with tape. Alternatively, if you are using the pen, you don’t need to do anything else!
Select cardstock as your material you will be cutting and follow the prompts.

When cutting with foil, it will tell you to put the foil tool in first. After it is done foiling, make sure you remove the foil BEFORE it cuts.
After it’s finished cutting out the tags, if there is any foil dust, you can brush it off gently with a tissue.
How to Create Your Own Design:
When it comes to creating your own gift tag design, you will use the fine point blade to cut it out. However, you can either use print and cut for a more complex design with more colors and detail, or you can use foiling or writing for simpler designs.
Open up a new, blank canvas in Cricut.
Go into images and search “tag”. There should be a lot of blank options that you can use to create your tag.
Add any images or text that you want to the tag. When I was creating the tags above, I used the contour tool to remove certain parts of it so it fit better with my tag.
If you will be foiling or writing with a pen, make sure to select that linetype.
After the linetype is correctly chosen, select all the elements of the tag and press “attach”.
If you are doing print and cut, you will need to flatten the entire image before cutting.
Follow the instructions for creating the project in Design Space.
More About Cricut Foil Transfer:
- Cricut Foil Transfer vs Foil Quill: Which One Should You Get
- The Cricut Foil Transfer Tool Kit: The Ultimate Starter Guide
- What Materials Does Cricut’s Foil Transfer Work With?
- Cricut Foil Transfer Tool: FAQs Answered!
Other Cricut Projects You May Enjoy:
- DIY Cricut Paper Ornaments and Gift Card Holders
- EASY DIY Christmas Stocking
- 50+ Cricut Christmas Projects – Easy and Jolly Ideas!
- 28+ Jolly Cricut Christmas Ornament Ideas
- Three Fun Cricut Christmas Village Projects – And Tips for Success!