
DIY Tooth Fairy Pillow and Pattern + Teaching Kids to Sew
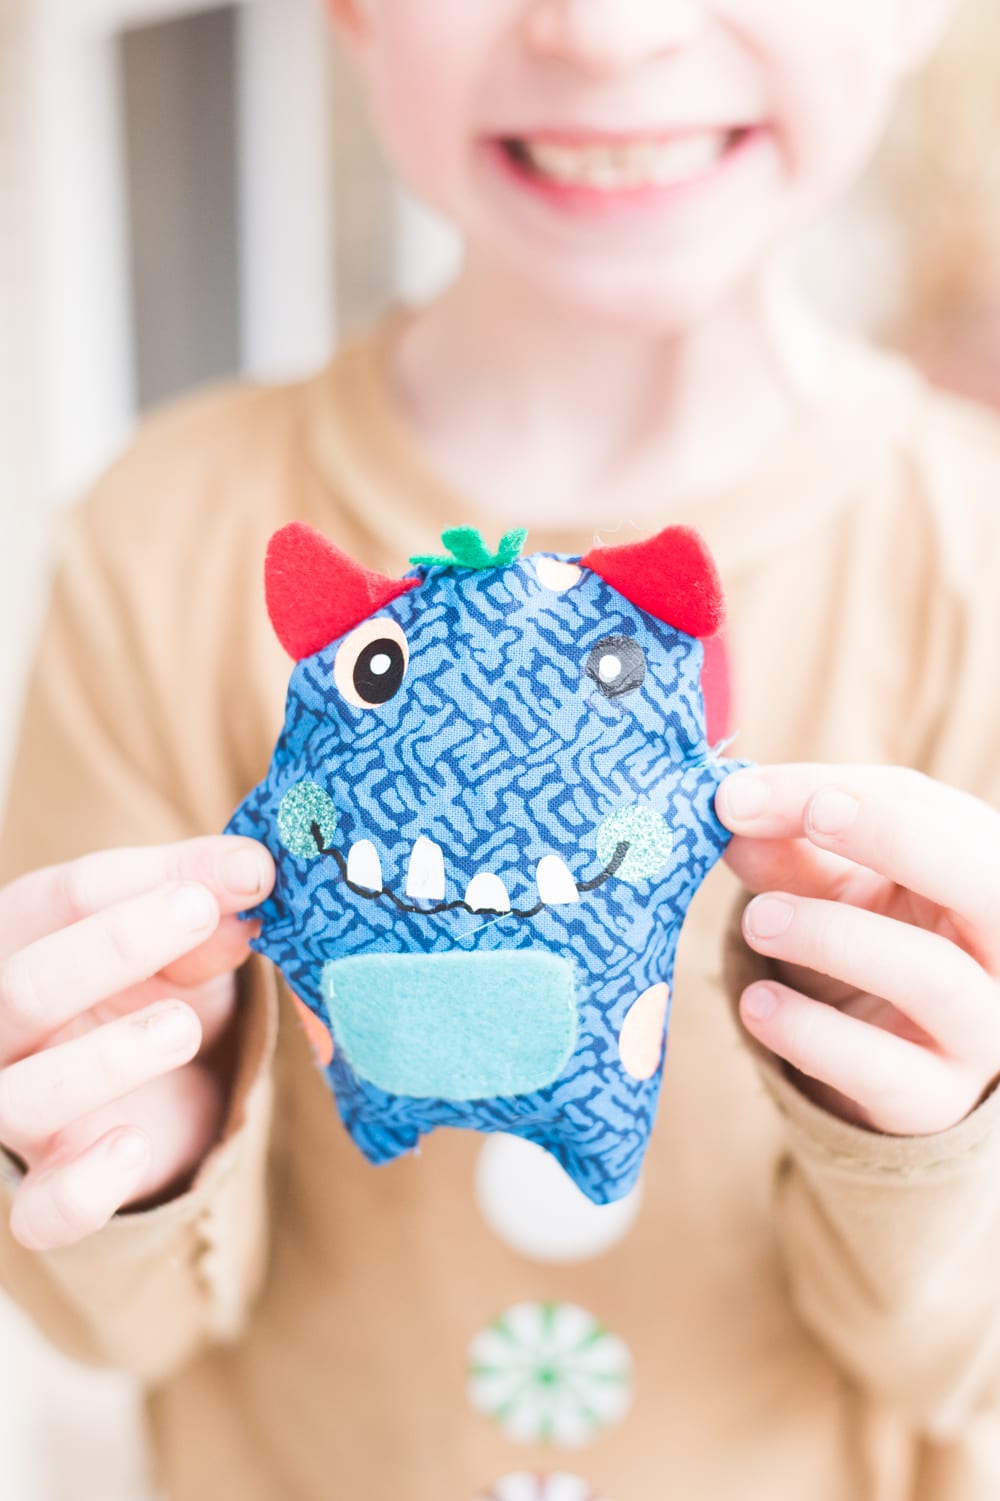
A Tooth Fairy Pillow is the perfect way to trade your child’s tooth for coins! Here is an easy-to-follow tutorial to make this Tooth Fairy Monster Pillow!
Tooth Fairy Pillows
Jack started losing his teeth last year.
I’d be lying if I said I wasn’t super emotional when he discovered his first loose teeth…and when he subsequentially lost that loose teeth.
I remember thinking about how I distinctly remembered feeling that little tooth for the first time pushing through his gums…and yes, I cried then, too.
Why do kids have to grow up so fast?
Try as I may, there hasn’t been anything I’ve done to make my kids getting so big, so throughout all these milestones, I have tried my best to embrace the excitement of the new stage.
Because let me tell you – Jack was SO excited to start losing his teeth. It’s really such a big milestone, especially when they are at school. I volunteer in Jack’s first-grade class, and at least one kid every time shows my a dangly tooth (which, I have to admit, makes me gag a little bit).
Of course, losing teeth comes the fun of the tooth fairy! But man, a tooth under a pillow is tricky for the tooth fairy to get.
I had seen people use Tooth Fairy pillows in the past, and I thought it was such a fun idea – the tooth stays nice and safe, and the Tooth Fairy can easily swap it for a couple of coins.
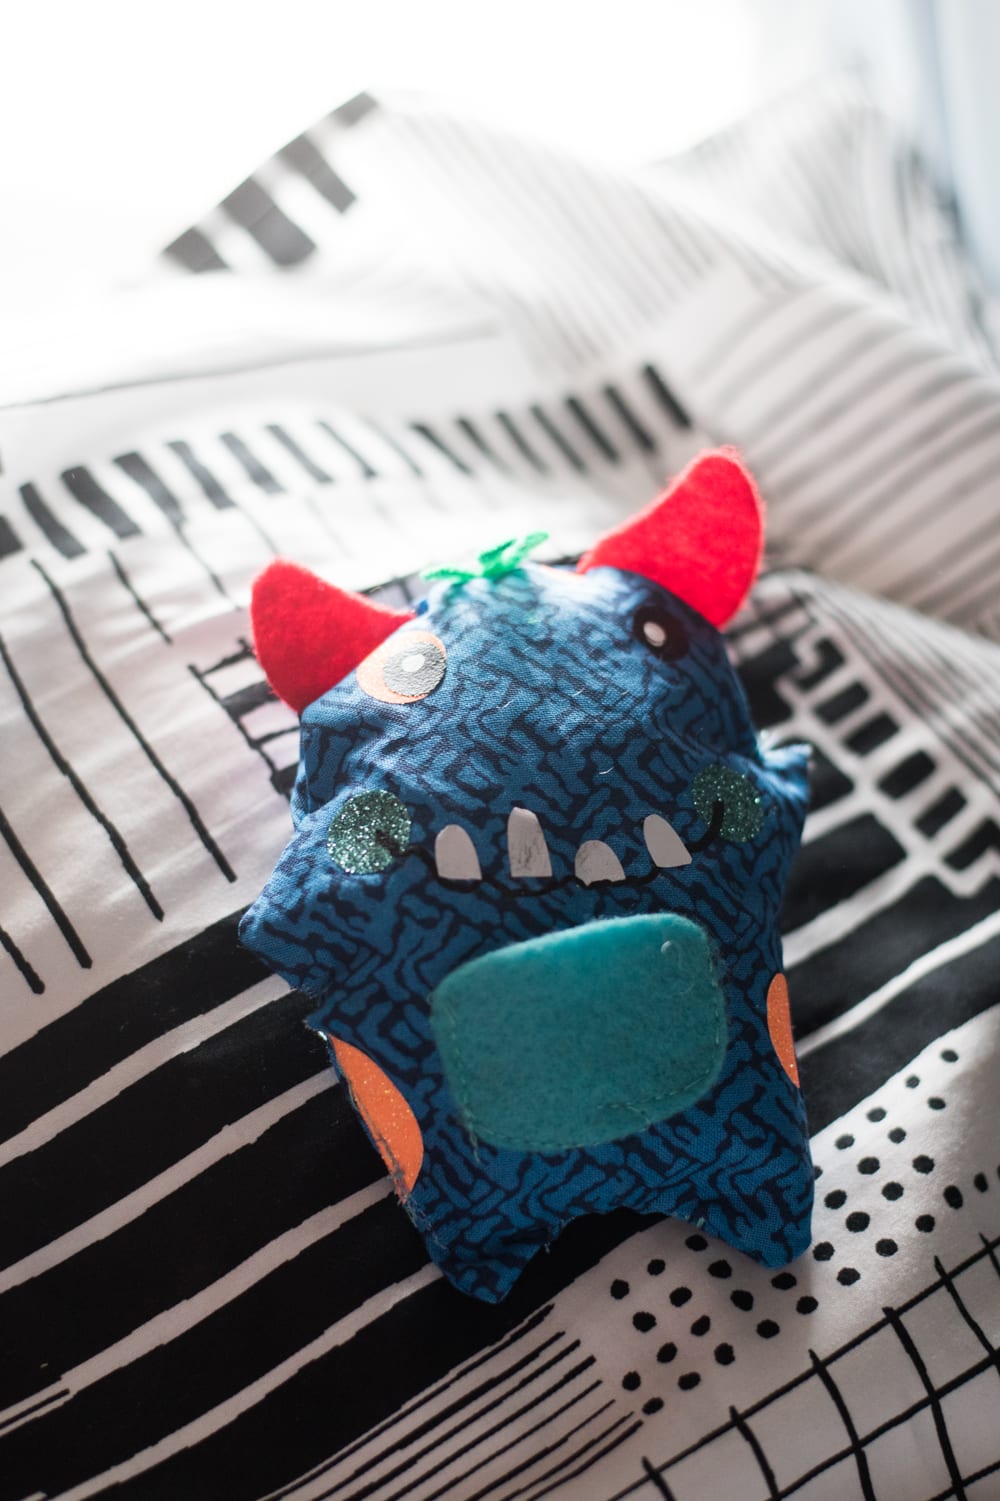
When Jack’s first tooth was loose, we went and bought the materials to make this adorable monster tooth fairy pillow…but as most things in my life go, we didn’t end up getting it made in time.
But when Cricut invited me to share a sewing project, I knew that was the time to do it.
Plus, he’s only lost four teeth. Many more can be used with this tooth fairy pillow.
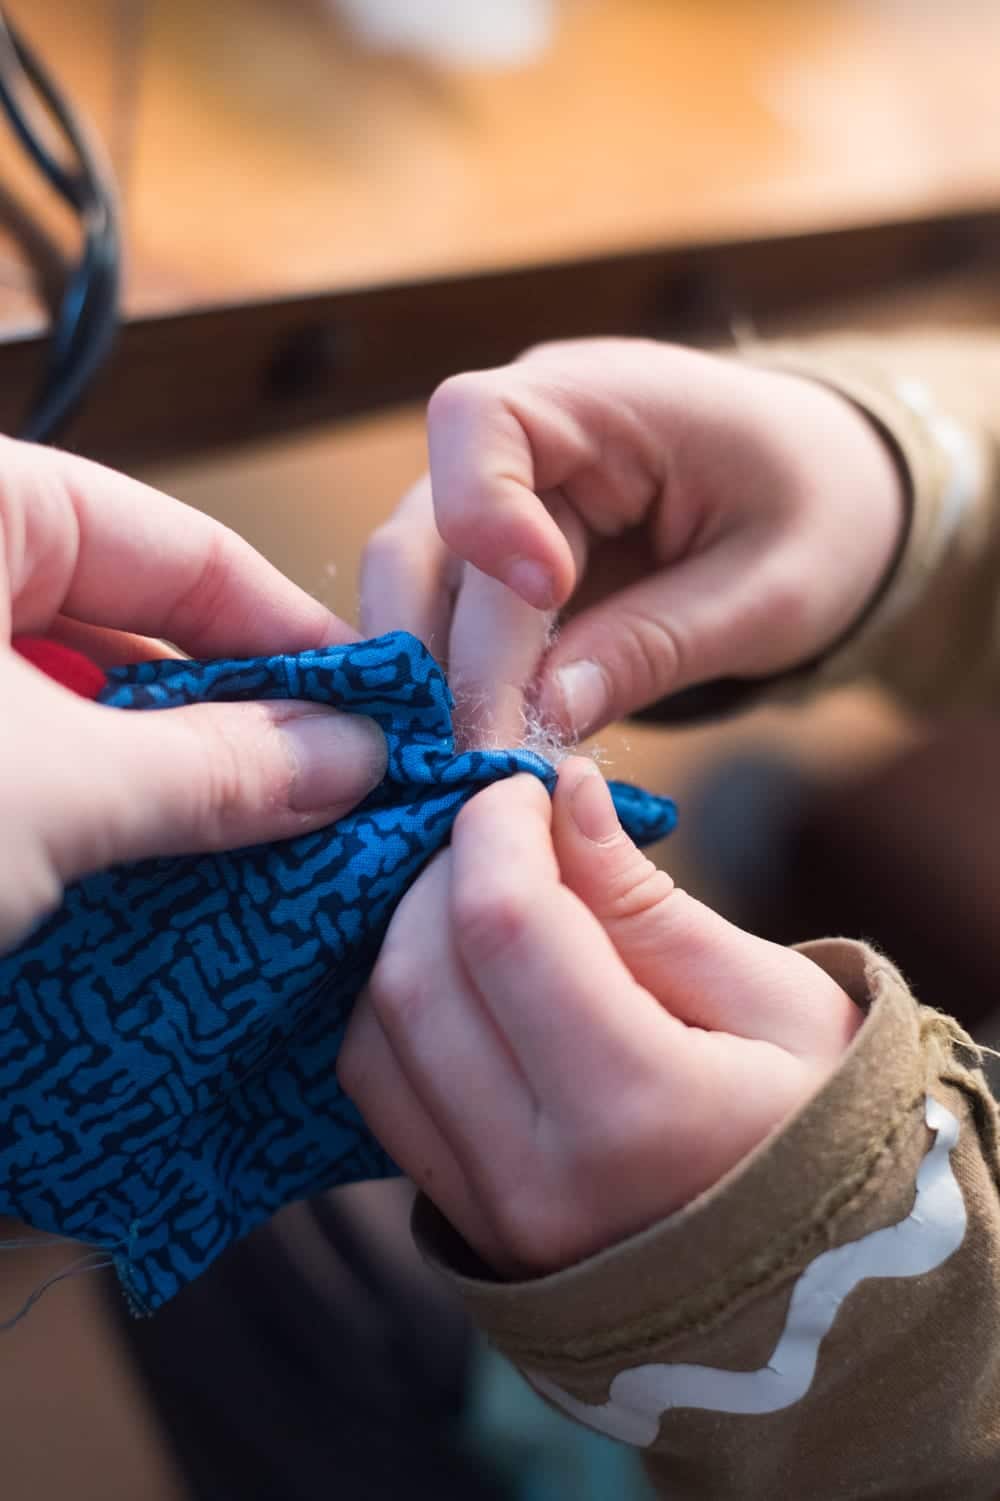
I also thought this would be a fun time to have Jack help me sew. He’s expressed a desire to sew, which I think is AWESOME. I actually let him look through a bunch of projects, and this is the one he chose…which was perfect since we had all the materials.
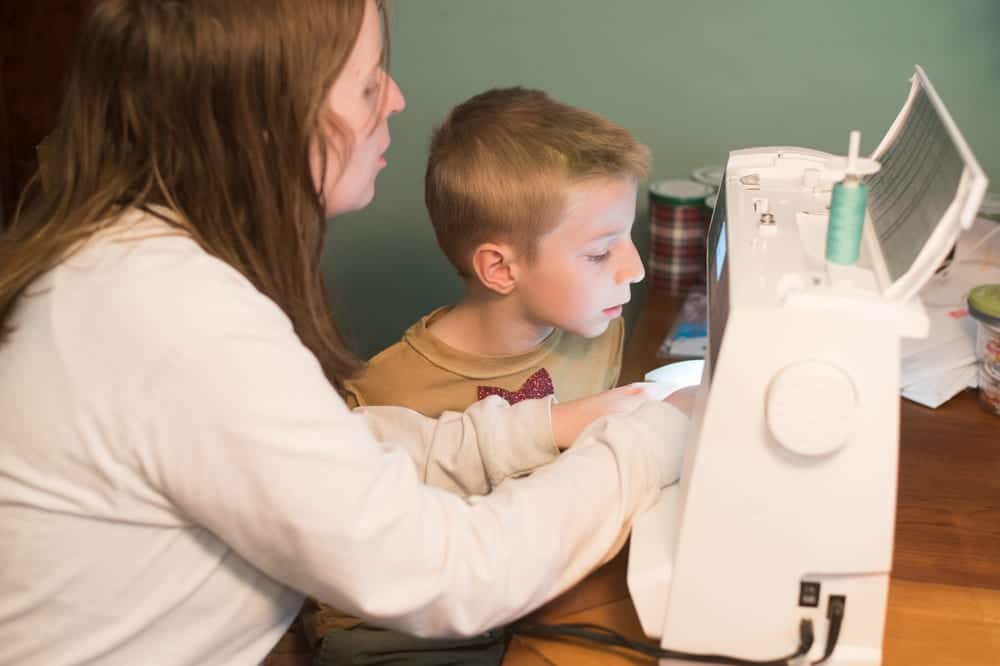
So in this post, I will share how I made this Monster Tooth Fairy Pillow, as well as some tips for teaching children how to sew.
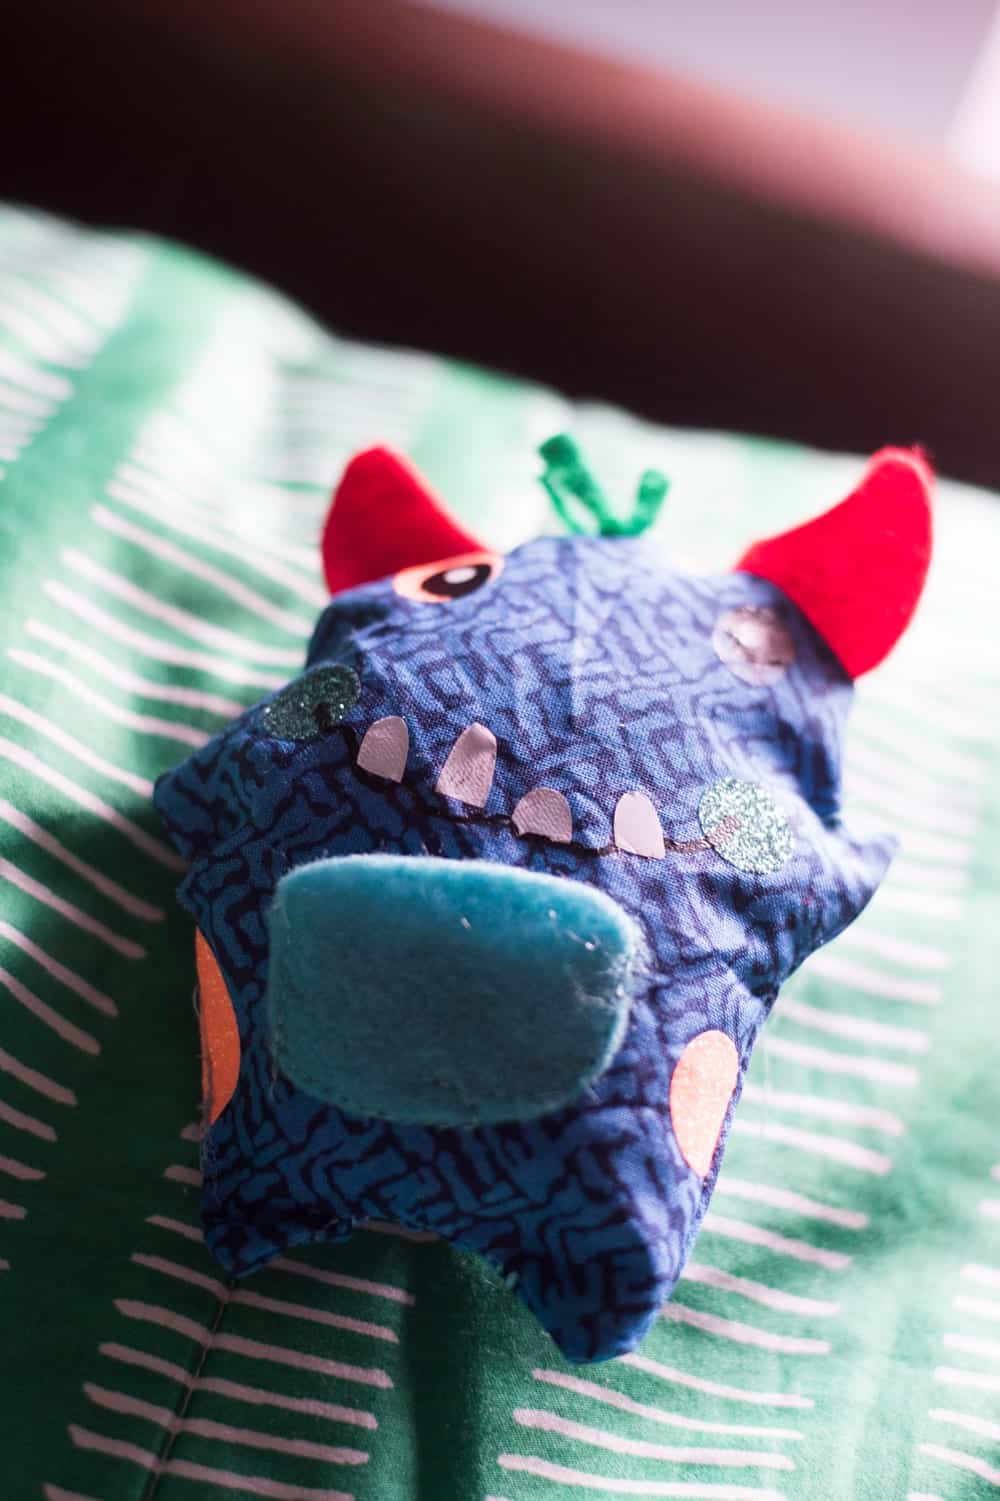
DIY Tooth Fairy Pillow
This is such a fun and easy project – especially if you involve your child. I’m a huge fan of teaching children how to sew – even the basics can get you pretty far.
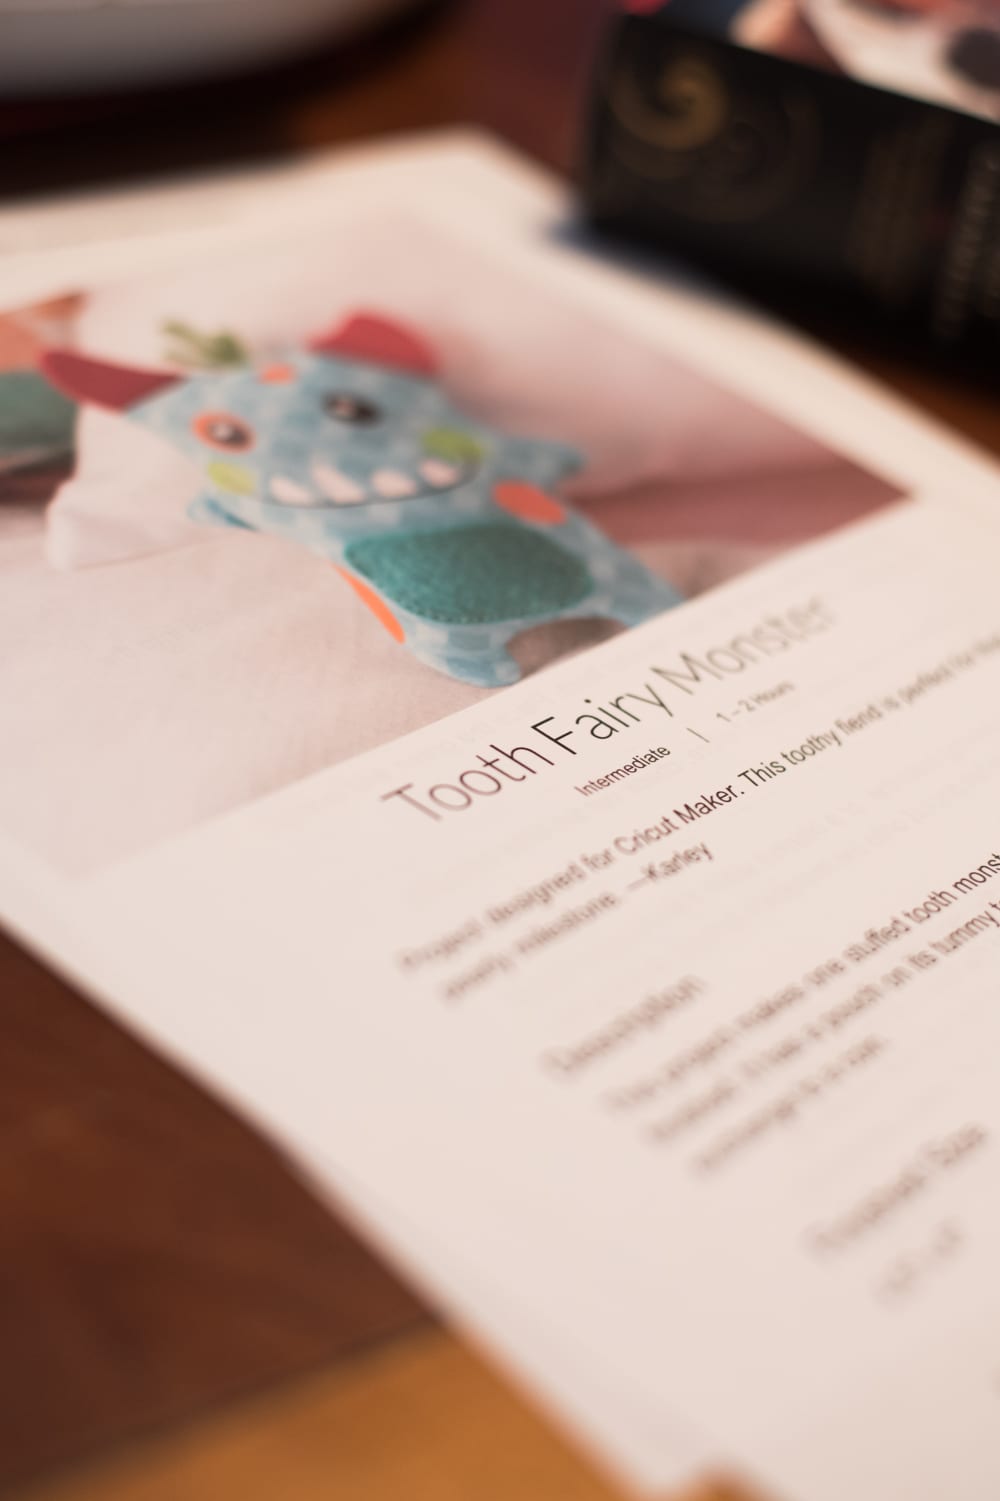
For this project, I used my Cricut Maker to cut out the pattern – so unfortunately, if you don’t have a Cricut Maker, I don’t have an exact pattern for you.
However! It’s such a simple pattern, you can easily just draw the pattern out yourself on the fabric of your choice.
Tips for Success
Pick lighter material – I let Jack pick out whatever material he wanted, and he went with one that was super dark…which is fine. However, the fabric marking pen markings didn’t show up on it. Fortunately, I know what 3/8″ is, but I do find the markings to be helpful to make sure you stay on track. If you want the markings, pick a lighter fabric.
Be careful with the iron on – If you look closely, you will see some of our iron on got a little wrinkled due to too much heat. We had a couple of different types of iron on (SportFlex, Glitter, and Every Day), and they all require different temps. Try and keep it the same type and iron them on together as much as possible.
Print off the instructions – I always suggest this with every Cricut project, but I think it’s especially important with sewing projects. It’s nice to just have them right in front of you and not having to reference back to a computer or phone the whole time.
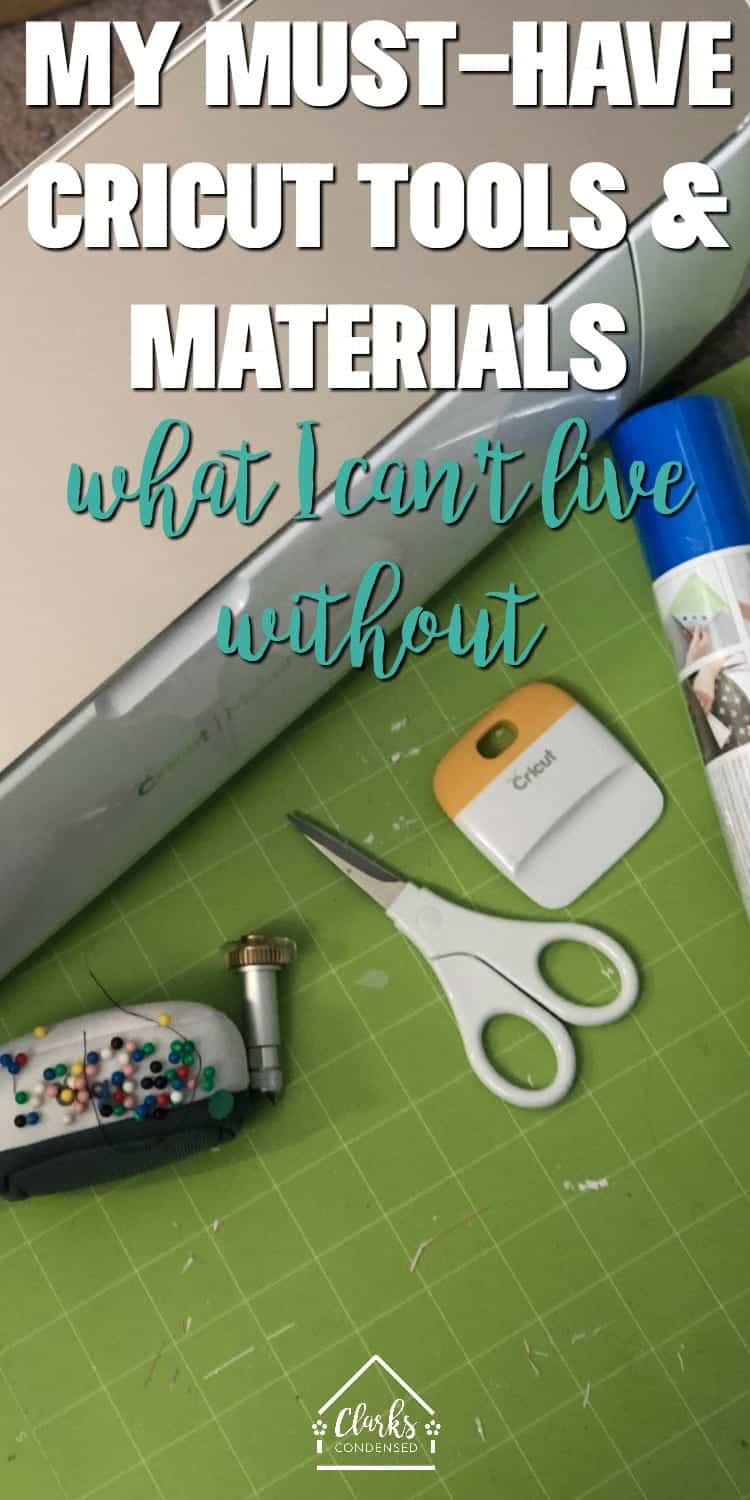
Materials:
- Cotton
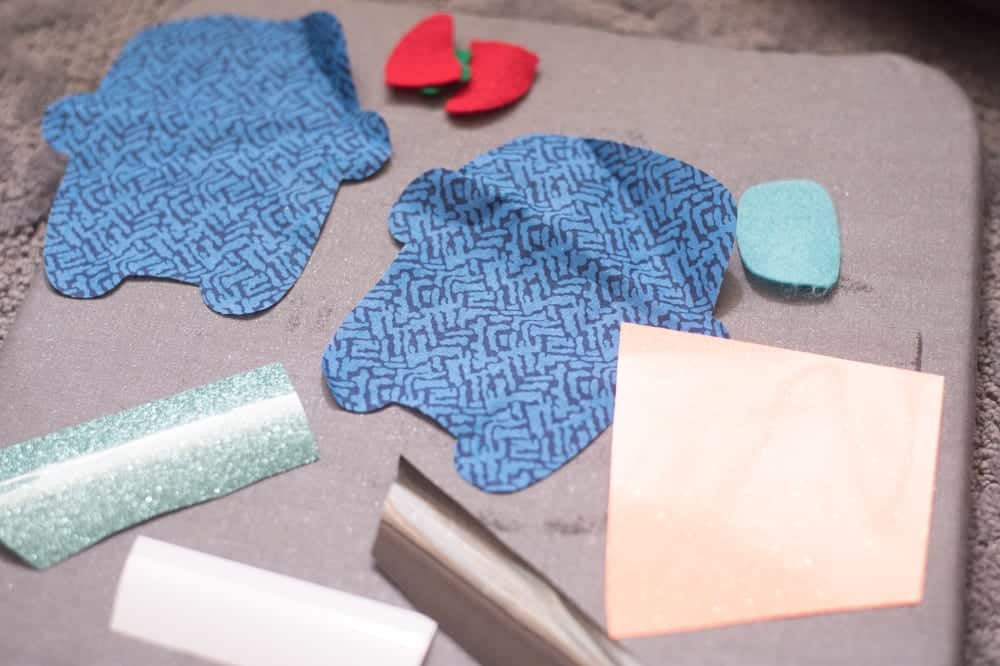
- Felt – I just used some pieces from Joann’s Fabric. However, I felt like they were a bit flimsy, and there was a little bit of trial and error figuring out exactly how to cut them. I really do love the Cricut brand of felt – it cuts perfectly every time (you can use the rotary blade or fine point blade)
- Iron-on vinyl in various colors – for this project, it suggests orange, white, black, and blue, but you can adjust these depending on what you want. I do think it’s good to have black and white for sure.
- Fabric Marking Pen
- Rotary Blade
- Fine Point Blade
- Stuffing
- Sewing machine
- Pink FabricGrip Mat
- StandardGrip Mat
- Iron or EasyPress 2
Instructions:
- Open up this project in Design Space. If that link doesn’t work, just search for “Tooth Fairy Monster”
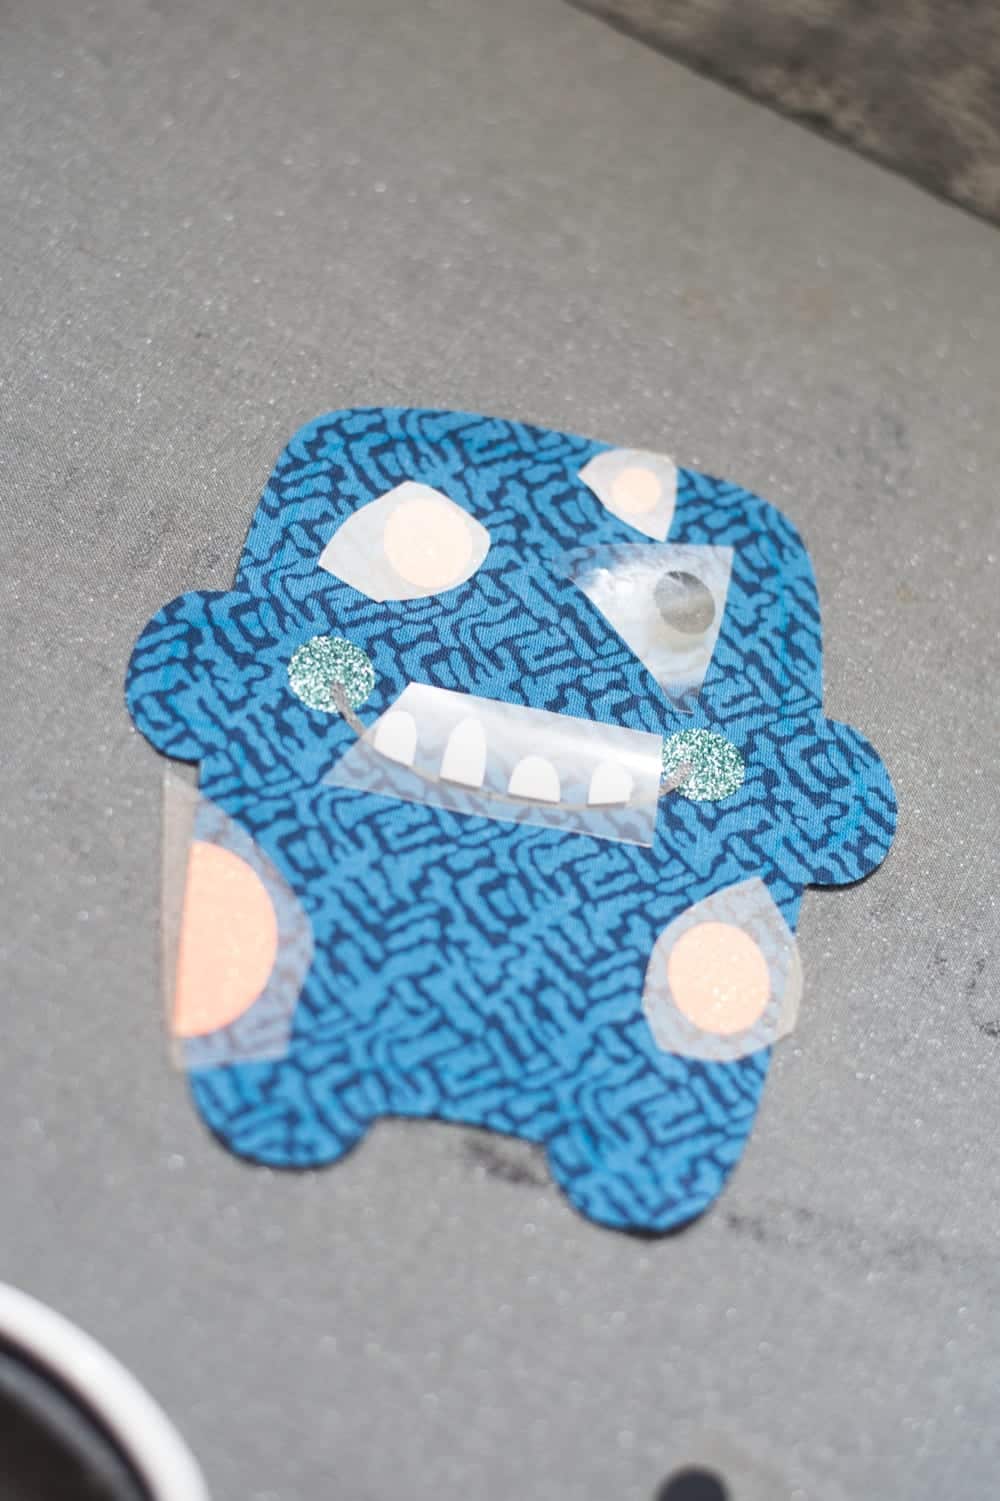
- For all the iron-on pieces, make sure you press “mirror” before you cut
- Select the correct settings according to what you are cutting. I started with all of the iron-on pieces and then moved onto the felt and cotton just so I didn’t have to keep switching back and forth between the mats.
- Cut everything out with your Cricut.
- Weed out the excess material on the vinyl. If you need to, cut pieces apart so they are easier to put on your material.
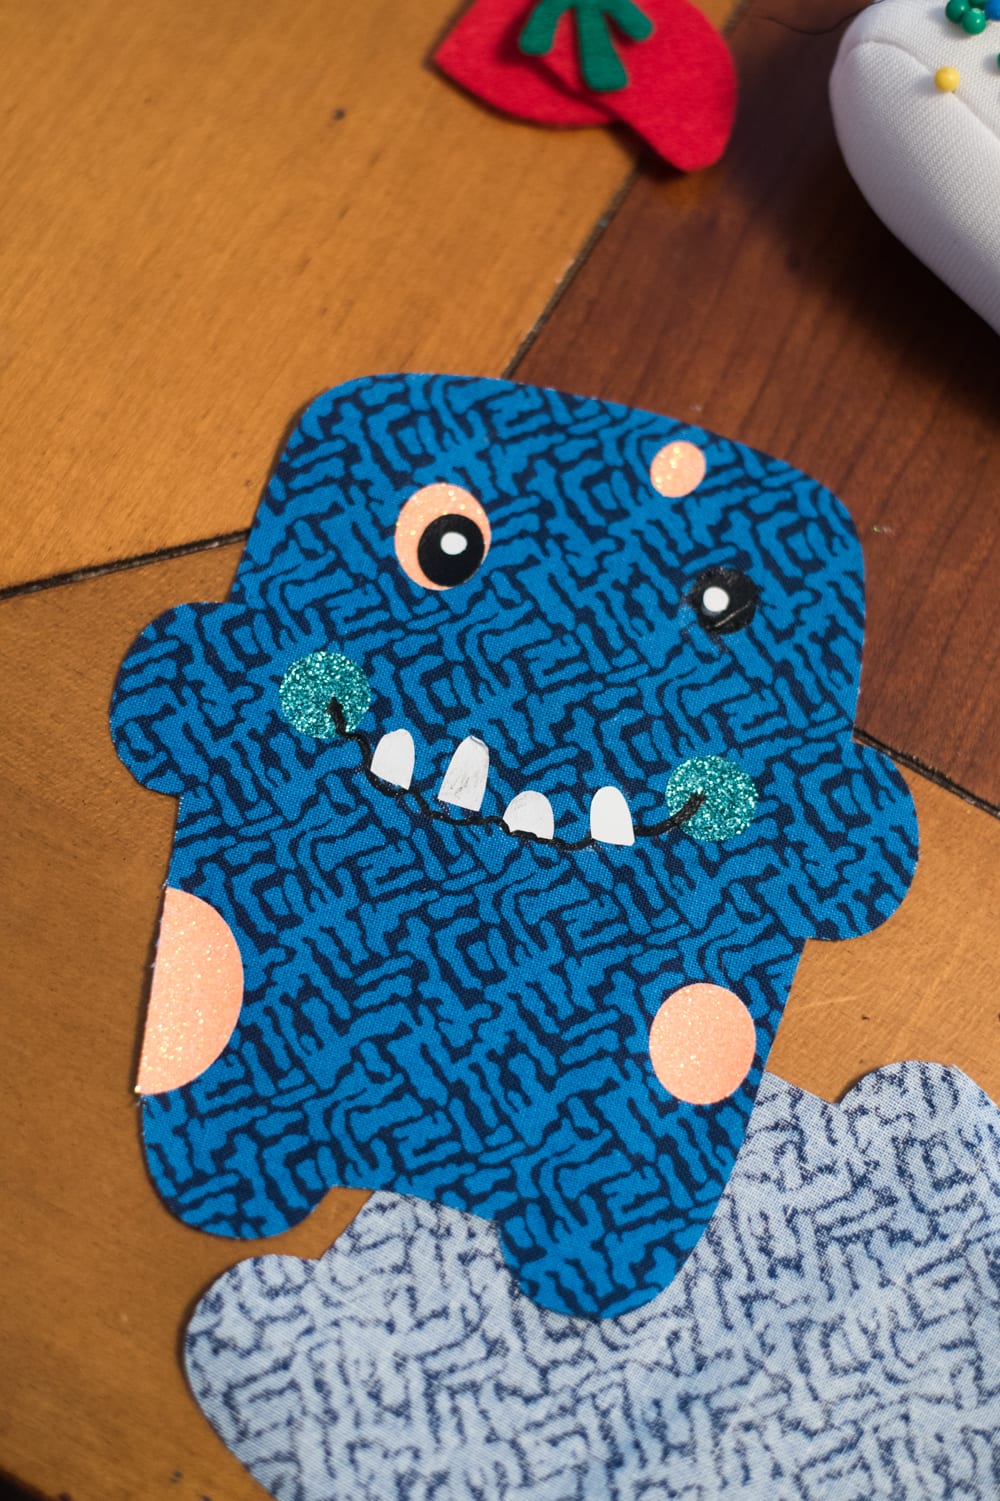
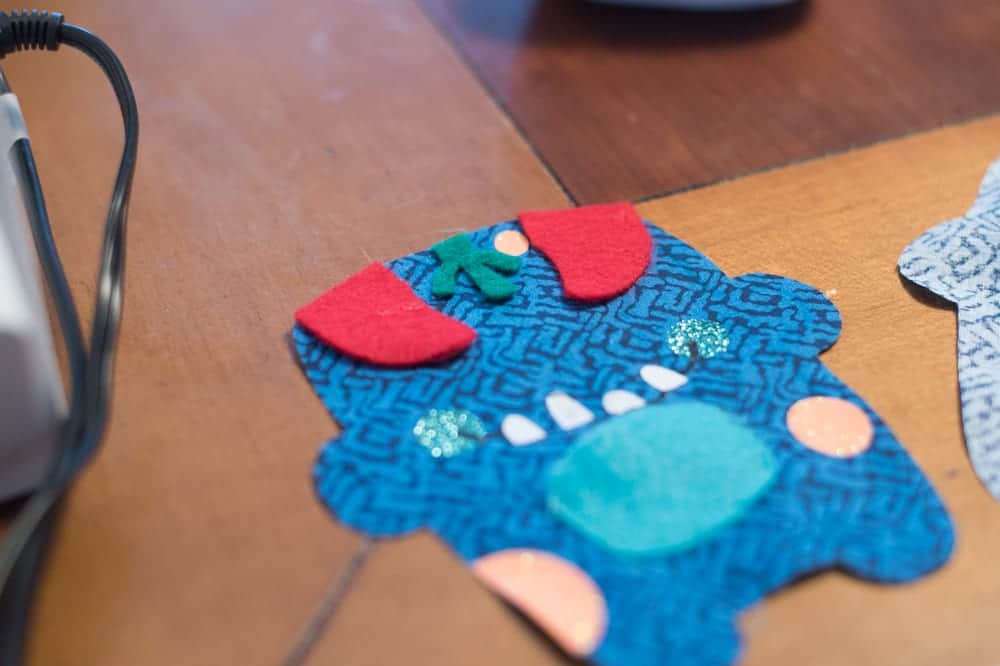
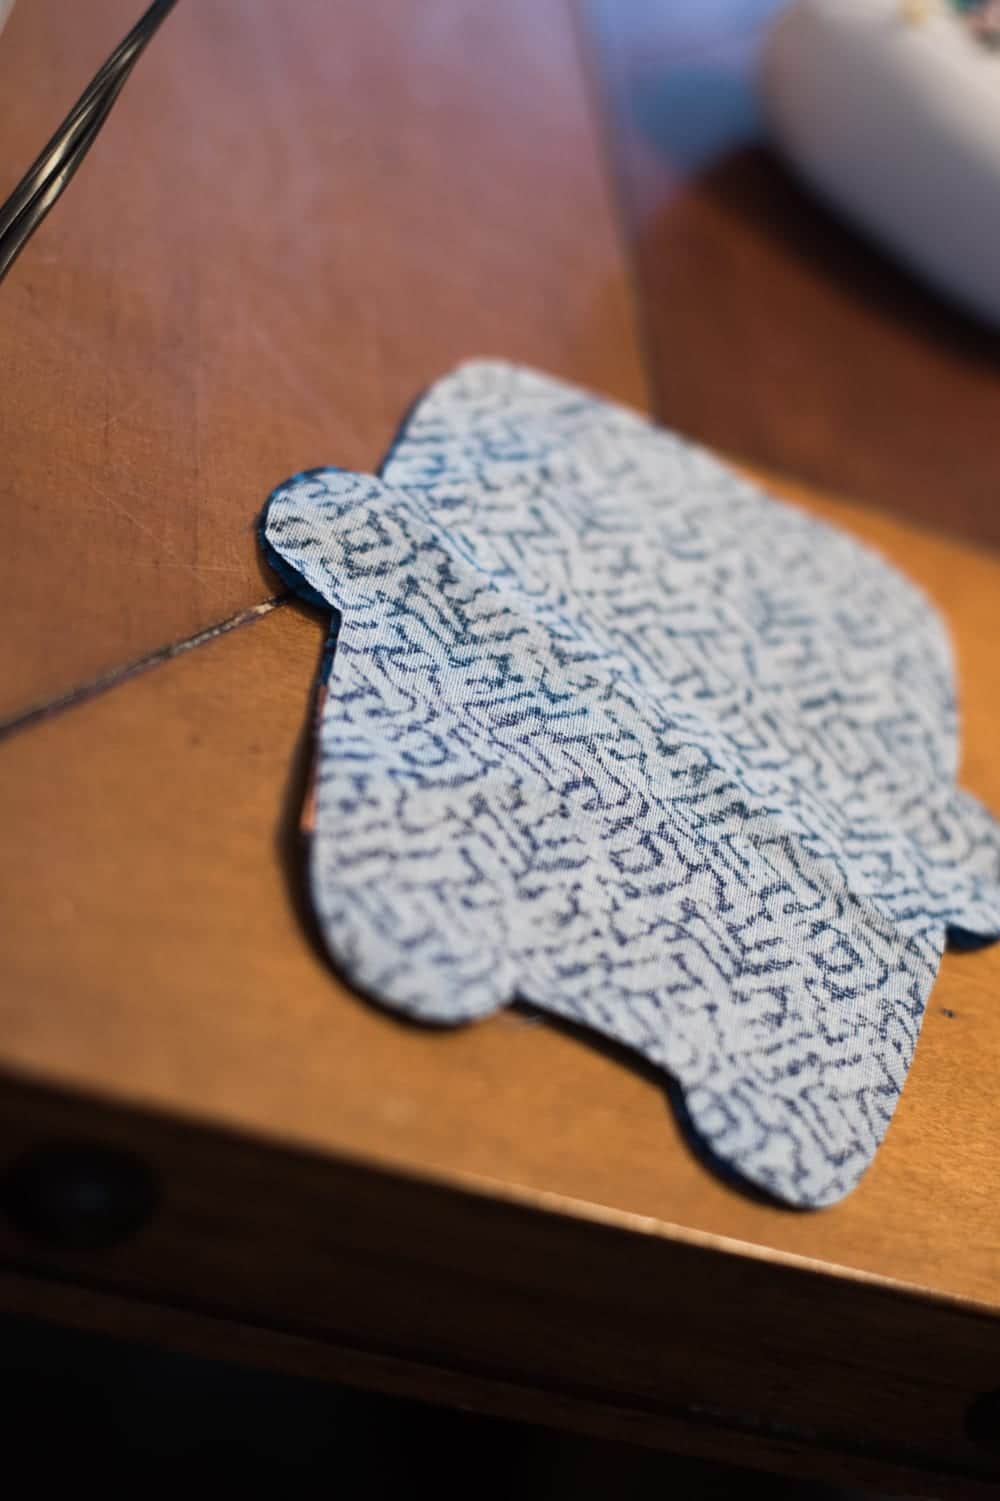
- Iron-on all of the pieces to the right side of one of your pieces of cotton.
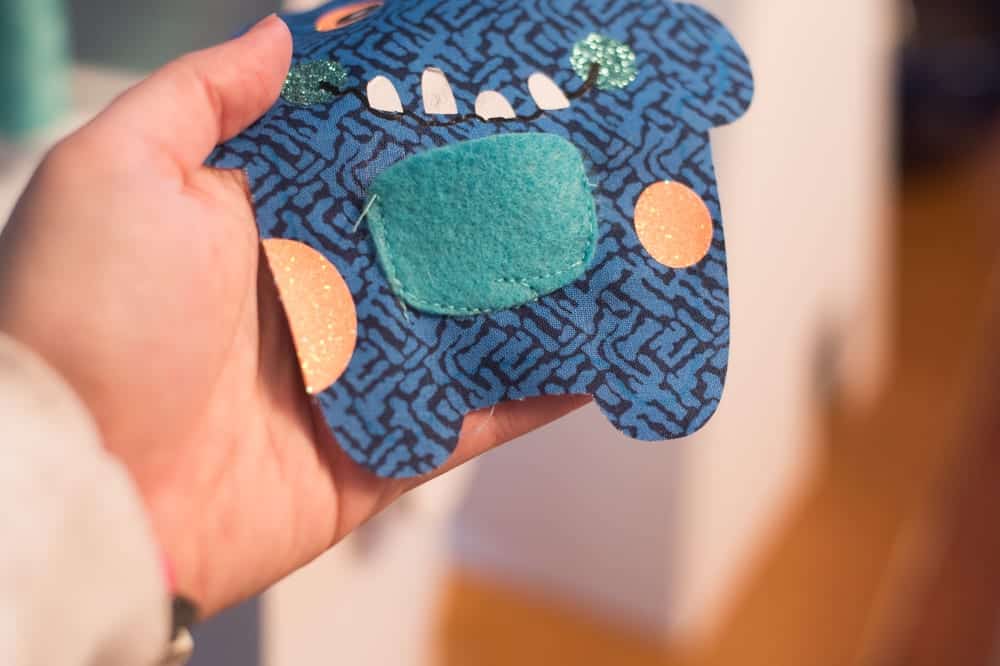
Either hand sew or machine sew the little pocket on the front. Honestly, I wish I would have done it by hand stitching. It’s such a small piece of felt, and obviously, I messed up. haha!
Pin or tack the horns and little hair tuft to the piece of cotton with the iron on. I used some basting spray just so I could avoid using pins.
Place the pieces of cotton right sides together. You can pin them together if you want.
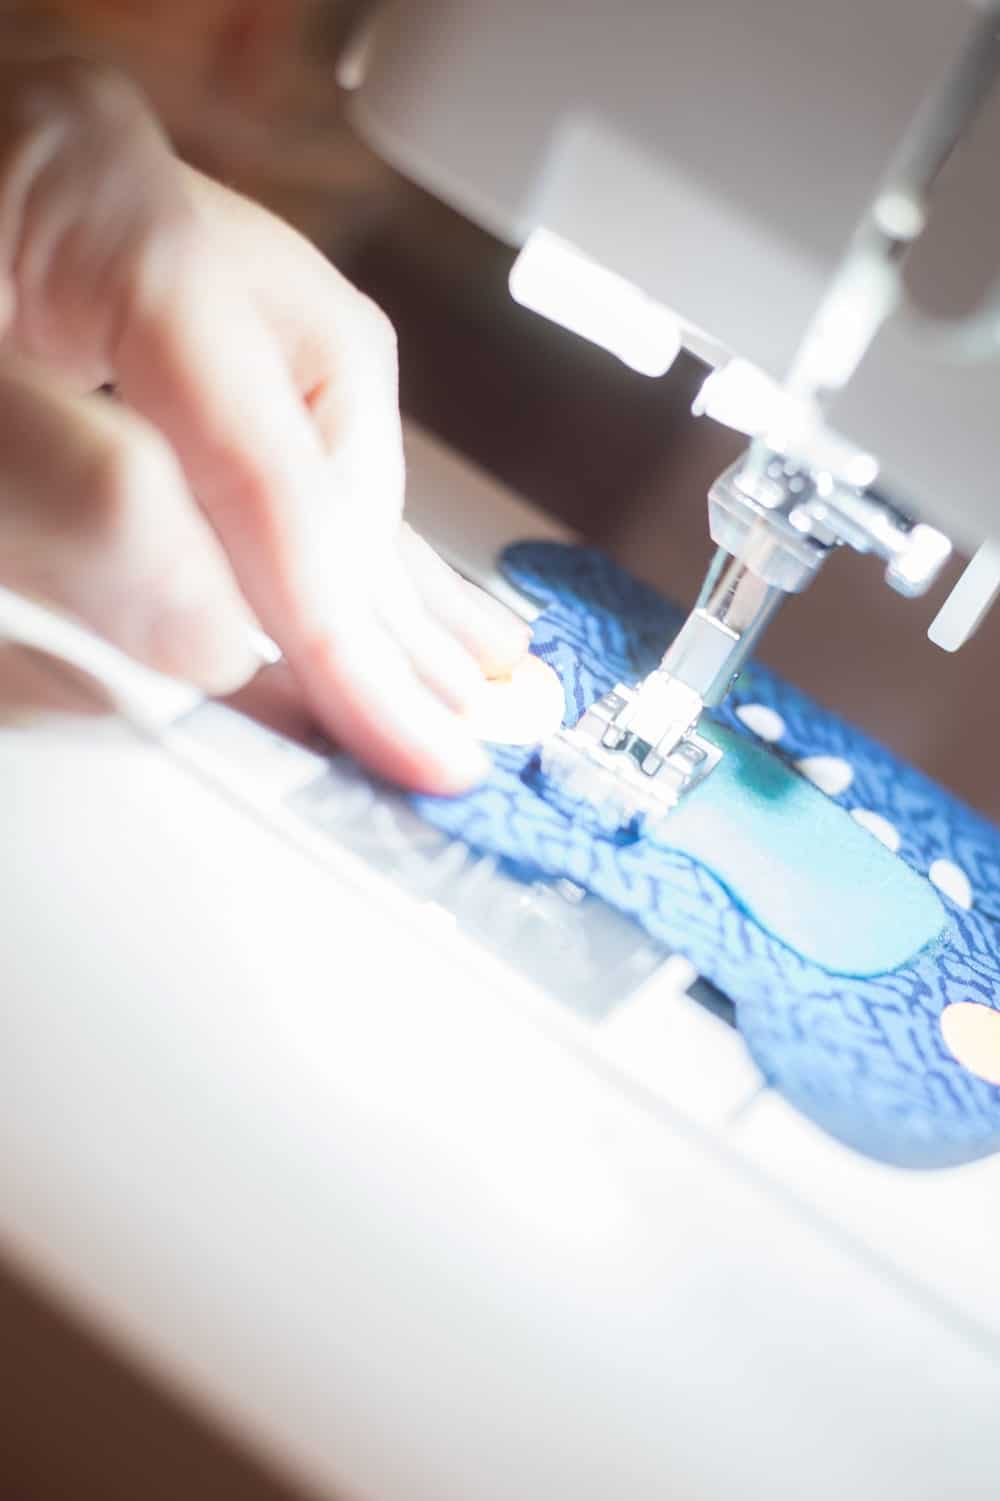
Sew around the edges using a 3/8″ stitch. I would start about two inches below one of the arm pits, because you will want to keep that area open to turn it right side out.
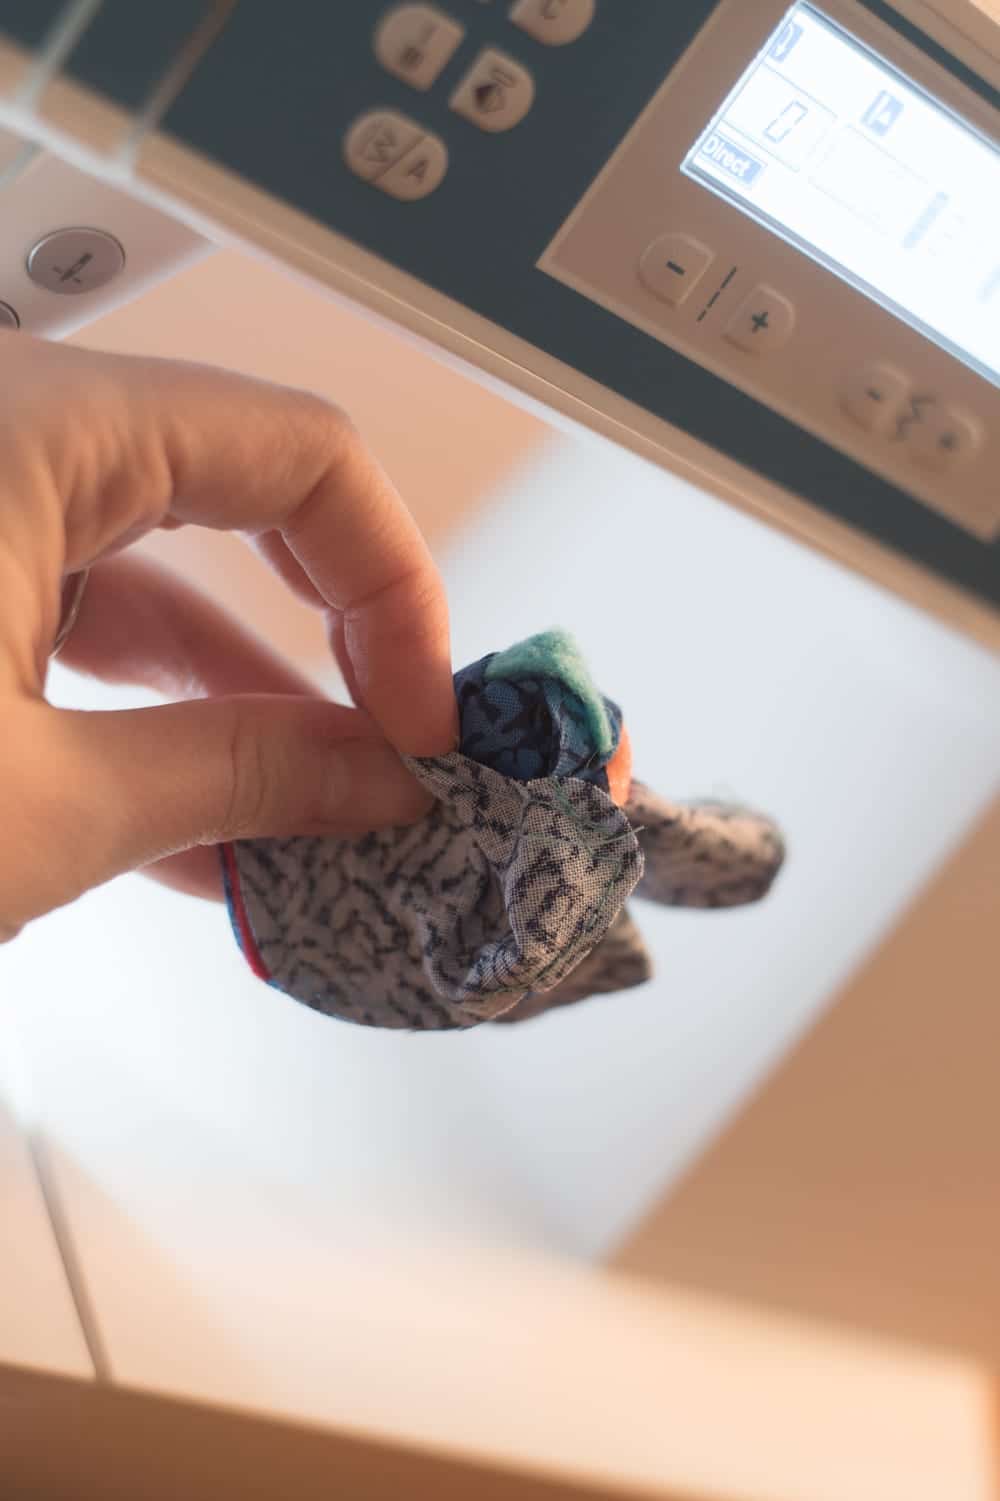
After sewing, clip the edges and turn right side out.
Stuff with stuffing.
Stitch the open edge closed, and enjoy!
Toothfairy Pillow
Materials
- Cotton
- Felt – I just used some pieces from Joann’s Fabric. However, I felt like they were a bit flimsy, and there was a little bit of trial and error figuring out exactly how to cut them. I really do love the Cricut brand of felt – it cuts perfectly every time (you can use the rotary blade or fine point blade)
- Iron-on vinyl in various colors – for this project, it suggests orange, white, black, and blue, but you can adjust these depending on what you want. I do think it’s good to have black and white for sure.
- Fabric Marking Pen
- Rotary Blade
- Fine Point Blade
- Stuffing
- Sewing machine
- Pink FabricGrip Mat
- StandardGrip Mat
- Iron or EasyPress 2
Tools
- Cricut Maker
- EasyPress or Iron
- Sewing Machine
Instructions
Open up this project in Design Space. If that link doesn’t work, just search for “Tooth Fairy Monster”
For all the iron-on pieces, make sure you press “mirror” before you cut
Select the correct settings according to what you are cutting. I started with all of the iron-on pieces and then moved onto the felt and cotton just so I didn’t have to keep switching back and forth between the mats.
Cut everything out with your Cricut.
Weed out the excess material on the vinyl. If you need to, cut pieces apart so they are easier to put on your material.
Iron-on all of the pieces to the right side of one of your pieces of cotton.Home » DIY Tooth Fairy Pillow and Pattern + Teaching Kids to Sew
DIY Tooth Fairy Pillow and Pattern + Teaching Kids to Sew
UPDATED ON AUGUST 12, 2020 | PUBLISHED ON FEBRUARY 27, 2019
Posts on Clarks Condensed contain affiliate links, which I earn a small commission from. These are provided for your convenience, and the price isn't increased at all.
A Tooth Fairy Pillow is the perfect way to trade your child’s tooth for coins! Here is an easy-to-follow tutorial to make this Tooth Fairy Monster Pillow!
Tooth Fairy Pillows
Jack started losing his teeth last year.
I’d be lying if I said I wasn’t super emotional when he discovered his first loose teeth…and when he subsequentially lost that loose teeth.
I remember thinking about how I distinctly remembered feeling that little tooth for the first time pushing through his gums…and yes, I cried then, too.
Why do kids have to grow up so fast?
Try as I may, there hasn’t been anything I’ve done to make my kids getting so big, so throughout all these milestones, I have tried my best to embrace the excitement of the new stage.
Because let me tell you – Jack was SO excited to start losing his teeth. It’s really such a big milestone, especially when they are at school. I volunteer in Jack’s first-grade class, and at least one kid every time shows my a dangly tooth (which, I have to admit, makes me gag a little bit).
Get our FREE Cricut for Beginners Course + over 50 free project ideas!
Of course, losing teeth comes the fun of the tooth fairy! But man, a tooth under a pillow is tricky for the tooth fairy to get.
I had seen people use Tooth Fairy pillows in the past, and I thought it was such a fun idea – the tooth stays nice and safe, and the Tooth Fairy can easily swap it for a couple of coins.
When Jack’s first tooth was loose, we went and bought the materials to make this adorable monster tooth fairy pillow…but as most things in my life go, we didn’t end up getting it made in time.
But when Cricut invited me to share a sewing project, I knew that was the time to do it.
Plus, he’s only lost four teeth. Many more can be used with this tooth fairy pillow.
I also thought this would be a fun time to have Jack help me sew. He’s expressed a desire to sew, which I think is AWESOME. I actually let him look through a bunch of projects, and this is the one he chose…which was perfect since we had all the materials.
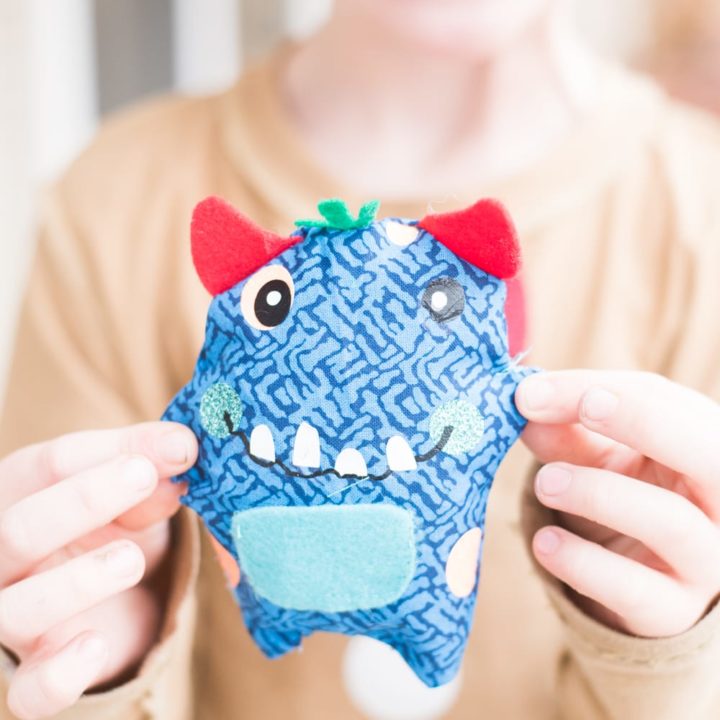
So in this post, I will share how I made this Monster Tooth Fairy Pillow, as well as some tips for teaching children how to sew.
DIY Tooth Fairy Pillow
This is such a fun and easy project – especially if you involve your child. I’m a huge fan of teaching children how to sew – even the basics can get you pretty far.
For this project, I used my Cricut Maker to cut out the pattern – so unfortunately, if you don’t have a Cricut Maker, I don’t have an exact pattern for you.
However! It’s such a simple pattern, you can easily just draw the pattern out yourself on the fabric of your choice.
Tips for Success
Pick lighter material – I let Jack pick out whatever material he wanted, and he went with one that was super dark…which is fine. However, the fabric marking pen markings didn’t show up on it. Fortunately, I know what 3/8″ is, but I do find the markings to be helpful to make sure you stay on track. If you want the markings, pick a lighter fabric.
Be careful with the iron on – If you look closely, you will see some of our iron on got a little wrinkled due to too much heat. We had a couple of different types of iron on (SportFlex, Glitter, and Every Day), and they all require different temps. Try and keep it the same type and iron them on together as much as possible.
Print off the instructions – I always suggest this with every Cricut project, but I think it’s especially important with sewing projects. It’s nice to just have them right in front of you and not having to reference back to a computer or phone the whole time.
Materials:
Felt – I just used some pieces from Joann’s Fabric. However, I felt like they were a bit flimsy, and there was a little bit of trial and error figuring out exactly how to cut them. I really do love the Cricut brand of felt – it cuts perfectly every time (you can use the rotary blade or fine point blade)
Iron-on vinyl in various colors – for this project, it suggests orange, white, black, and blue, but you can adjust these depending on what you want. I do think it’s good to have black and white for sure.
Stuffing
Sewing machine
Iron or EasyPress 2
Instructions:
Open up this project in Design Space. If that link doesn’t work, just search for “Tooth Fairy Monster”
For all the iron-on pieces, make sure you press “mirror” before you cut
Select the correct settings according to what you are cutting. I started with all of the iron-on pieces and then moved onto the felt and cotton just so I didn’t have to keep switching back and forth between the mats.
Cut everything out with your Cricut.
Weed out the excess material on the vinyl. If you need to, cut pieces apart so they are easier to put on your material.
Iron-on all of the pieces to the right side of one of your pieces of cotton.
Either hand sew or machine sew the little pocket on the front.
Pin or tack the horns and little hair tuft to the piece of cotton with the iron on. I used some basting spray just so I could avoid using pins
Place the pieces of cotton right sides together. You can pin them together if you want.
Sew around the edges using a 3/8″ stitch. I would start about two inches below one of the arm pits, because you will want to keep that area open to turn it right side out.
After sewing, clip the edges and turn right side out.
Stuff with stuffing.
Stitch the open edge closed, and enjoy!
Other Sewing Projects:


This is such a cute idea! J has his first loose tooth right now, and I’ve been thinking about how I’m going to find it and get it out from under his pillow! This would be perfect!