
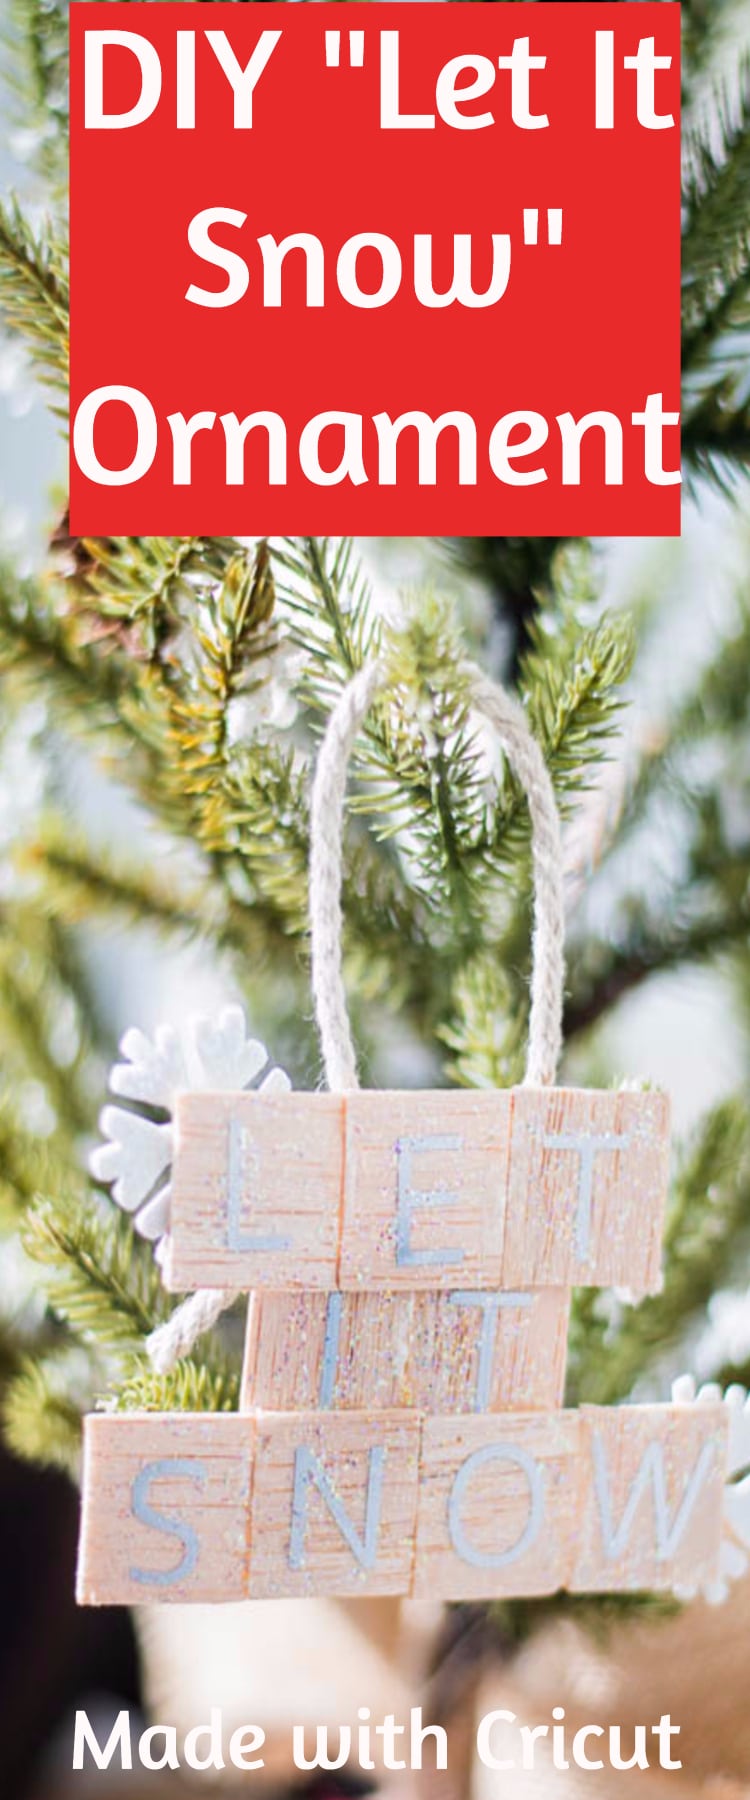
DIY “Let it Snow” Ornament
Cricut Ornament Ideas
I’m so excited to be a part of the Cricut Ornament Exchange for 2017!
I always think exchanges like this are so fun, and I’m thrilled to be rubbing shoulders with some of the best Cricut creators around.
For this event, we were asked to make a Christmas ornamenet, sent it to another participant, and then share the tutorial on our blog.
I’ve been out of town for a week, so I haven’t gotten mine yet, but I can hardly wait to check it out and share it with all of you.
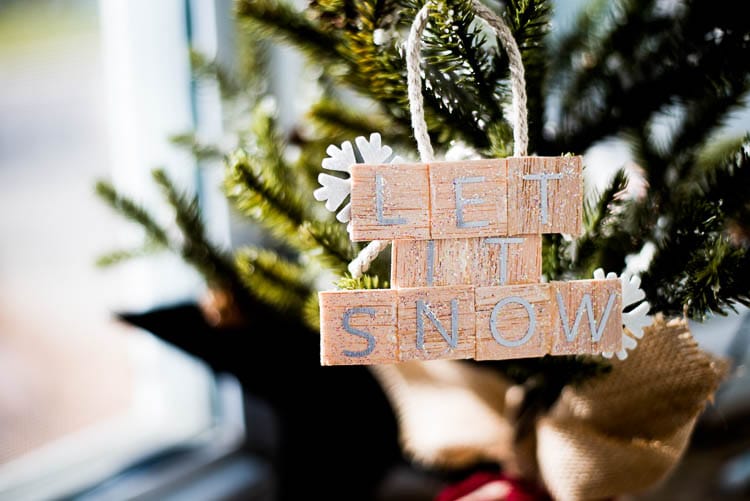
Until then, I will be sharing my tutorial for this “Let it Snow” ornament (I wish the silver adhesive foil showed up better in this picture!)
This is a pretty easy project, though I will admit it took a few unexpected twists and turns as I was making it.
Originally, I was going to make the the wood pieces look like scrabble tiles…but when I went to cut the foil, the font for the numbers was too small, and I was too lazy to go back and resize it #reallife.
Then, I had grand plans to cut out the snowflakes that are behind the wood tiles using some glitter craft foam I found a the store…but not matter how many times I tried, I could not get it to cut. I’m not sure if it was the brand, the thickness, or what. Next time, I will use some Cricut craft foam and paint glitter on the snowflakes afterward.
And finally, in the end, I wish I had used basswood instead of balsa wood because it’s a little less flimsy (and I would have been less concerned about it breaking in the mail).
But, I like how it turned out. It’s not the fanciest ornament around, but it certainly represents how I approach crafting – simple and easy.
I hope that you will enjoy this tutorial and will be able to replicate it yourself. Please let me know if you have any questions.
Also, after the tutorial, you will be able to see the linkup for all the other ornament tutorials from those who participated in this exchange, so I hope you will be able to find some great ideas for your Christmas tree this year!

Materials:
Note: If you don’t have a Cricut machine, you can still do this project with an xacto knife and adhesive letters – it just might take a little extra work 🙂
Basswood or Balsa wood – 1/16 or 1/32 thick(make sure to read this post before attempting to cut: How to cut wood with Cricut Explore Air and Cricut Maker)
Glitter Paint (I used one that dried clear but had colored, silver glitter in it – I believe it is called Glitter Twinkles)
Foam Snowflakes (or you can try to make your own using Cricut Craft Foam)
Twine (or something else to make a hanger from)
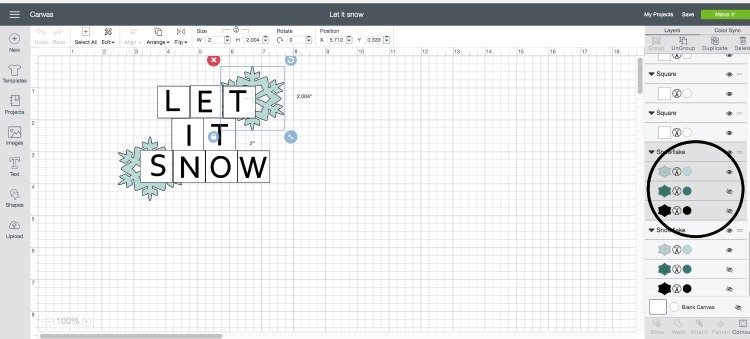
Cricut Design Space Project – click that link to get the exact design I used; please don’t edit it! If you do not cut the snowflakes, just hide those in the layer panel so it doesn’t cut them (or you can hide them on your mat when you go to cut!)
Directions:
Open up this project in Cricut Design Space.
As I mentioned above, if you are not cutting out snowflakes, go to the layers panel and close the eyeball next to them to hide them so they don’t cut.
Press “Make It”
Double check your mats and place your materials on the mats in the order you will be using them.
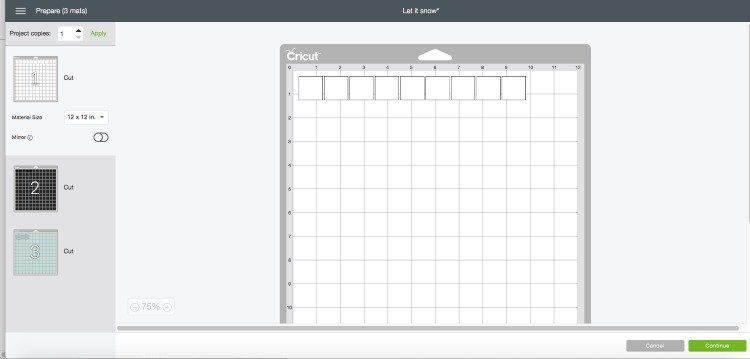
The first mat will be the wood that you chose to use (either balsa or basswood). Make sure you read these instructions on how to pick the correct settings for these materials.
Then, cut your foil, and if desired, your foam.
After your materials are cut, weed out the excess foil. Use transfer tape to carefully transfer each foil letter to each piece of wood.
Using your glitter paint, glue over the letters (two coats).
Carefully glue your pieces of wood together using wood glue. This takes a lot of care to do, so make sure you are very careful. Let dry completely. I recommend doing one line at a time, and then gluing them all together.
Adhere two glitter snowflakes to the back of the “Let it Snow” wood pieces after they have dried.
Glue a piece of twine or ribbon to the back of the ornament as an ornament hanger using wood glue.
‘);


It’s so fun!! Isn’t it funny how some projects go? Even with twists and turns, it turned out super cute!
I love this! What a cute, easy ornament idea!
Thanks! It was really fun to make!
I love the simplicity of this ornament!
Thanks, Mary!
I love it!
Thanks, Jessica!