
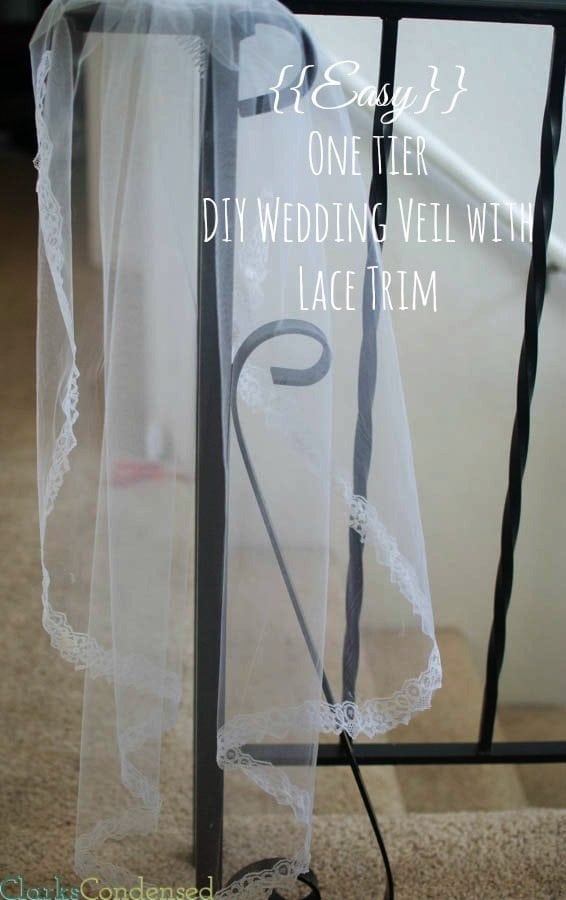
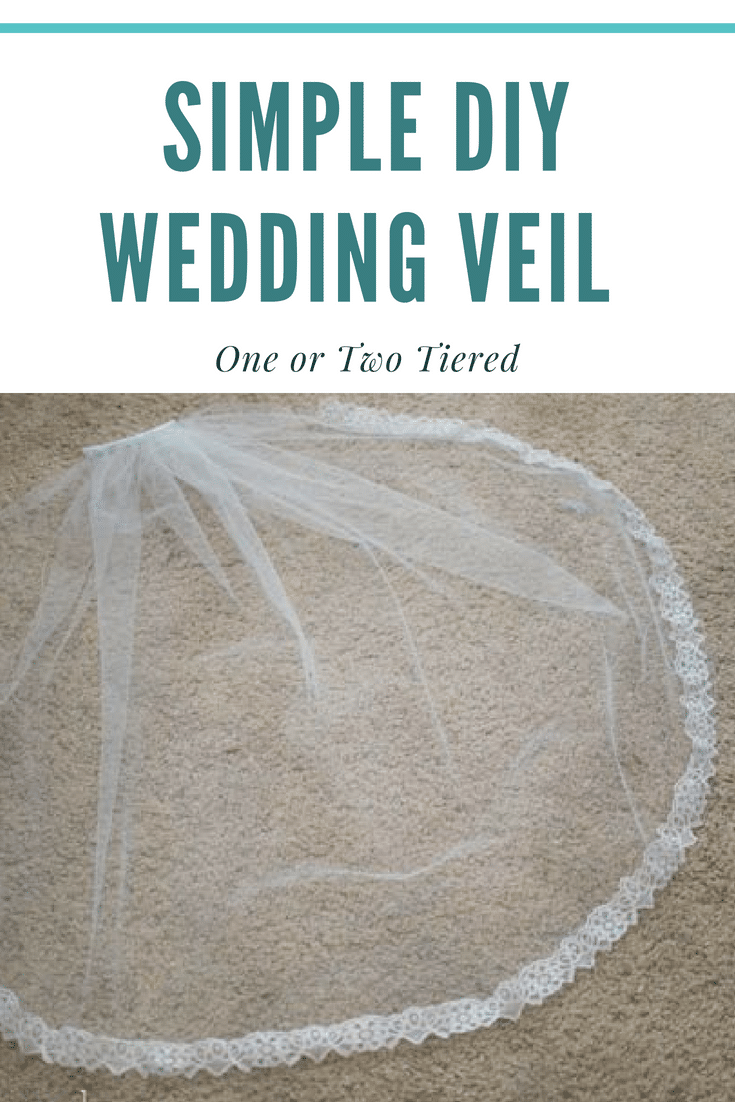
Simple DIY Wedding Veil Tutorial
Wedding veils are expensive to buy but are actually inexpensive and easy to make. Here is a simple DIY Wedding veil tutorial with lace.
DIY Bridal Veil
As much as I love weddings, I feel that a lot of thing related to weddings are too expensive. While some don’t think DIY weddings are the way to go, I think in many ways, they are! We did so much of Forrest and mine’s wedding on our own, and it turned out great.
I think that wedding veils are ridiculously overpriced. I mean, some of them, that are beaded with crystals and have lots of layers, might be worth paying a little more for, but I’m just shocked when I see very simple ones going for over $100. So, I thought it would be fun to see how easy it was to make myself. Even though I obviously have no use for a wedding veil, it seemed like a fun Sunday afternoon project.
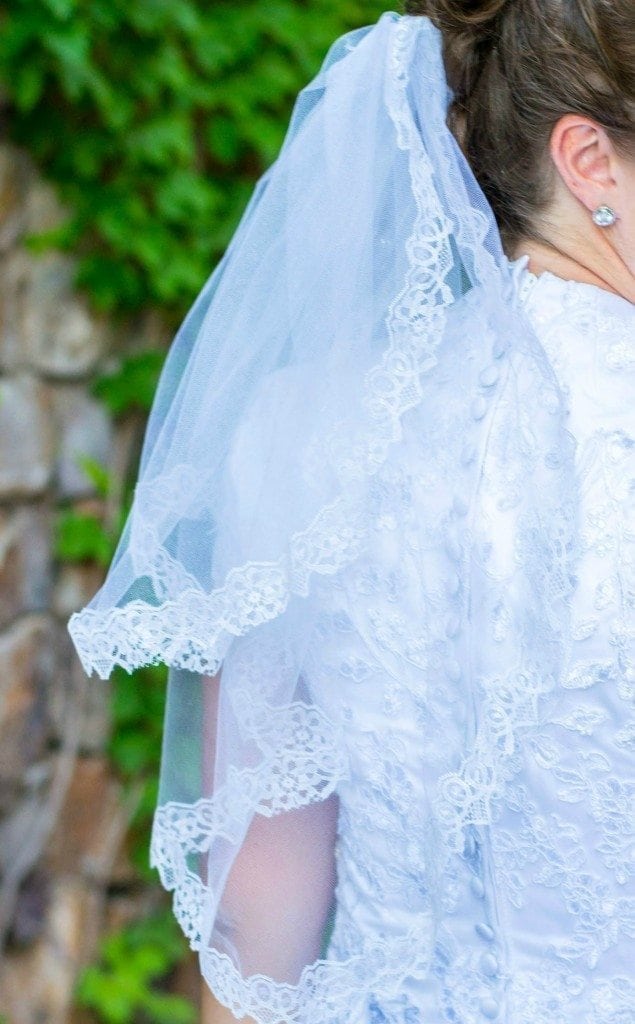
It actually was pretty easy. It took me about two hours to complete, including adding the lace trim. That obviously isn’t a necessity, but I love lace and felt like it really dressed up the veil. This tutorial is just for a single tiered veil, without a blusher but hopefully it will give you the framework for making a more complicated one, if that’s what you want. I didn’t have quite enough lace to go all the way around, and I used blue string so it was easier for you all to see, so please ignore those imperfections! I also listed that you can get beads (crystals, pearls, etc) for this project. I obviously didn’t use those, but I think they’d be a nice touch. I just didn’t want to spend a few hours beading a veil that wasn’t going to be used. This is based off of this tutorial from A Practical Wedding, with my modifications. If you are interested in making a veil with a blusher or two tiers, check that link out!
How to Make a Wedding Veil
Materials Needed
3-10 yards of 108″ Bridal Illusion (100% tulle — I got mine at Joann’s) — make sure it matches your gown. I made a veil that was a few inches below my waist and used two and a half yards. You can use 56″, it just won’t be as wide or full.
Bridal Comb (I used plastic bridal combs, though I imagine you could use metal combs as well.)
White Nylon Thread
Sewing Scissors
Lace of choice (optional) (at least one yard more than the length of your veil.)
Beads (optional) and beading needle
Step One:
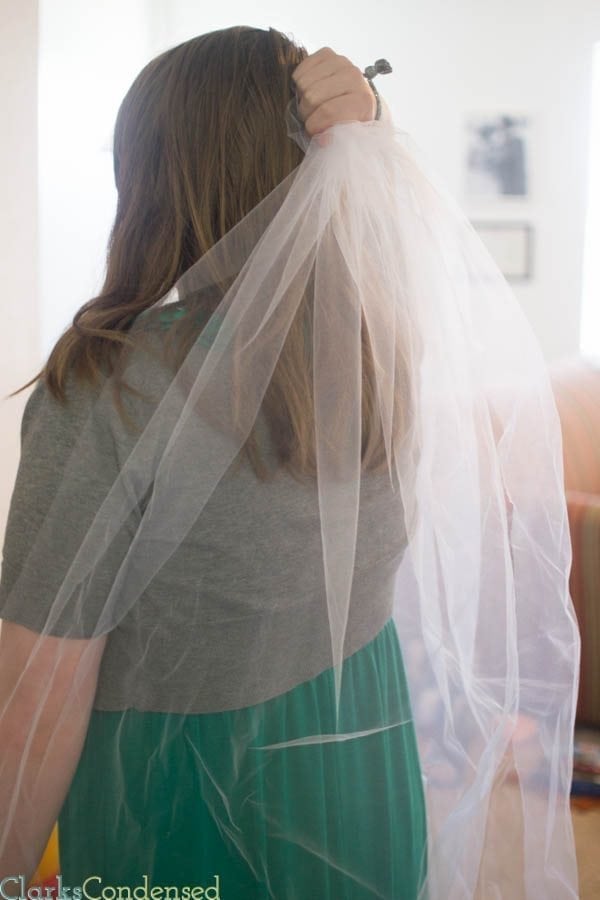
Gather the short edge of your tulle and place the gathered edge on your head, where you want your veil to eventually start.
Step Two:
Let it fall down your back and mark with a pin the length you want it. I highly recommend having someone help with this step.
Step Three:
Put the fabric on the ground and measure down to the length you want the veil to be. From that mark, find the center of the tulle at that length and make another mark.
Step Four:
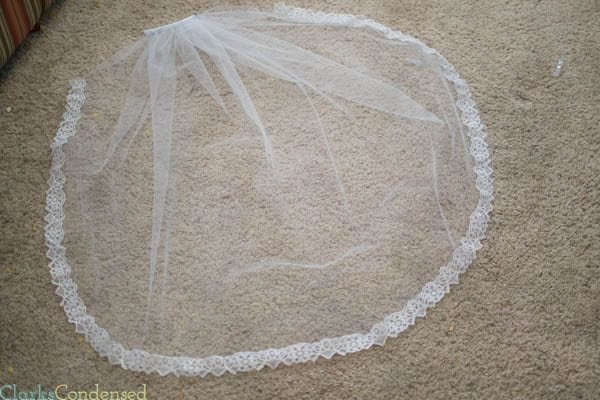
Cut a half circle out of the fabric, making the center of the half circle the mark from the previous step.
Step Five:
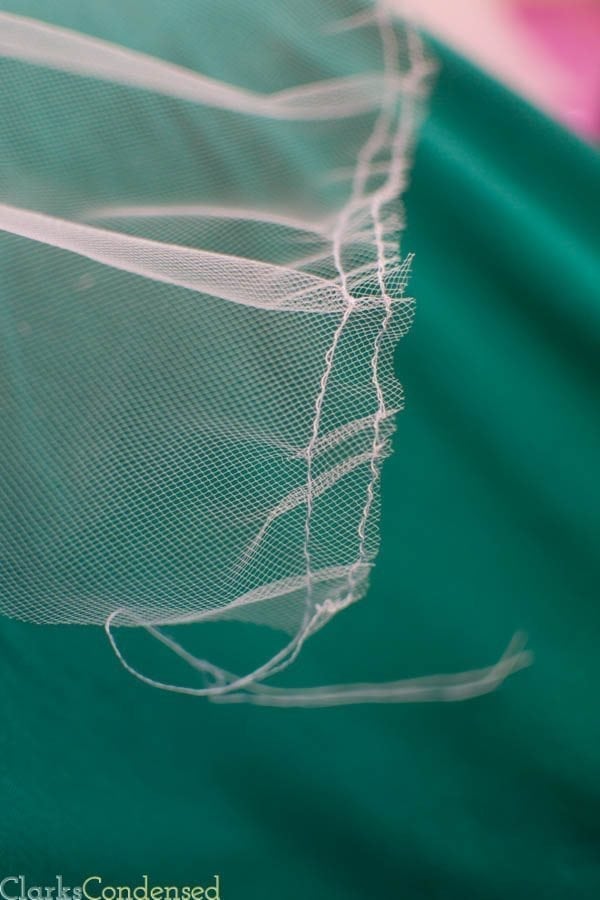
Using your sewing machine, along the straight edge of the tulle, sew two running stitches.
Step Six:

Using the running stitches, gather the straight edge of the tulle until it is the length of the comb. Tie a knot at the end of each piece of string, as close to the tulle as possible and then trim off the excess thread.
Step Seven:
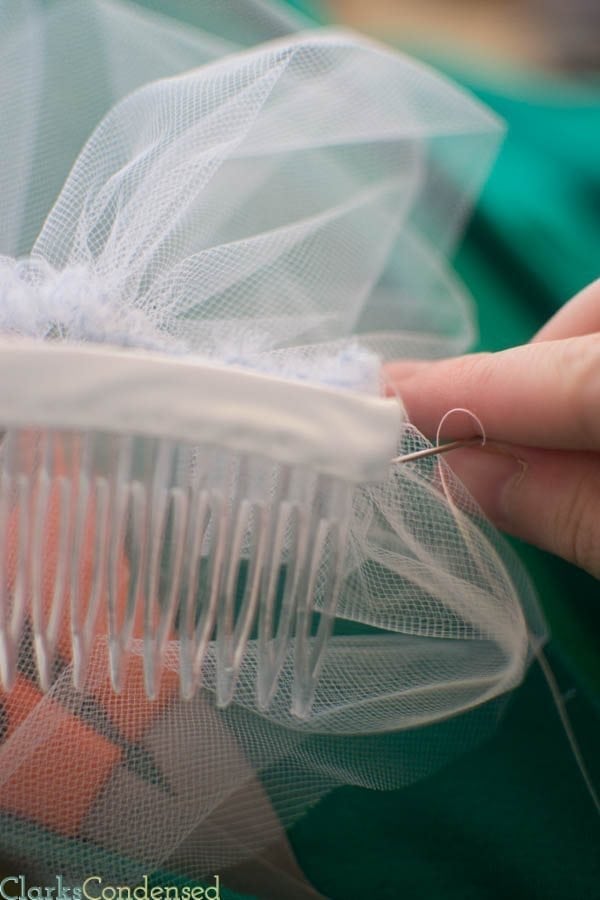
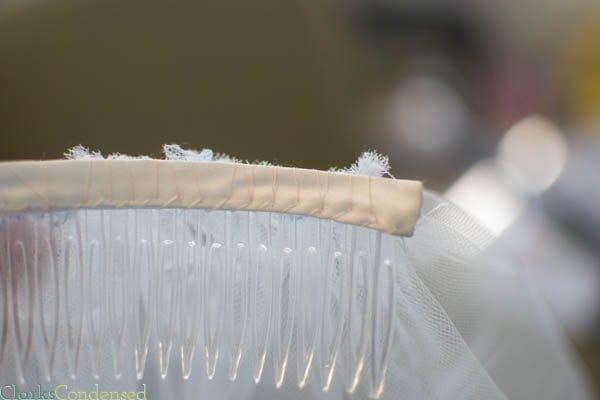
Now it’s time to attach the headpiece! This can be a little bit tricky to explain. You want to lay the tulle right side up, with the wrong side’s gathered edge facing the front of the bridal comb.
Using a needle threaded with the white thread, attach the veil to the headpiece. I started on the backside of the comb, poked the needle through the bottom corner’s fabric and then did a loop stitch over the top and repeated this pattern until I reached the end, and then I tied it off with a tight knot. Hope this picture can help you understand it a little better!
I actually just found this video that does a great job showing how to attach a comb. Definitely watch it!

If you don’t want to add any embellishments, then you are done. However, if you’d like to add a lace trim, continue on.
Step Eight:
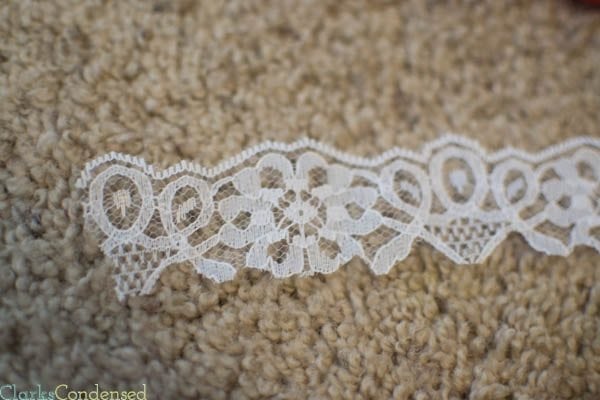
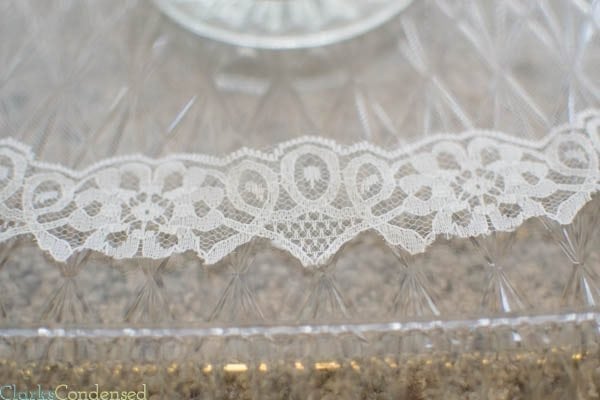
I used lace that I bought by the yard at Joann’s that was about 1 1/2 inches wide. When I bought it, the lace had a bunch of extra tulle along, so I carefully cut that out, and I came up with the lace pictured. I thought it was easier to work with and just created a more finished look. So, if you want to do that, first measure out the amount of lace you need (always get more than you think you’ll need — I didn’t do this, and I ended up not having all that I needed.) You won’t really know the exact amount until you have the first part of the veil finished. I laid my lace around the edge of the veil up to the comb, which is where you’ll want the lace to end.
Step Nine:
Using clear fabric glue, attach the lace to the edge of the veil. I lined it up so the lace was hanging over the edge of the veil a little bit, so the tulle didn’t show at the bottom where I had cut the excess tulle from the lace. Be very careful as you attach it and go slowly.
Step Ten:
Let it dry completely (overnight is best) and enjoy! If you want to add beading you can…but I didn’t do that, so, that’s not part of this tutorial! If you end up making one of your own, I’d love to see a picture!
This is one I made for my sister-in-law. I will do a tutorial on a two tier soon!


Can I round off the corners after I attach the veil to the comb. I’m not sure yet what my daughter would like.
You sure can!
Just to clarify, you used a clear fabric glue only for the lace correct? I just purchased some clear thread thinking I would need to hand tack it to the veil.
Yes, that is correct 🙂
Would you glue the lace rather than stitch? I am making a veil and using the brides grandmothers lace from her veil. I’m not sure what would work best! Suggestions?
I think you could do either – both have pros and cons. With something as delicate as the grandmother’s lace, I think I would consider stitching it.
Greetings from Paris! Thanks for the instructions! I was wondering if you had any issues gluing the lace trim around in a circular pattern. Did you have to gather it at any point in order to get it to lay properly? Or was the lace you used flexible enough to follow the rounded edge without any problems? Thanks for your help!
When you say “cut a half circle out of the fabric”, do you mean to say “cut the fabric into the shape of a half circle”?
Well, both of those sentences mean the same thing, so sure, that’s what it means if that makes more sense to you 🙂
Hi Kate! Did you happen to attach the lace on the underside of the veil, or the top part where everyone sees? I plan on sewing lace onto mine (my mom gave me her veil and I’m trimming it with lace that I’ve purchased off Etsy to match my lace dress). I would think it would make most sense to lay the lace underneath the veil, and sew it that way as a pose to on top? But I have no clue, suggestions would be greatly appreciated!!
Hi! I actually did it on top, but in the end, it didn’t really matter because the lace ending up looking the same on both sides — if that makes sense! It really depends on the lace you use 🙂 I’d love to see the finished product!
Great job Katie!