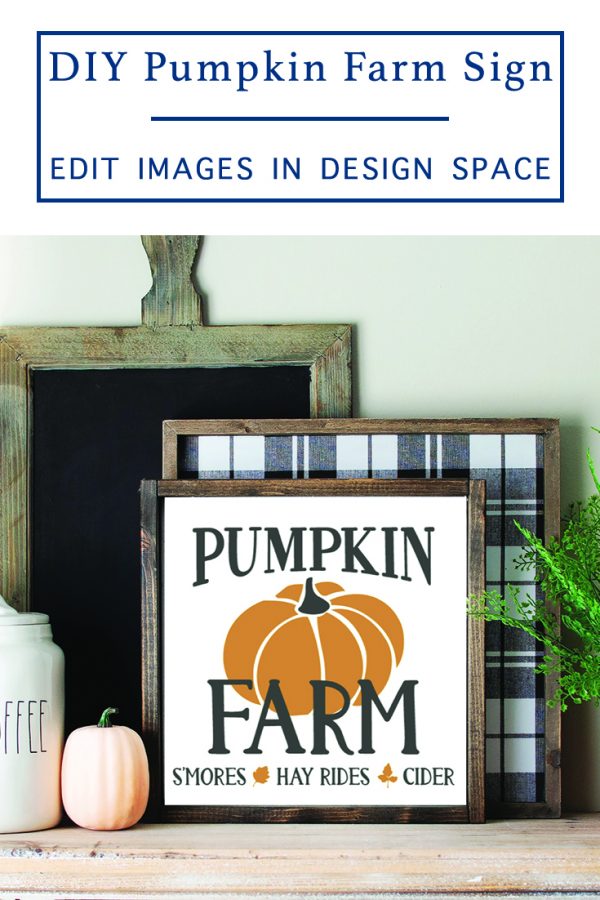
DIY Cricut Farmhouse Sign – Perfect for Fall
This is an easy Farmhouse sign you can make with your Cricut! It features a fun Fall design that will make any house feel a little more cozy this fall!
Cricut Fall Sign
It’s encroaching on the Fall season, and I am so ready for a change of scenery. And, even though we can’t physically go anywhere to see the falling leaves and feel the cool crisp air, I am changing the decor in our home and making it feel more like fall.
So, I made a pretty little Fall farmhouse sign. And, it’s so easy to create a custom design in Cricut Design Space.
I love making home decor with my Cricut. It’s easy, and totally more affordable than buying something store bought, and you can make it totally custom.
And, if you are crafty you probably have everything you need to make a whole bunch of signs for your home and family!
Supplies

- Cricut (Amazon / Cricut.com)
- Design Space Access
- Iron-On Vinyl or Adhesive Vinyl (Amazon / Cricut.com)
- EasyPress or Paint and Paint Brush
- Blank Sign
- Design Space Cut Link
Create a Custom Design in Cricut Design Space
Let’s get started! Begin by opening the cut file. I have set it up already, but if you want to make it more custom, keep reading to see how.
Step 1
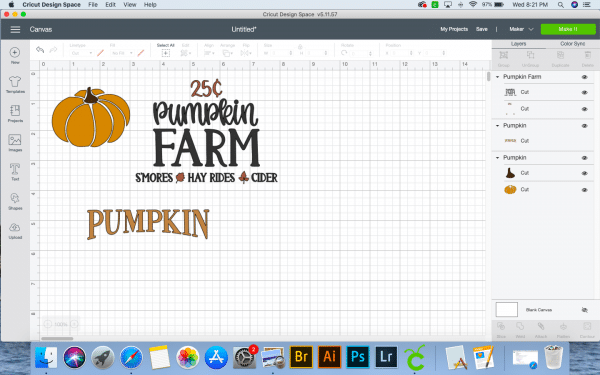
Choose the images in Design Space that you like. For this project, I used three different cut images. The word pumpkin, a pumpkin image, and a pumpkin farm image. All together, they would make a very busy small sign.
Step 2
After the images are selected and in the workspace, ungroup each image.
Step 3

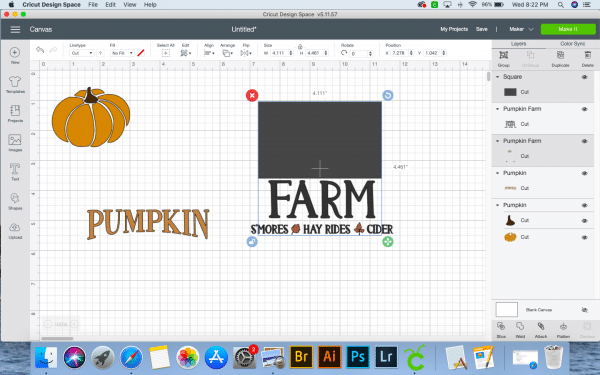
Add a simple square to the workspace and cover the text above the word farm in the pumpkin farm image.
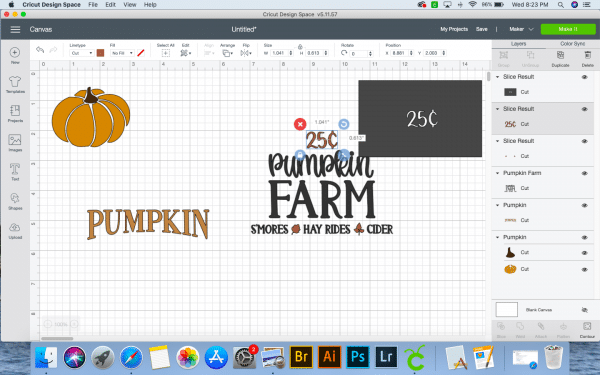
Next, slice the image to remove the text. (You will need to do this step twice because there are different colors (or cuts) in this image.) Delete the text/images you don’t want to use.
Step 4
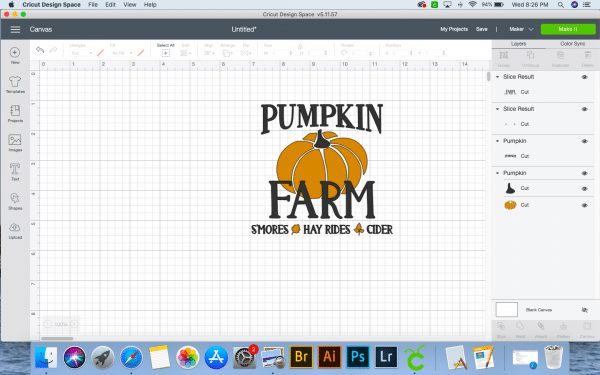
For my project, I only wanted to use two colors of vinyl. I prefer to use Iron On Vinyl on my wood signs. (If you use paint, you can select all, and weld the entire image. Then, cut the adhesive vinyl, and use it as a stencil)
Select the parts of the design that you want to keep the same color and weld them together.
You may need to hide parts of the image to make this step easier – just click on the little eye in the control panel and it will hide the image, click the eye again to see the image.
Step 5
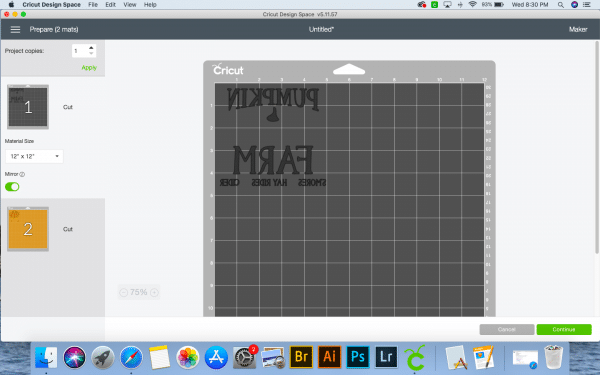
Send the file to cut. If you are using Iron On, remember to place the HTV on the cutting mat adhesive side down, and mirror the cut.
Step 6
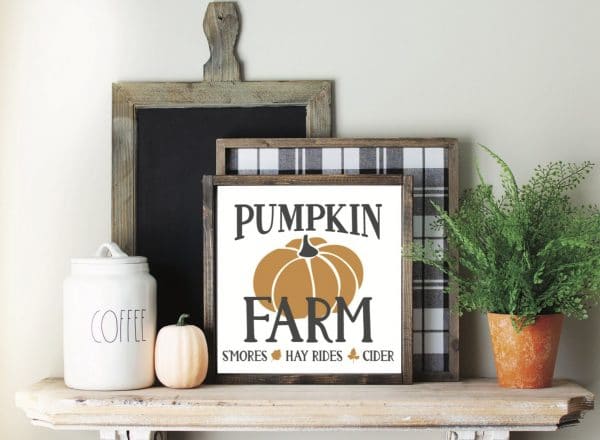
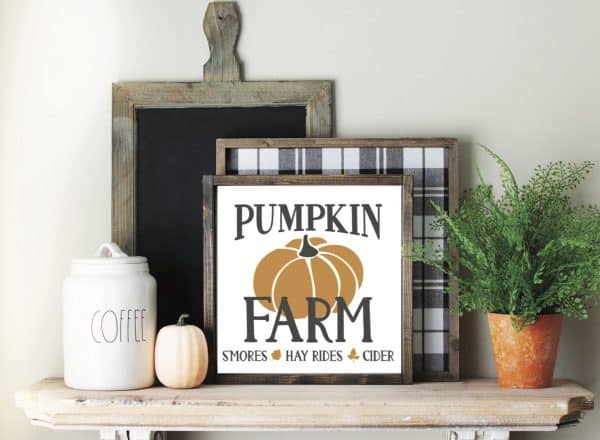
After the project is cut, weed the excess Iron On and place it on the blank sign.
I layered the text over the pumpkin to make life a little easier for myself. And to make it easier to use the file if you are painting it. However, you can slice the text out of the pumpkin image too, if you want.
Step 7
Press the design onto the sign. (Or paint it) This Beautiful DIY Thanksgiving Tray + Free SVG is a great resource for pressing HTV onto wood.
Step 8
Step back, sip your pumpkin spice in a flannel shirt and enjoy the new project you made!
More Cricut Fall Posts You’ll Love:
- DIY Happy Fall Y’all Front Porch Sign + Why I Love My Explore Air 2
- Fall Fabric Bunting Flags Pattern
- DIY Halloween Luminaries
- Welcome to Our Patch – DIY Halloween/Fall Sign
- Beautiful DIY Thanksgiving Tray + Free SVG
- Dreamland Baby Review + Coupon: How it Transformed My Son’s Sleep