
How to EASILY Swap Heads in Photoshop
Did you get the perfect photo…and one person was blinking? Trying to get a group of tons of people all smiling and looking at the same time? Swapping heads in photoshop can help you get that one perfect pictures! This tutorial will show you just how to do that.
Head Swap Photoshop
Although I’m not a professional photographer, I love dabbling in portrait photography when I can.
This usually ends up primarily taking pictures of my children and other family members, but I love it.
While I absolutely embrace the funny faces that you’ll laugh about when you look back at that time in life, I also totally understand the desire to have just ONE picture where everyone is looking and smiling.
So I will fully admit to swapping heads on photos I have taken just to get that one. perfect. picture.
I primarily have done this with group shots, because it can be frustrating to have a great picture, only to realize one person had their eyes closed or sneezed.
I’ve asked a few times on Instagram if people would like this tutorial, and there is always a good response. So I hope that this will be helpful.
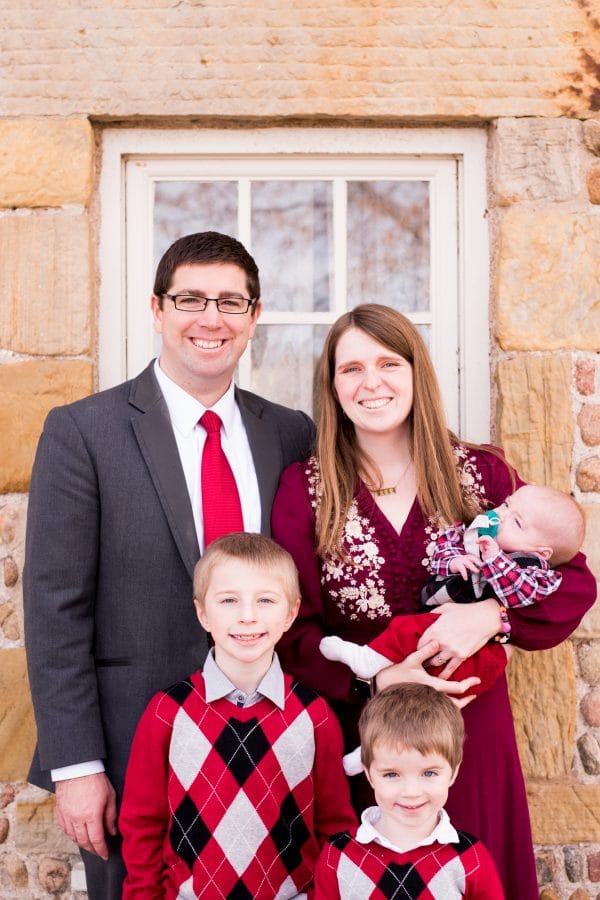
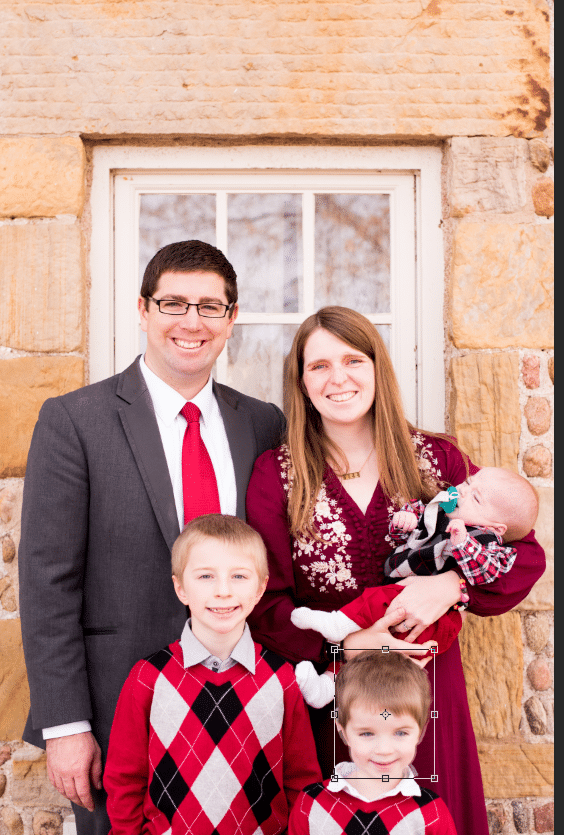
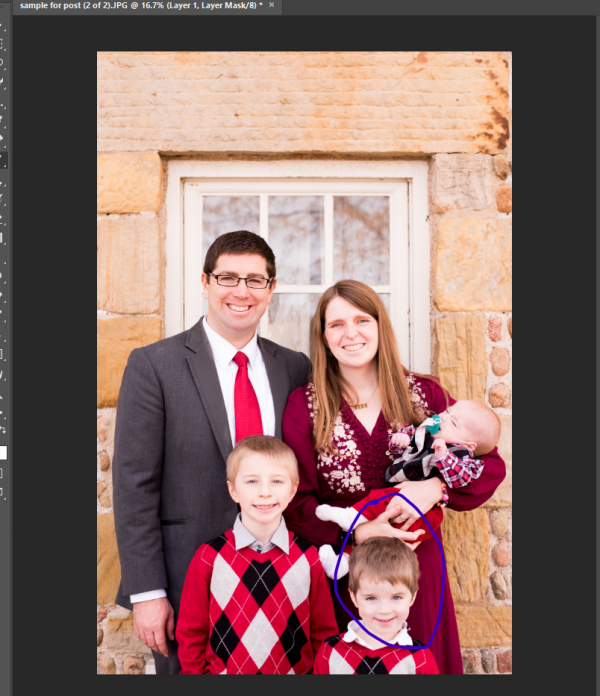
I recently did this with a big group photo of my whole family, and I pieced together several of the shots to come up with one that had everyone looking and smiling.
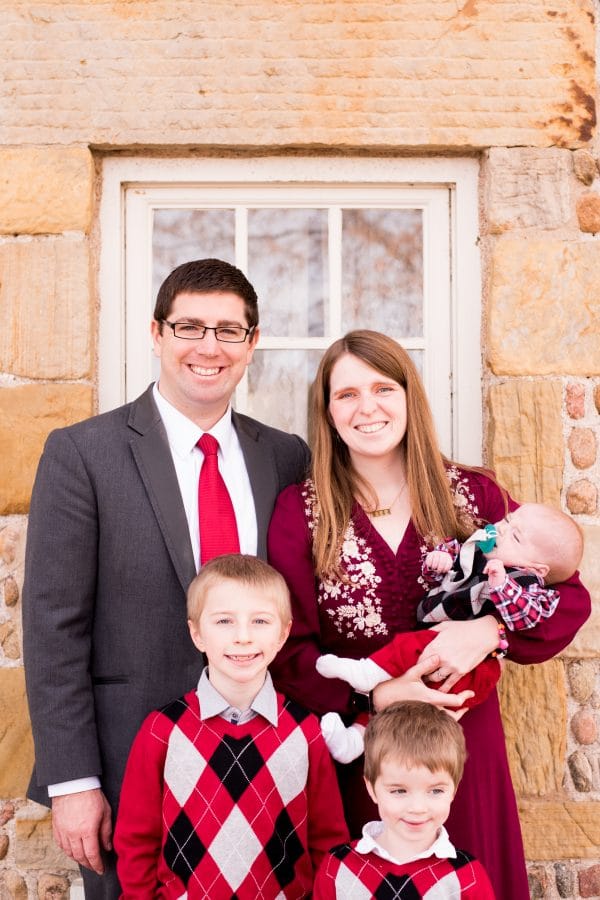
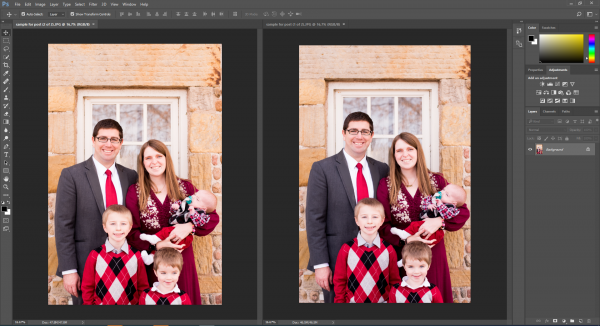
Here are the two photos I am swapping heads with. Obviously, the picture with the good face is almost exactly the same as the photo with the face I’m swapping, so normally I would have just used that one. But it just was an easy one to use for the tutorial:
Prep Work:
When swapping heads, it’s important to keep a few things in mind:
- The images need to be roughly the same pose. If you are swapping a head of someone on the beach with their hair up with someone sitting down in the woods with their hair down, that’s not ideal. I only swap heads when I’m working on images from the same pose.
- Make sure the images are edited to have very similar lighting, contrast, etc. The point is to make the head swap look as natural as possible. If the lighting is totally different, it’s going to stick out like a sore thumb!
I always edit all my images in Lightroom, and then I export the images I will be swapping heads on into Photoshop. You can obviously edit in Photoshop as well, but I find Lightroom to be more user-friendly.
I don’t think you can even buy the software for Lightroom and Photoshop anymore. They offer it as a subscription-based product (which is kind of annoying!) for $9.99 a month through the Adobe website.
Make sure you keep the image in its original size when you go to swap the heads. You want to make sure it’s high quality.
If you are taking photos with a DSLR, I prefer to shoot in RAW, as I find that allows me the most flexibility with editing.
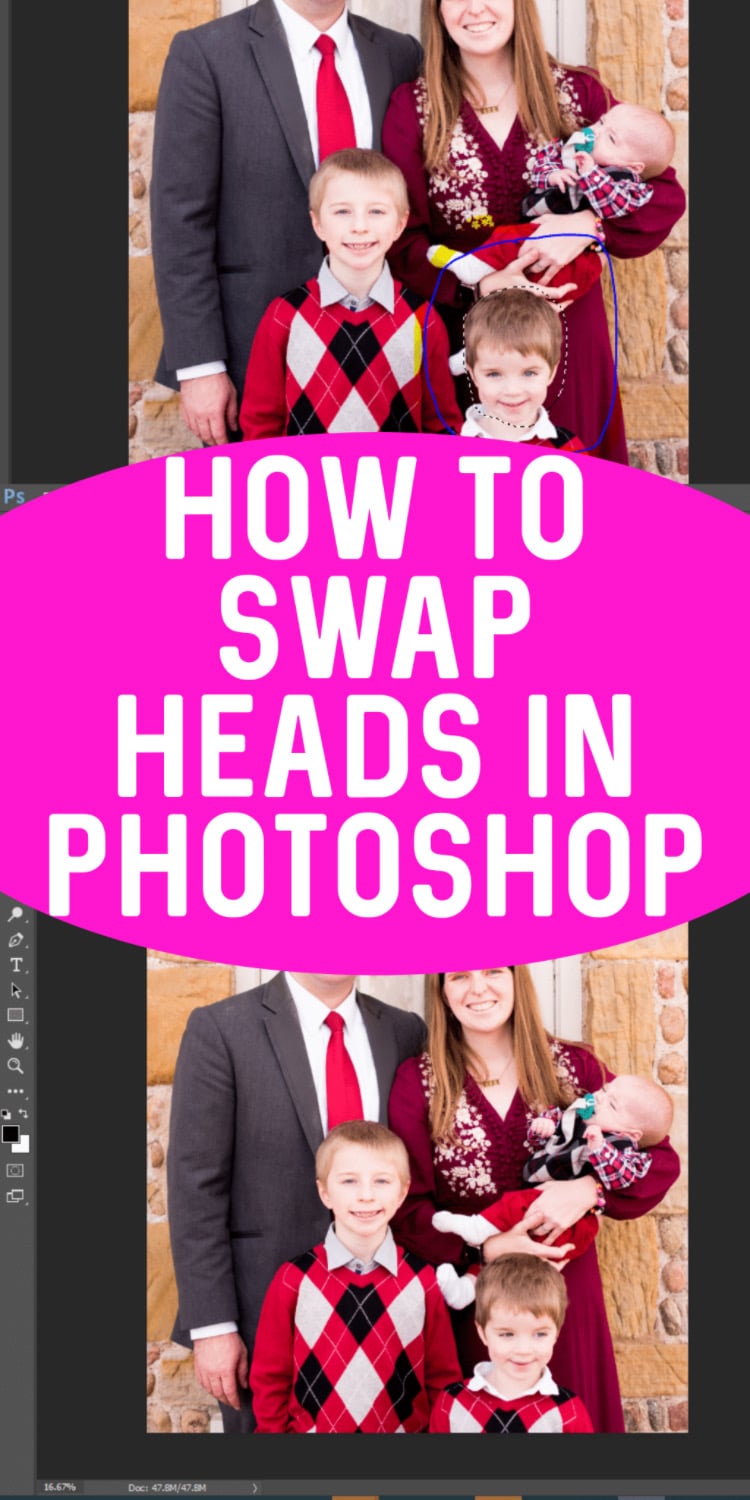
How to Swap Heads
Here is a video tutorial, but if you get confused, make sure you reference the tutorial below, as it explains the instructions more thoroughly.
Open Photoshop
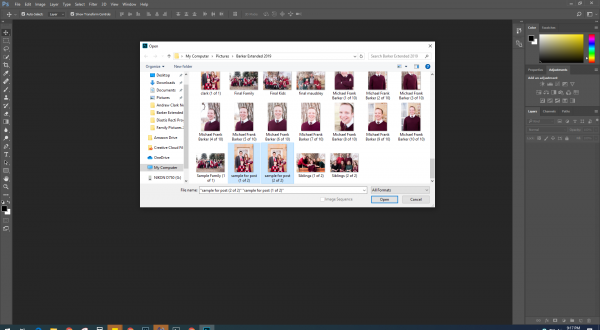
Go to File, and then Open. Select the images you will be swapping heads with and open them all.
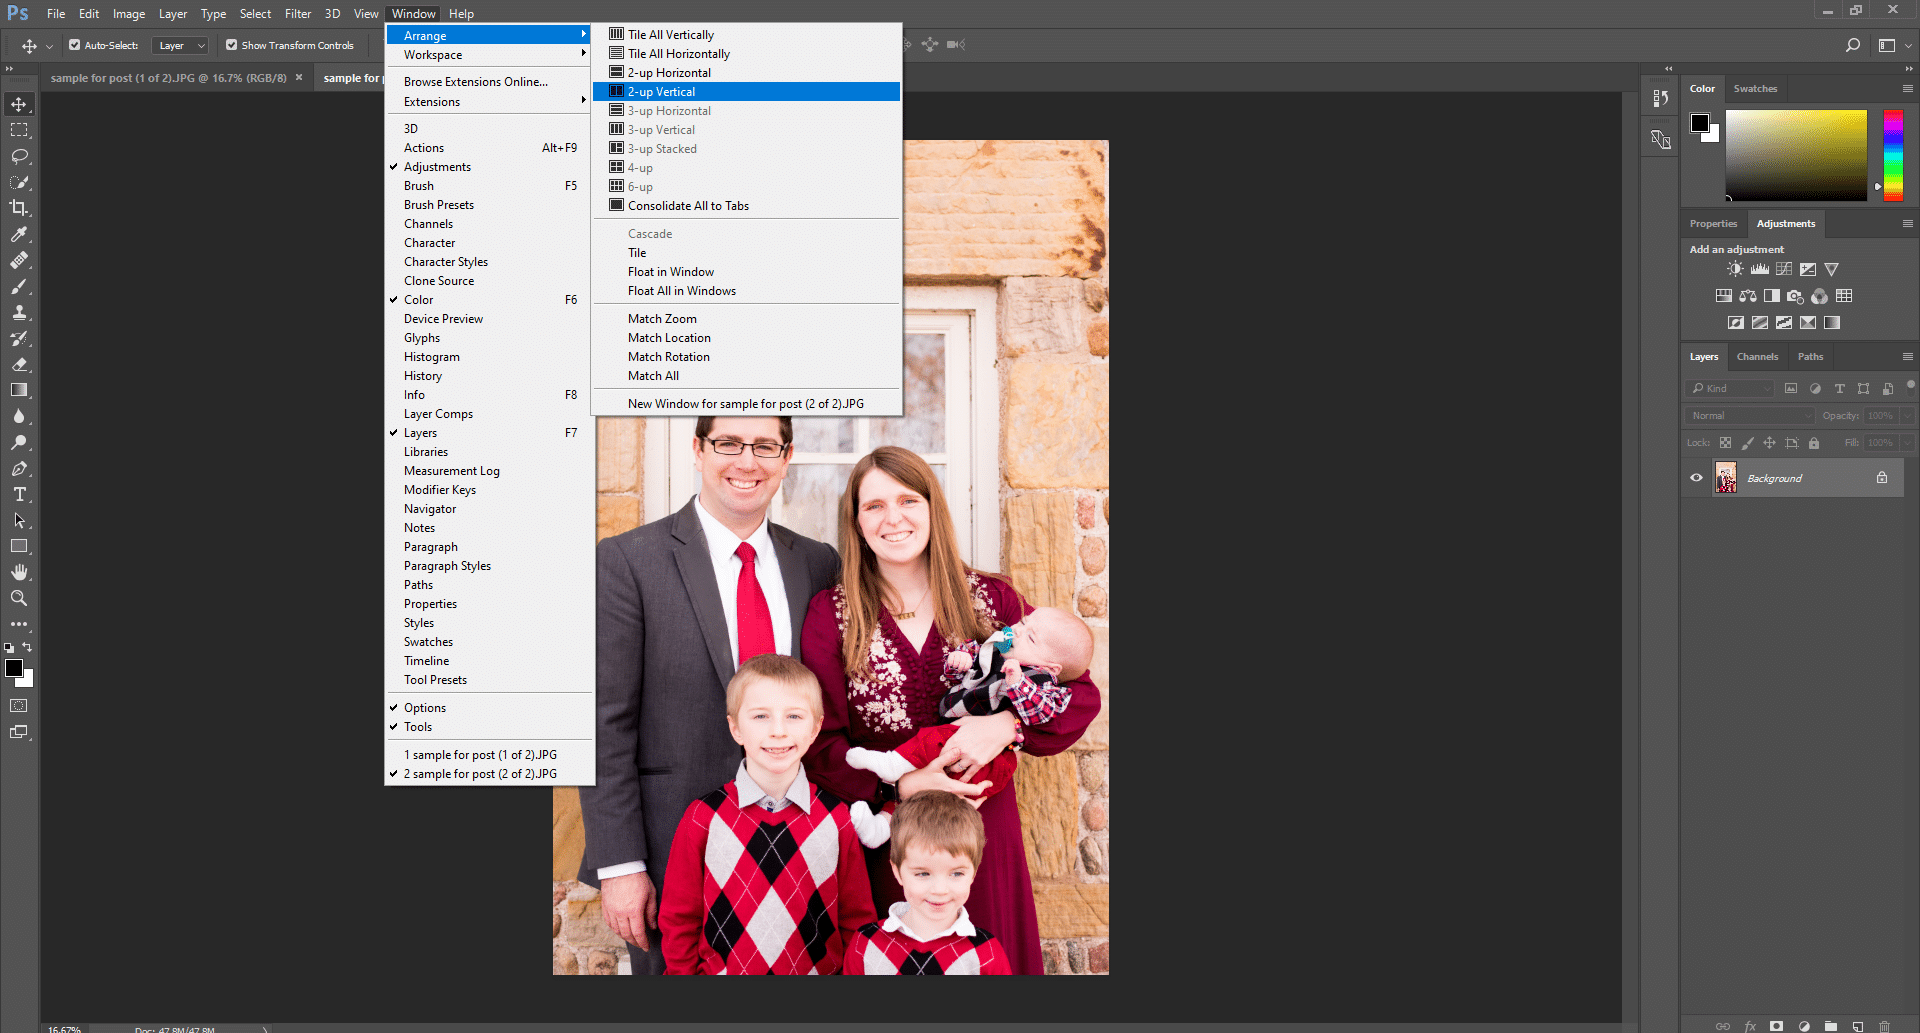
Next, go to “Window” in your menu bar and hover over “Arrange”. Select either “2 up horizontal” or “2 up vertical”. I pick depending on whether the photos are vertical or horizontal.

Next, select the lasso tool, which is the third from the top in your toolbar.
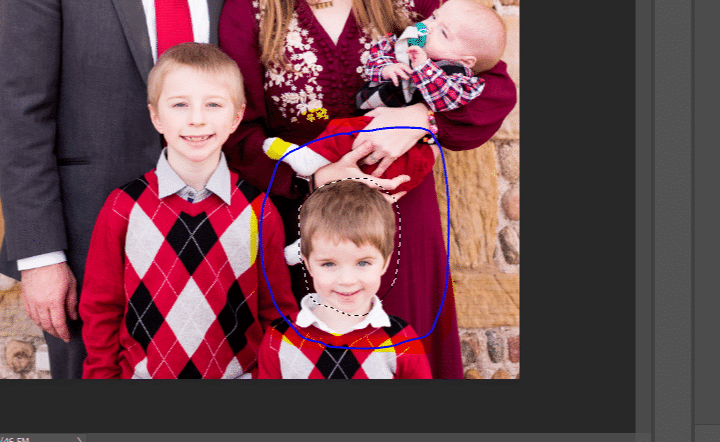
After you’ve done this, go to the picture with the face you want to be on the final product. Carefully trace around the face or head. I try to leave a little bit of buffer in the outline (so I won’t just outline the eyes, nose and mouth – I will outline the just a little outside the entire head).

Now select the move tool, which is at the very top of your tool bar.
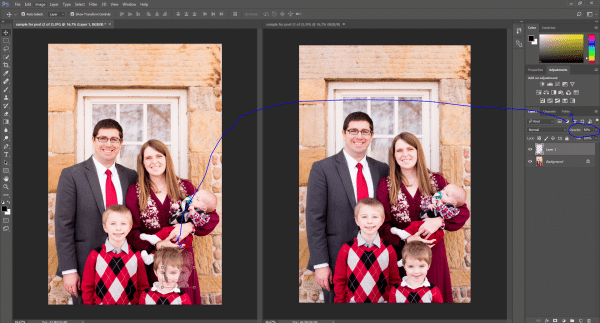
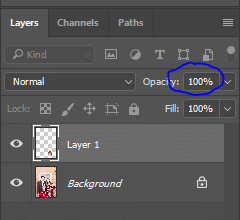
Click on the face you just traced and pull it over to the image you want to put it on. Then, go over to the layer’s panel and under “opacity” change it to 50%.
Move the face around so it lines up as closely as possible with the face that is originally on the picture. You can adjust the size as much as you need. It may not line up perfectly, so just do the best you can. After you’ve done this, change the opacity back to 0%
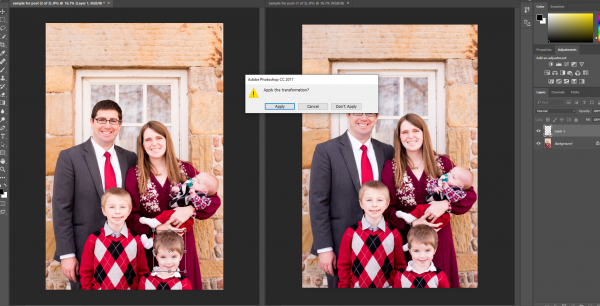
Apply the transformation.
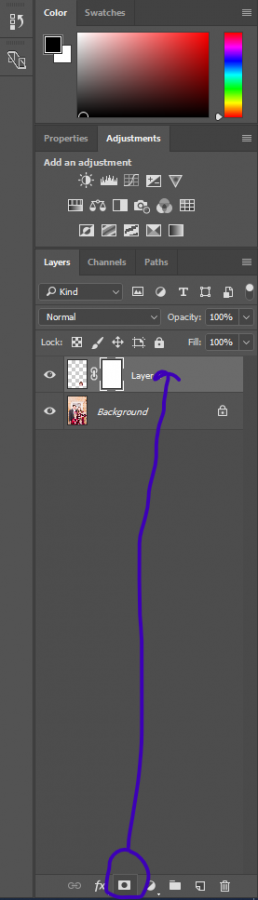
Go over the layer’s panel. Make sure you have the current layer you are working on selected, and then add a mask. This is at the bottom of the panel, and it looks like a rectangle with a circle in it.

Go back to your toolbar and select the brush tool. Then, make sure the little color boxes at the bottom of your toolbar have the color black.
Using the brush tool, come to the final photo and brush around the face to blend everything in to make it look as natural as possible.

And voila! You have a swapped head.
Let me know if you have any questions!


Thank you for this! I feel like any time I take photos with my kids I always have this problem!