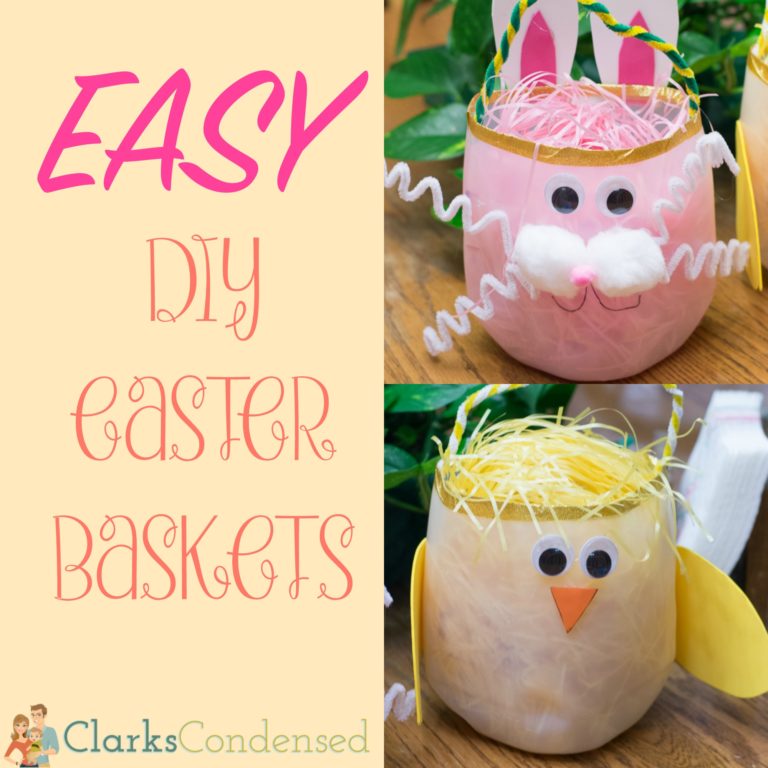
DIY Milk Jug Easter Basket
Make your own DIY Easter baskets using upcycled materials from around the house! Here is our easy tutorial for a DIY Milk Jug Easter Basket – perfect for all ages.
DIY Easter Baskets
Easter is quickly approaching – I totally didn’t even realize it was in March this year until last week.
As with other holidays, I love celebrating Easter. One of my goals this year was to do more fun crafts and activities with Jack, and the holidays are the perfect time for that.
We had a couple of bottles of Tampico, and I thought that it would be fun to make some DIY Easter Baskets for Jack and Oliver with them. The more I thought about it, the more cute ideas I came up with them. I was really hoping they would turn out!
I’d say about 50% of my ideas turn out pretty well. This is one of the 50% that did. In fact, I think they are one of my favorite creations to date. We made them at my mom’s house, and my mom said, “Wow, I didn’t realize you were so craft!” Thanks mom. haha!
These are a fun project to get your kids involved in. Obviously you need to be careful so they don’t burn themselves with the hot glue (I definitely have a few burns on my fingers), but it’s fun and easy. I think they turned out so cute!
So here is a tutorial. The first part of the tutorial is the same for both the bunny basket and the chick basket, and then after step you can choose which one to make!
Thank you to Tampico for making this post possible!
How to Make Easter Baskets out of Milk Jugs
Materials:
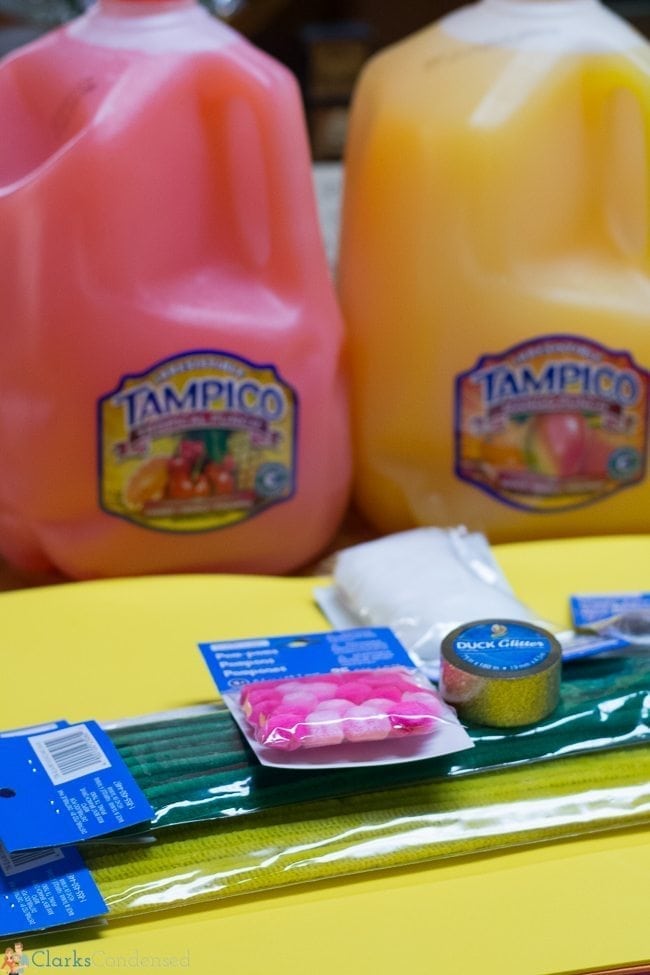
2 Empty Milk or Juice Jugs
Yellow foam sheet (for chick)
Orange foam (for chick)
White foam (for bunny)
Pink foam (for bunny)
Four white pipe cleaners (for bunny)
Three large white pom poms (for bunny)
1 small pink pom pom (for bunny)
Two more pipe cleaners per basket in whatever colors you want
Large googly eyes
.75×180 inch Duck Mini Glitter Tape (whatever color you want! I got it for about 1.99 at Michaels)
Hot glue and hot glue gun
Scissors
Directions:
Step One:
Clean out the jug with water and let dry. Remove any labels
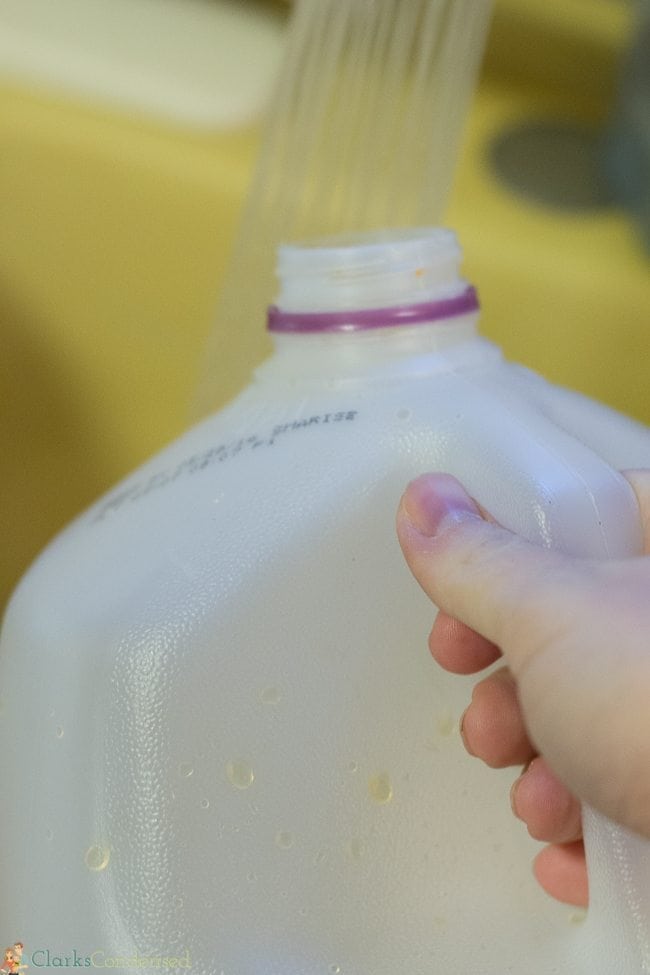
Step Two:
Cut off the top part of the jug. I just start cutting about 2-3 inches from the spout.
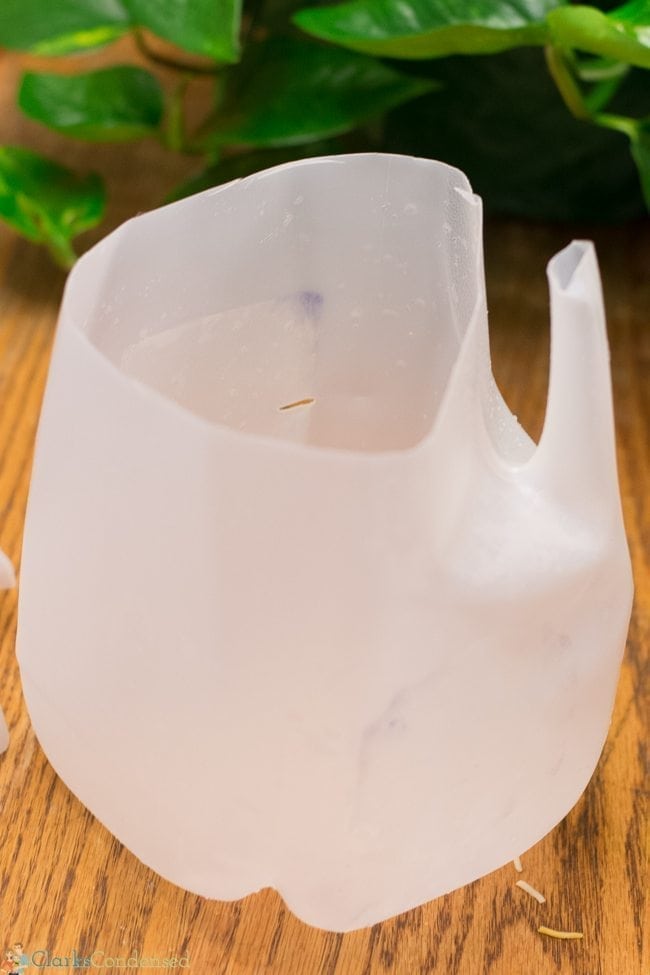
Step Three:
Cut off the handle.
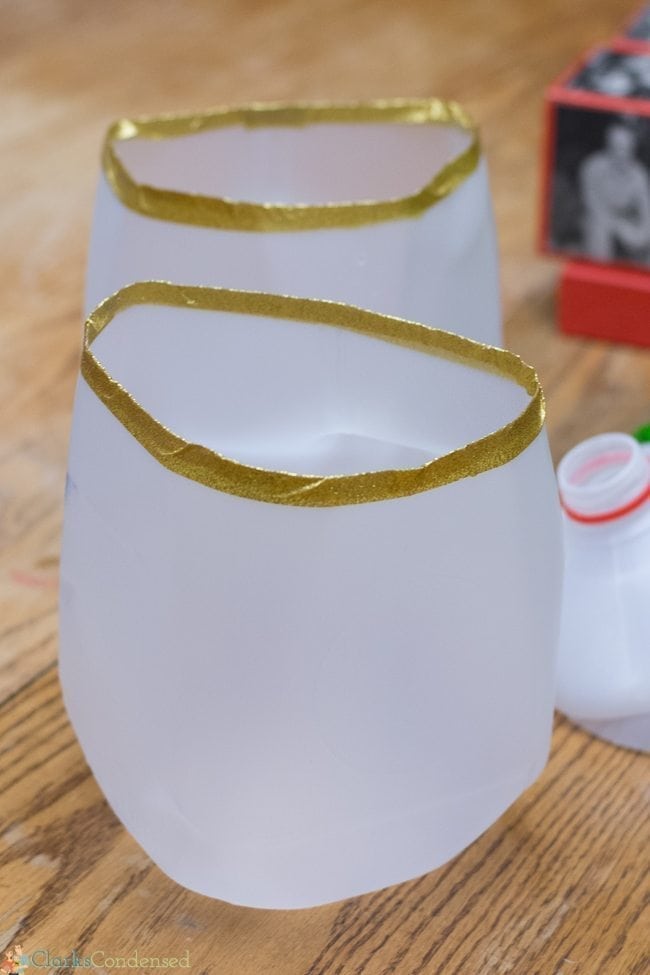
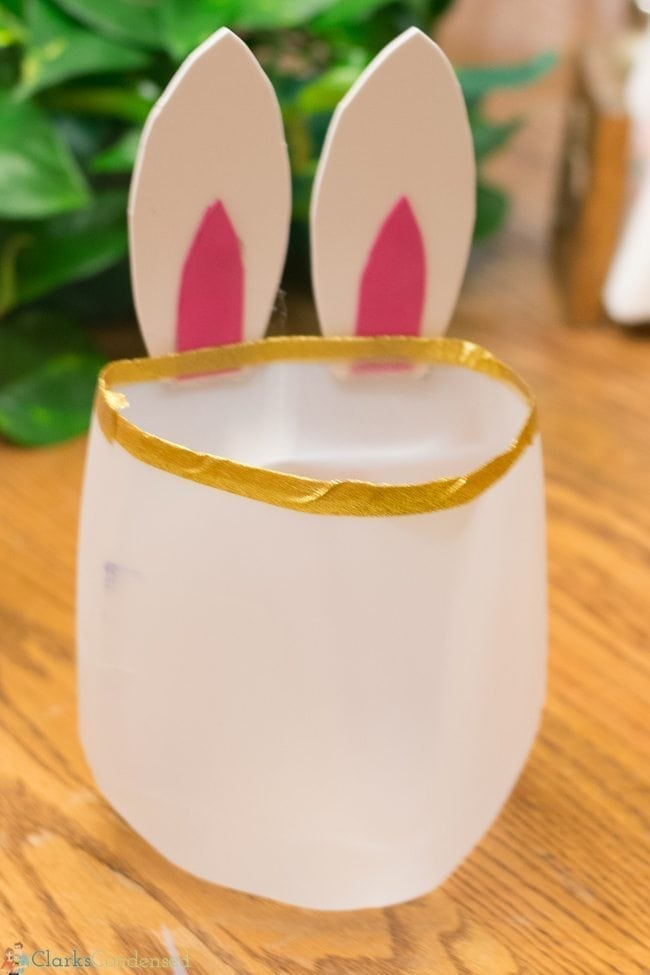
Step Four:
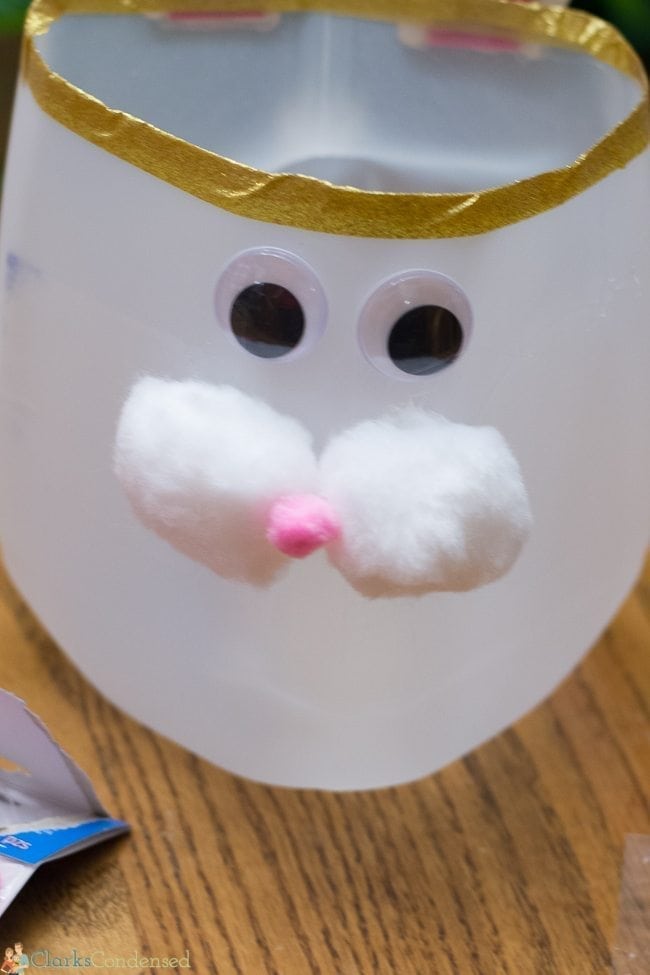
Using the glittered duck tape, tape around the top edge. This makes it not so your littles won’t get their fingers cut (and it’s just cute)
Now you will choose whether you are doing the bunny or the chick (or both!). Both instructions are below.
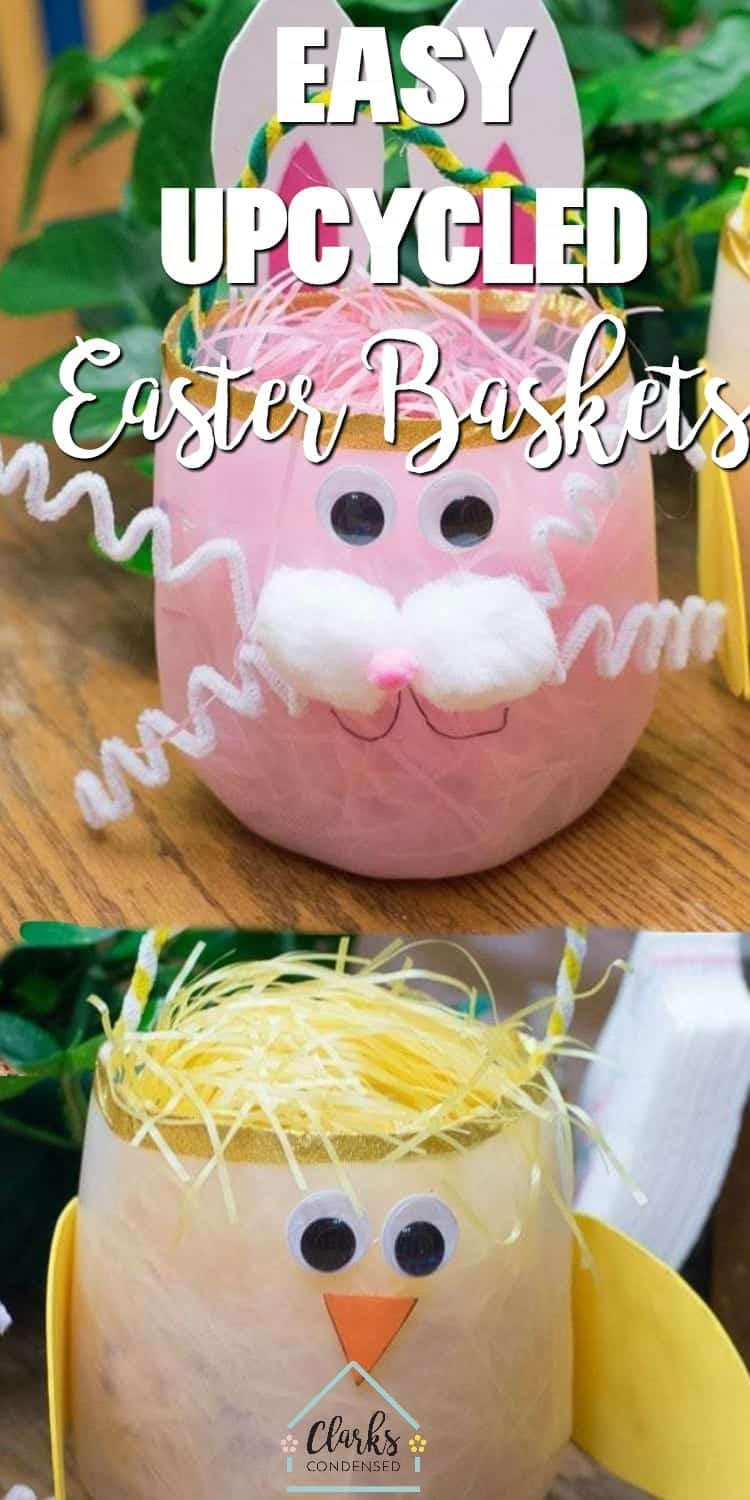
For the Bunny
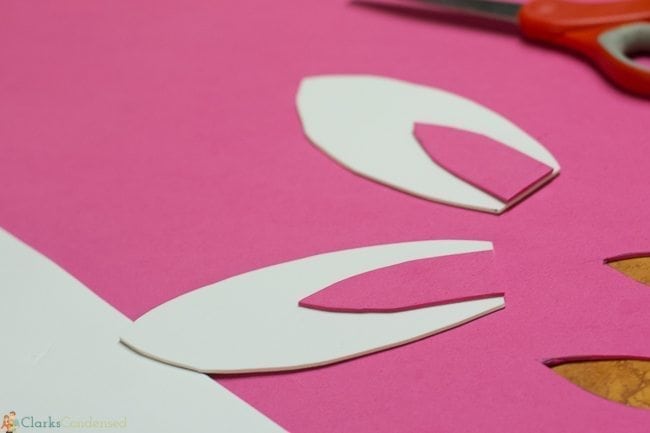
Step One:
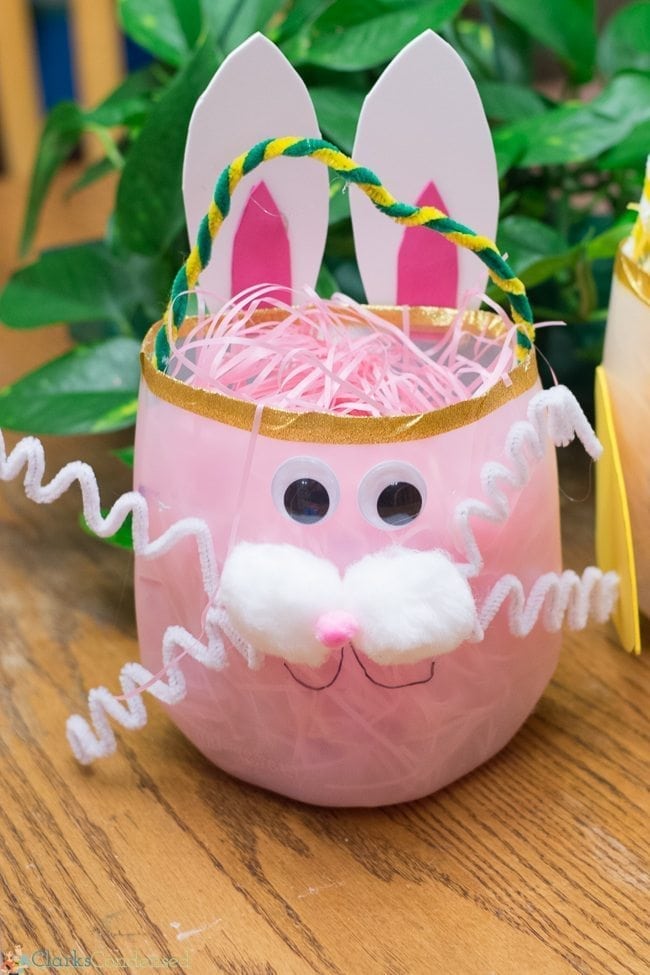
Cut out large ears out of the white foam and then a smaller piece to fit in the white ears with the pink. Hot glue the pink area into the white.
Step Two:
Place some hot glue on the bottom edge of the front of each ear.
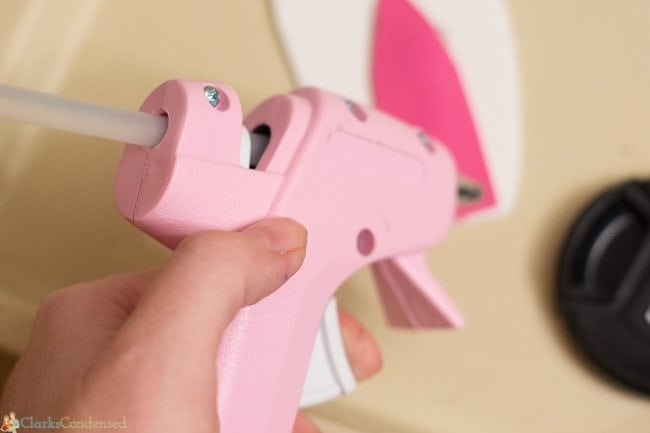
Step Three:
Glue each ear to the back of the jug
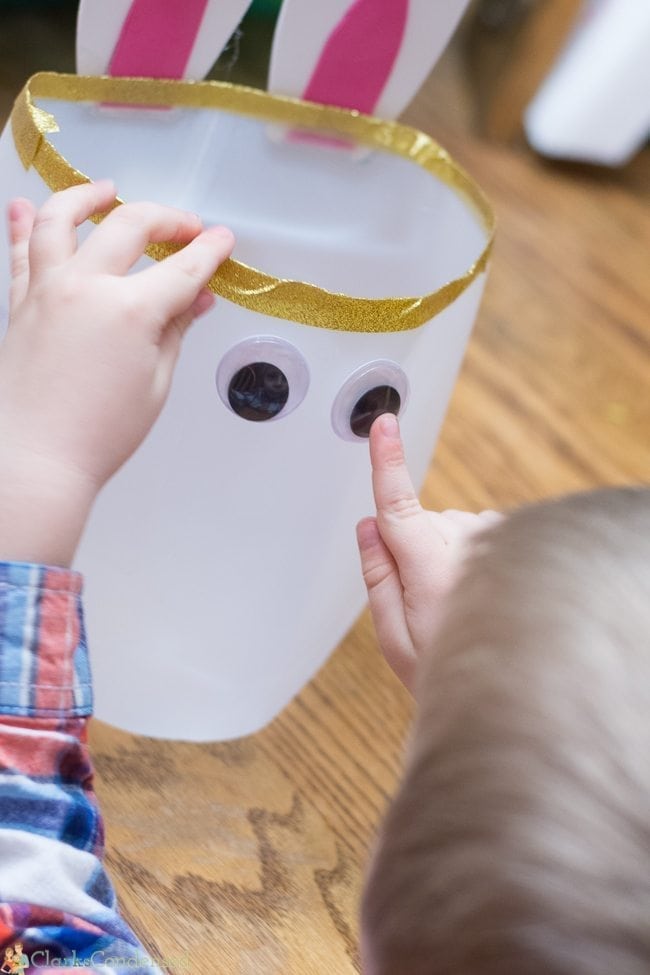
Step Four:
Glue the googly eyes on with hot glue
Step Five:
Using hot glue, glue two large white pom poms under the eyes and then a pink pom pom on top of that.
Step Six:
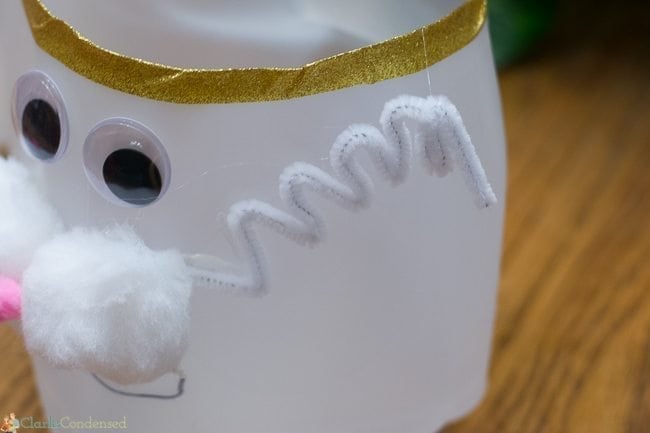
Bend the four white pipe cleaners like below.
Step Seven:
Attach to the bunny using hot glue. I put hot glue on the first two “V” shapes. Then draw a smiley face with a sharpie.
Step nine:
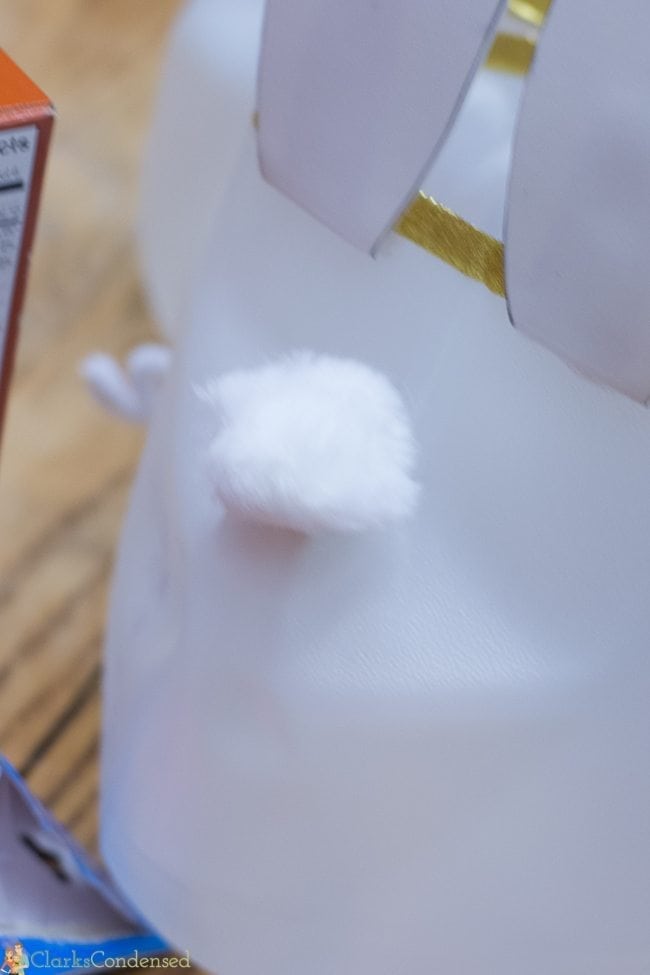
Stuff a large white pom pom in the spout!
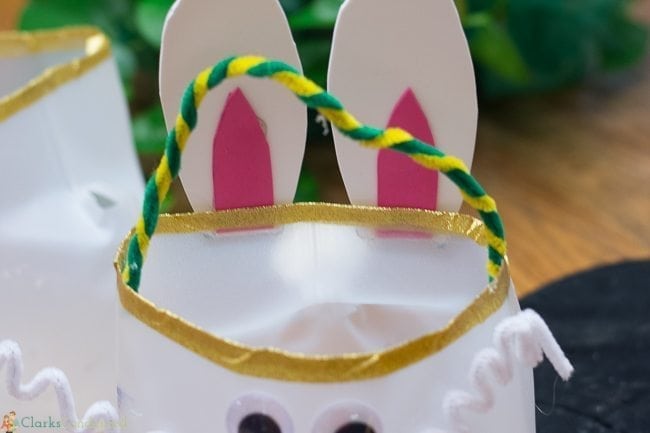
Step Nine:
Twist together two pipe cleaners. Hot glue to the top edges of the bucket to make a handle.
For the Chick
Step One:
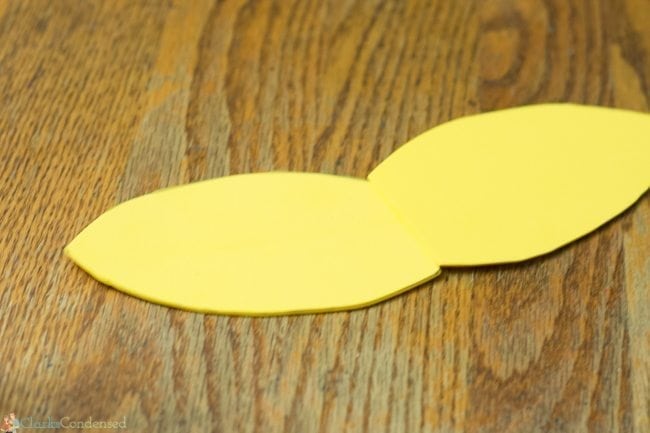
Make and cut out two wings out of foam, as well as a little beak.
Step Two:
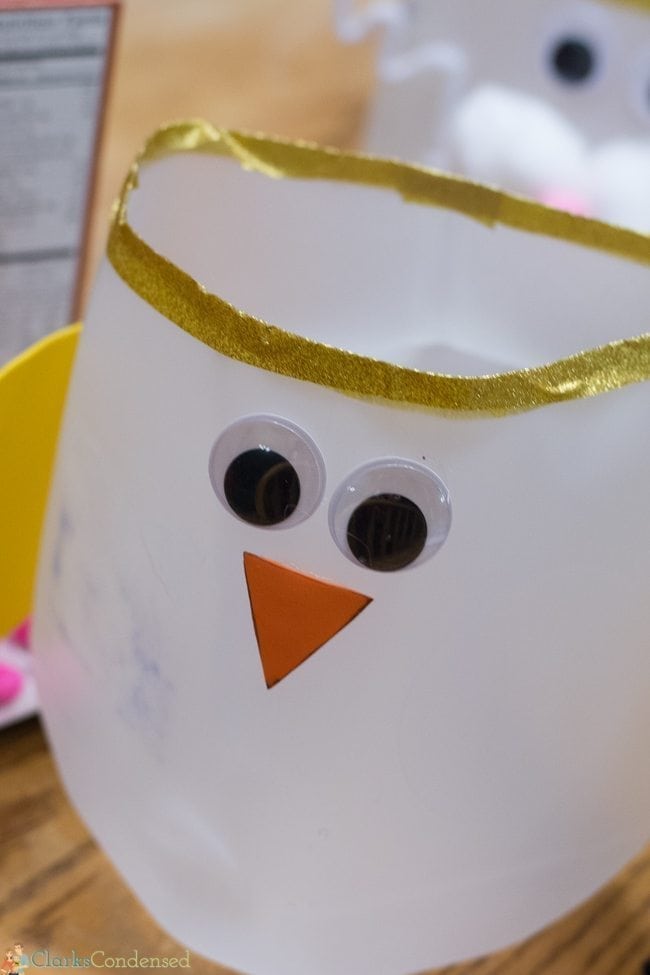
Glue the wings to the back side of the jug. Then glue the googly eyes to the front as well as the beak.
Step Three:
Twist together two pipe cleaners and glue to the inside top of the jug.
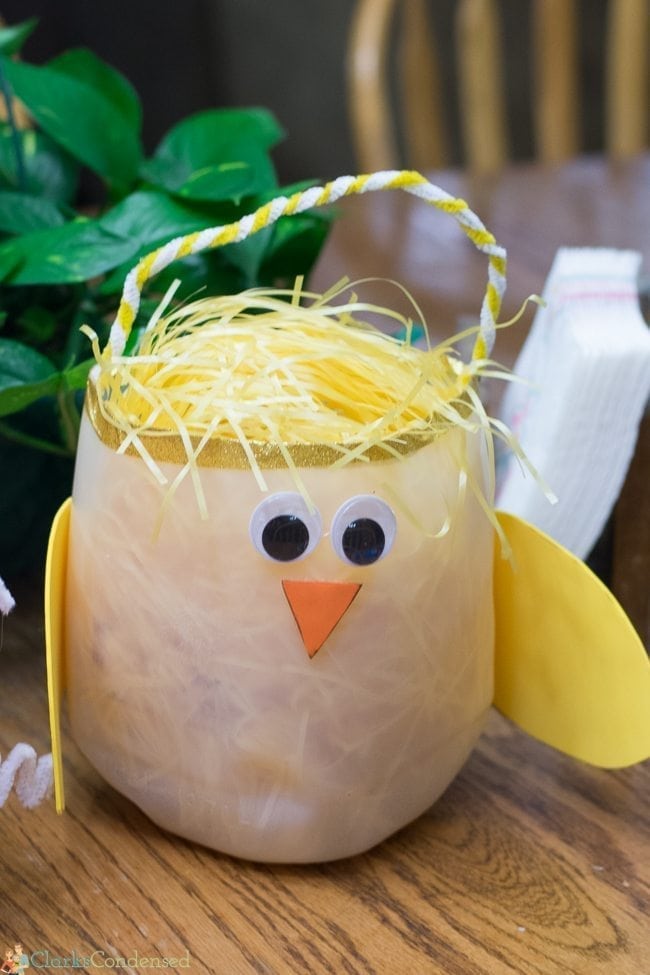
Fill with fake grass, eggs, or anything you want!
Other Easter Posts You May Enjoy
- The Best Dollar Tree Easter Products
- 22+ Baby and Toddler Easter Basket Ideas (Inexpensive and Useful!)
- DIY Easter Grass: How to Grow Your Own Easter Grass