
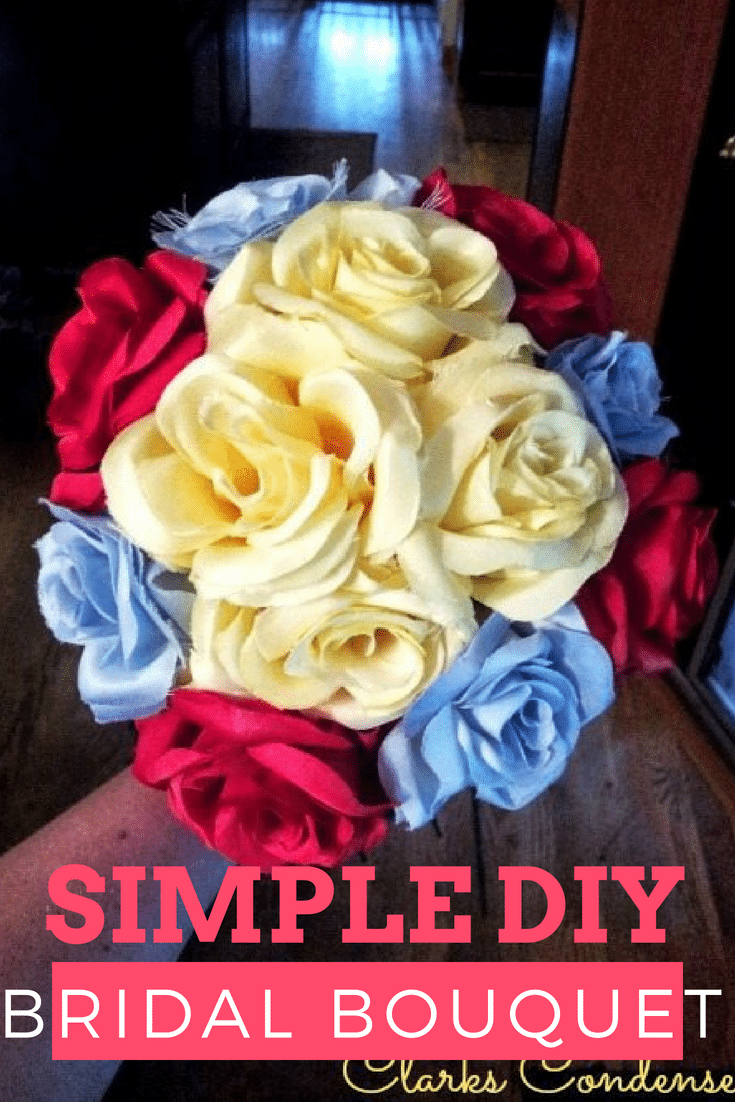
Simple DIY Bridal Bouquet Tutorial
Are you looking for simple wedding bouquets for your upcoming wedding? Here is a quick tutorial on how to make a bouquet with fresh or silk flowers.
Silk Flower Bouquet
Did you enjoy last week’s post on an easy, DIY boutonniere? I hope you did! As promised, this week I’ll be sharing how to make a simple bridal or bridesmaid bouquet. I know, it isn’t Wednesday, but this week, Wedding Wednesday and Thrifty Thursday are being combined (mainly because I just did not have time yesterday!)

One of my most favorite “accessories” for my wedding was my bridal bouquet. As I mentioned last week, a friend of my parents did our flowers, and she did a magnificent job. The flowers were all perfectly placed, and it felt so unique to me! And, I loved that she made the bridesmaid’s bouquets to be little mini versions!
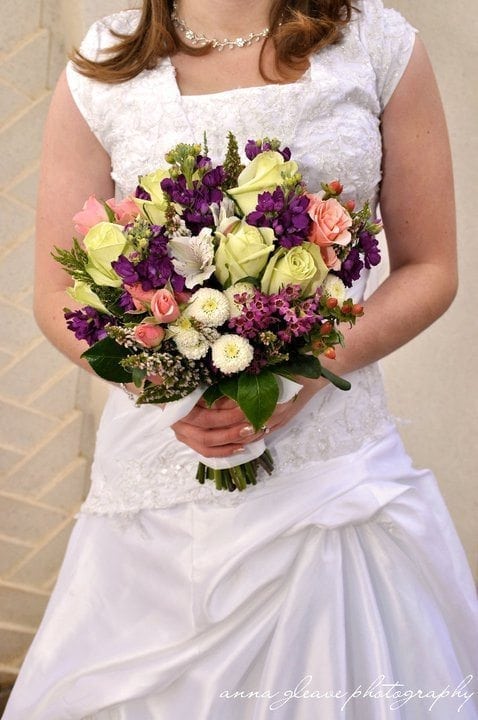
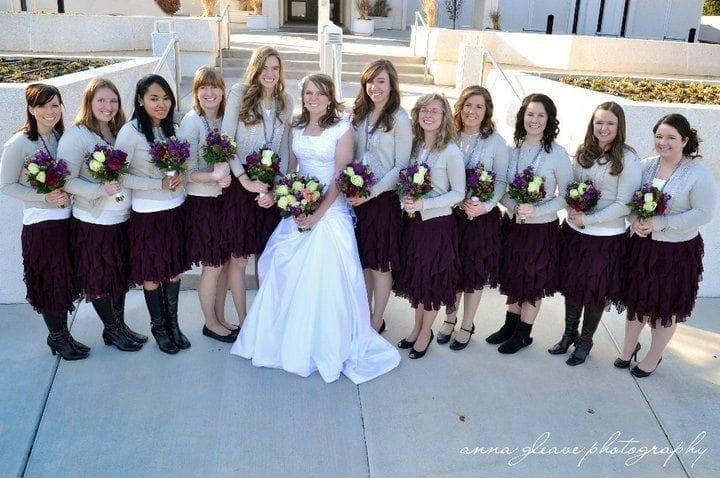
photo credit it to Anna Gleave Photography
Well, I’m not going to show you how to make a bouquet quite as complicated as mine, but one that is fairly simple to make, and to be honest, the base for just about any bouquet. This would be perfect for anyone who just wants a simple bouquet and perhaps needs to save a little money.
In this tutorial, I will be using silk flowers I bought at the Hobby Lobby. While I much prefer fresh flowers, this can be another way to save money — especially if you are having more than one reception. I found a few places online that sell inexpensive silk flowers. Plus, you can use them for decorations in years to come. My mom still has a beautiful arrangement from my sister, Cindy’s, wedding on top of their entertainment center!
There’s several ways to make a bouquet — one of the most popular ways is to use some of that green, floral foam that you can buy at the store. For this bouquet, I’ll just be using flowers and a few other things to hold it together.
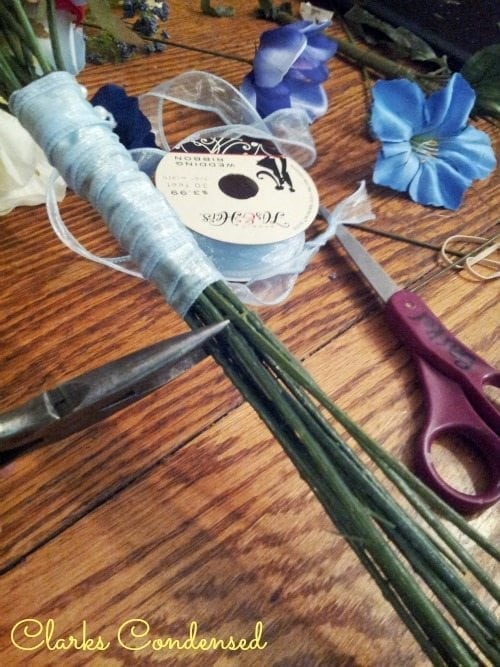
Materials
- 12 or more roses (the Dollar Tree is a GREAT place for silk flowers)
- 3 or more larger, rose like flowers
- Floral Tape
- Wired Ribbon
- Floral Pins
- Wire cutters or scissors
As a note, you will probably want to use a minimum of 12 flowers, or else the bouquet will really be too small. If you choose to use more, I’d get a few more large flowers as well. You also want to be very careful when doing the arrangement — flowers are super delicate and can break very easily.
Step One:
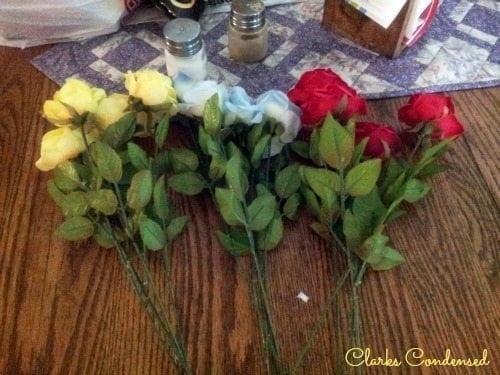
Lay out your flowers, just to get an idea of what you are working with.
Step Two:

Trim off thorns and flowers from the stems. Be careful not to cut too close to the stem, or your might end up breaking the flower! If you are doing your own arrangements, I recommend ordering a little bit extra, just in case some fall apart or break.
Step Three:
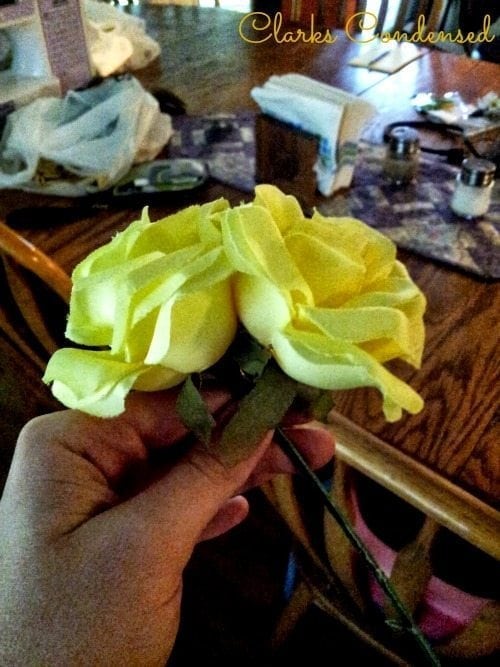
Take the two flowers you want at the center, and position them like above, with the stems crisscrossing.
Step Four:

Add in two more flowers to the side of the first two. In this picture, I rotated it a little bit, but the two original flowers are in the center. If you are using greenery, add some in here.
Step Five:
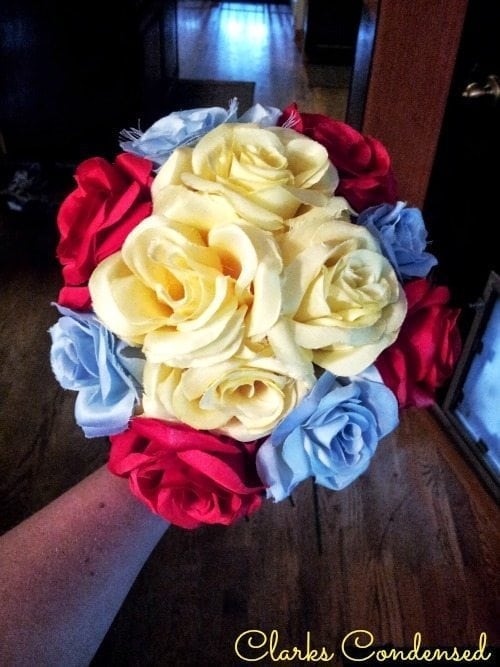
Continue adding flowers in, two at a time, around the other flowers, moving it clockwise to ensure that you put an even amount of flowers around it. Once you have it the desired size, you can either leave it, like the picture above, or you can add more flowers to the front (see next step)
Step Six:
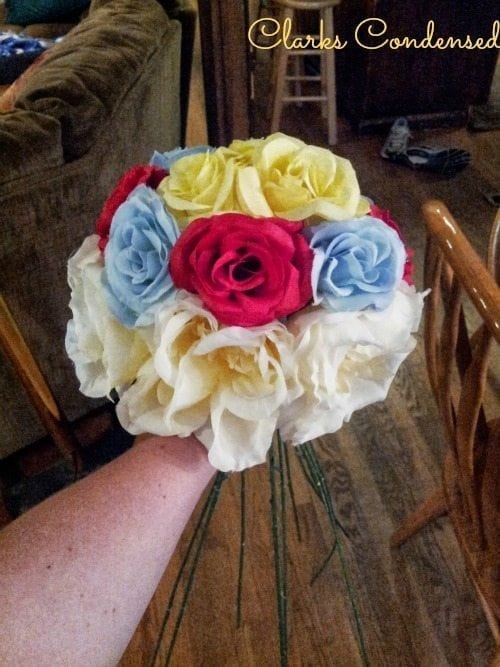
If you want to have it more full in the front, first determine which side you want facing out. Then, put three large flowers in the front, so it covers the front half (obviously, if you use more flowers and the bouquet is larger, you’ll us more.) If you want it to have an even more cascading effect, add two flowers directly under the center large flower, and then one directly under those two. I hope that makes sense — I ran out of flowers, or else I would have done that! Feel free to use whatever color you want.
At this point, it’s time to decide if it looks like you want it! If not, feel free to move flowers around. I found the easiest way to do this was to find the stem for the flower you want to move, and either move it up or down if it isn’t high enough, or use the stem to poke it out of the arrangement. Then, move the flower or greenery wherever you want. Don’t move on to the next step until you definitely know the arrangement is how you like it.
Step Seven:

At this point, if you are worried about the flowers come out place, you can wrap a rubber band around the base of the stems. I didn’t do that, but I know some people do. After that, take the floral tape, and wrap the tape several times around the stems about 1-2 inches underneath the base of the flowers.
Steven Eight:
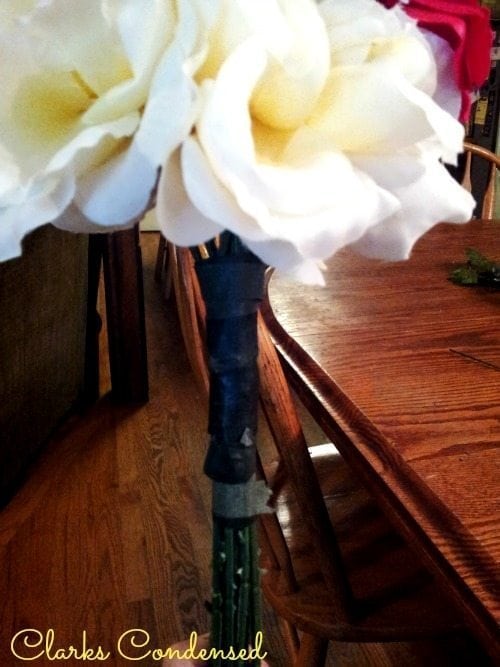
Wrap the tape about five inches down the stems to help hold them together, and then wrap all the way up again to where you started, overlapping as you go.
Step Nine:
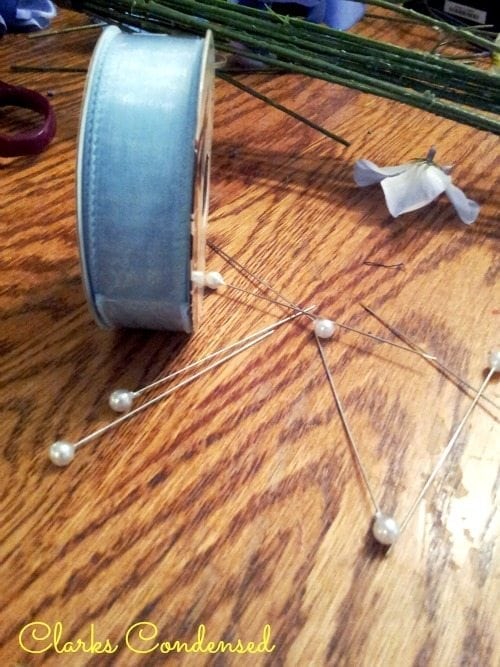
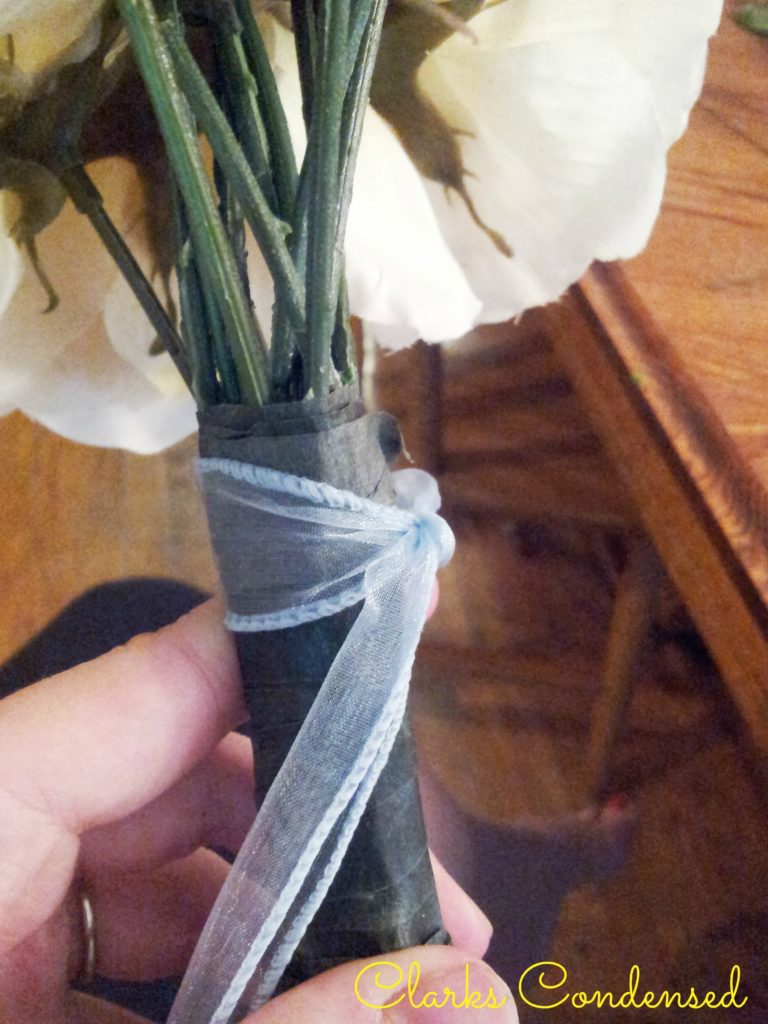
Get your ribbon and pins. Tie a small knot with the ribbon a little bit above the tape, with the knot at the back of the bouquet. Trim excess ribbon from the end of the knot.
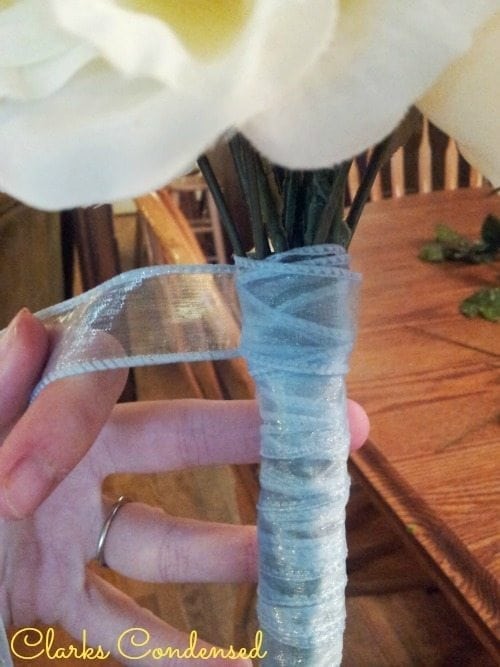
Step Ten:
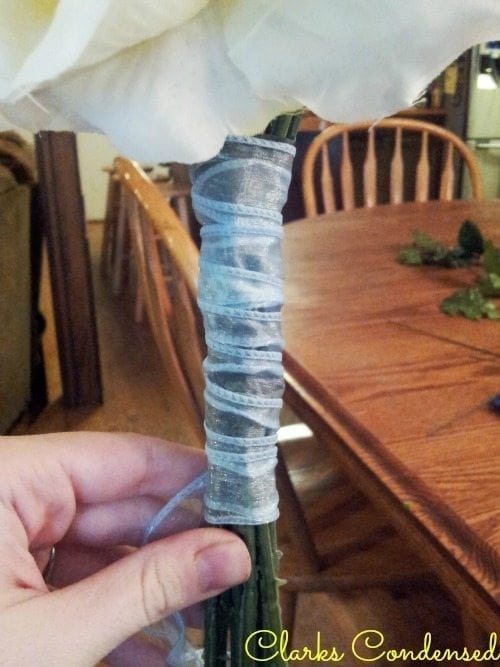
Wrap the ribbon all the way down to a little bit below where the tape is, overlapping as you go. Then, wrap back up, just like you did with the tape.
Step Eleven:
Cut the ribbon so that the end stops at the back. Hold the ribbon tightly so it doesn’t come unraveled.
Step Twelve:
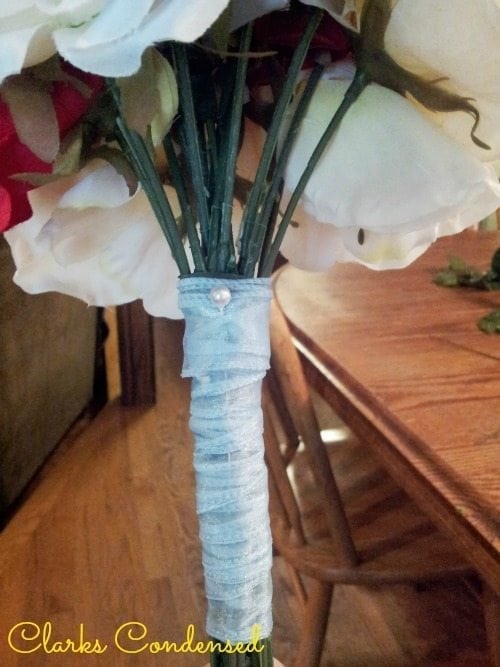
Using a floral pin, put the pin into the loose end of the ribbon, and push it through the ribbon. Don’t push the pin into the the stems, but just the the ribbon.
Step Thirteen:
Using scissors or wire cutters, cut the stems about an inch below the ribbon. I would wait to cut the stems until the day of the wedding. Keep in water until you are ready to use them!
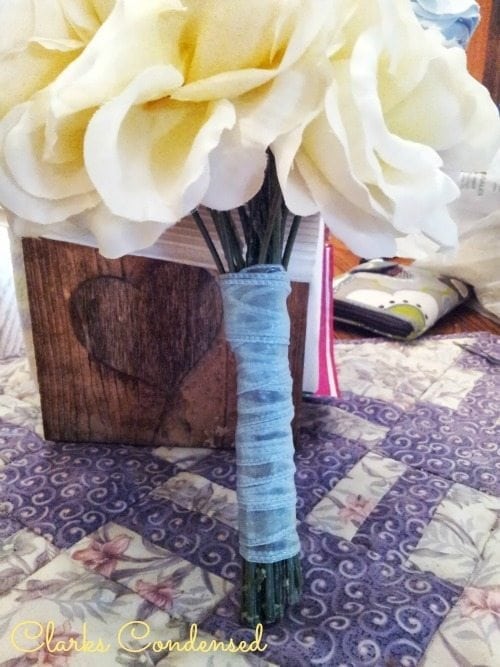
And there you have it! A simple, rose bouquet that is perfect for a wedding!
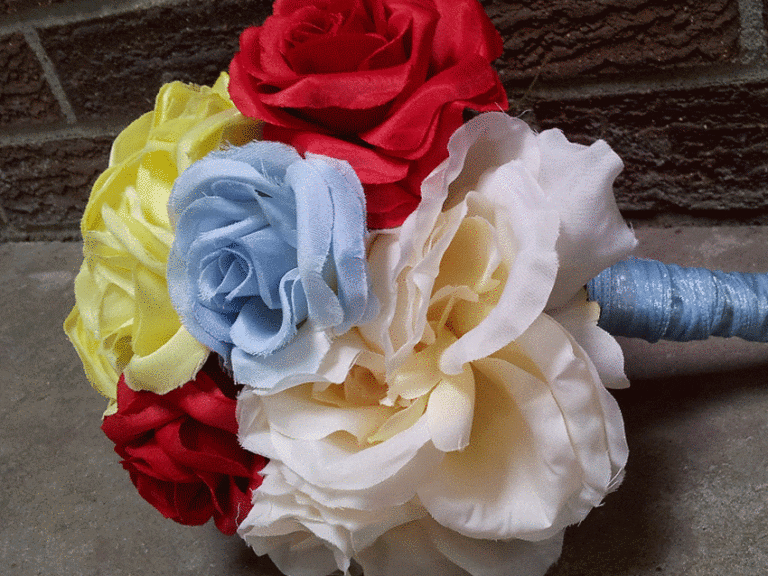
Here is another arrangement I made with the same technique. If you want to use other flowers, just follow the same steps, add in some greenery, etc., and you can come up with a lovely bouquet with your own individual taste in mind!


Disclosure: I am NOT a professional, nor have I ever claimed to be one. I’m sure there are many ways to make a bridal bouquet, and that some believe you should only have a professional do your flowers. That’s fine if you believe that, but that’s not always an option, and this is not the post for you! Remember, kindness matters.


This is really going to be a fun, bonding experience for me and my girls! I can’t wait to make these bouquets together!
I’d love to see how they turn out! Good luck!
Super lovely! I love it!
Thank you so much!
Flowers can really make the wedding look more elegant and attractive. I like your designs. Impressive!
It is always much more special when you DIY elements of your wedding. My good friend had all the bridesmaids over the day before the wedding to have a make your own bouquet and it was great bonding day. Also made it much cheaper for the bride and groom 🙂
What a fun idea! I think that would be such a fun thing to do with your bridesmaids. 🙂
Hello,
It was an awesome post to better understand how to build up an wedding bouquet by our own.
I like the idea and thought. It was so easy but still it looks so good. I will definitely try it in my own wedding which is in in next month.. Too excited.. 🙂
I’m glad you found this helpful! I’d love to see your finished bouquet 🙂
I love doing your own bouquet because that will mean that it is unique to you. When Travis and I were planning our wedding I planned on doing my own bouquet.
So fun! I bet it was beautiful.