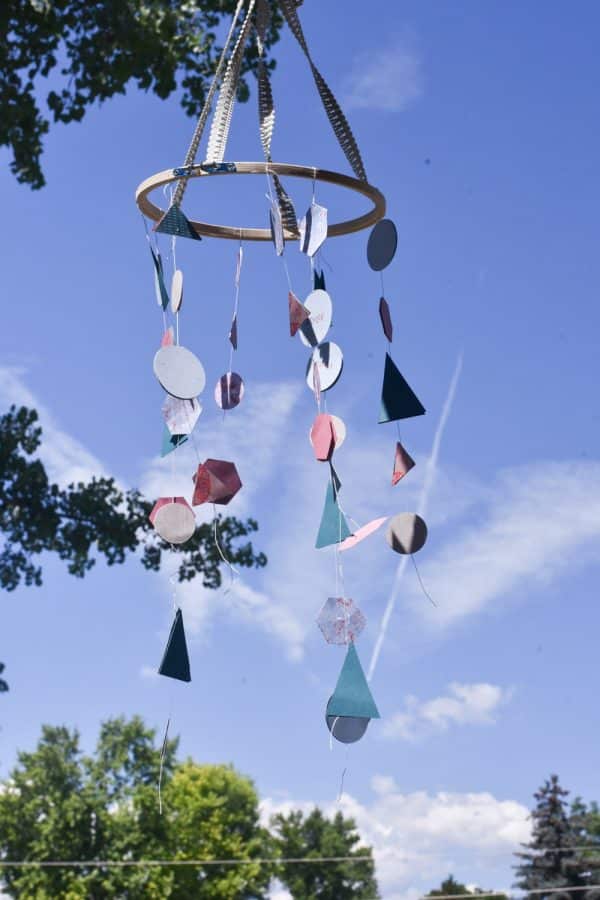
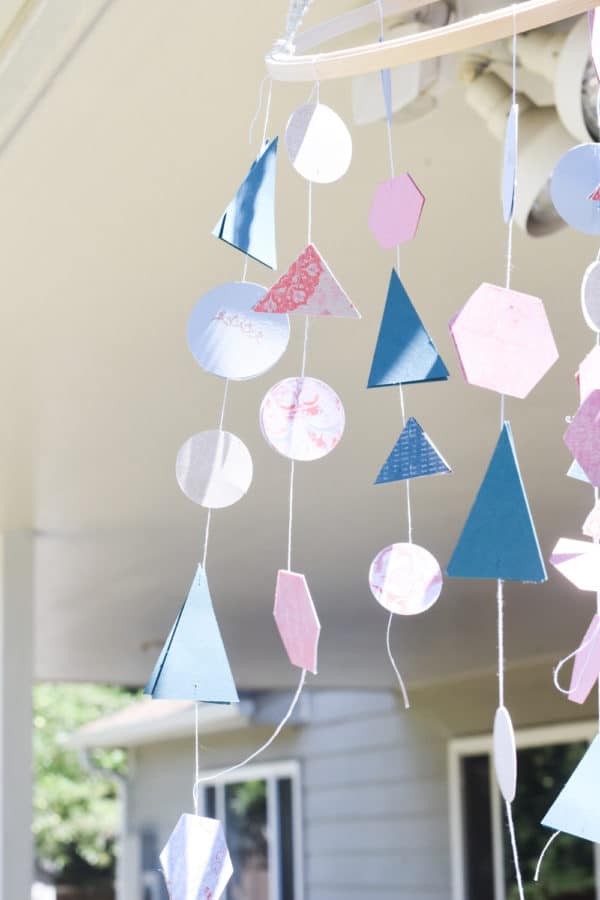
Easy DIY Paper Mobile – No Sew
This paper mobile can be easily customized with different colors and textures – it’s perfect for a living room, baby room, or any place your heart desires!
It’s been a while since I’ve done a craft project that didn’t involve HTV and a t-shirt.
Pregnancy just makes everything harder (or at least that’s the excuse I keep giving!).
However, for the next few months, I’ve partnered with Stampin’ Up to create some fun projects using some of their project kits – and when I got the July materials, I knew exactly what I wanted to do.
A paper mobile! I’ve seen these floating around Pinterest before, and I decided that I wanted to do a no-sew version.

In true Katie fashion, this project took some twists and turns along the way…and things didn’t always go as planned. However, in the end, I think I have a great project with tips and tricks that will help you accomplish it efficiently and easily.
First off, I wanted to introduce to you what Stampin’ Up is. I actually worked with them several years ago to promote their fun monthly boxes – Paper Pumpkin – so when they approached me a few months ago – I was thrilled!
Stampin’ Up specializes in cards and stamps (as you might have guessed), and there are so many fun projects they have to offer. However, you can push your imagination even further and use their products for other kinds of projects as well.
For the month of July, I selected the “Woven Threads” collection. I just loved how pretty everything was in this kit.

How pretty are those cards? I love having a nice arsenal of cards on hand for every occasion.
It includes:
- Woven Heirlooms Cling Stamp Set
- Woven Threads Designer Series Paper
- Woven Threads Sequin Assortment
- Sahara Sand Trim
- Frames
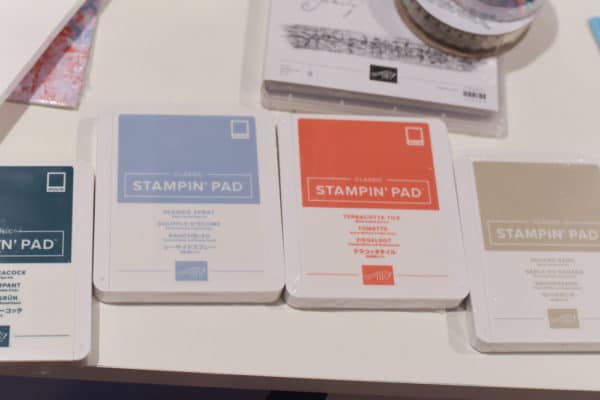
Here are some pictures of some of things we got – including the stamp pads (such great quality ink!).

If you want to learn more about these products, contact a Stampin’ Up! demonstrator. You can easily find one near you by visiting www.stampinup.com and clicking on the “Find a Demonstrator” button
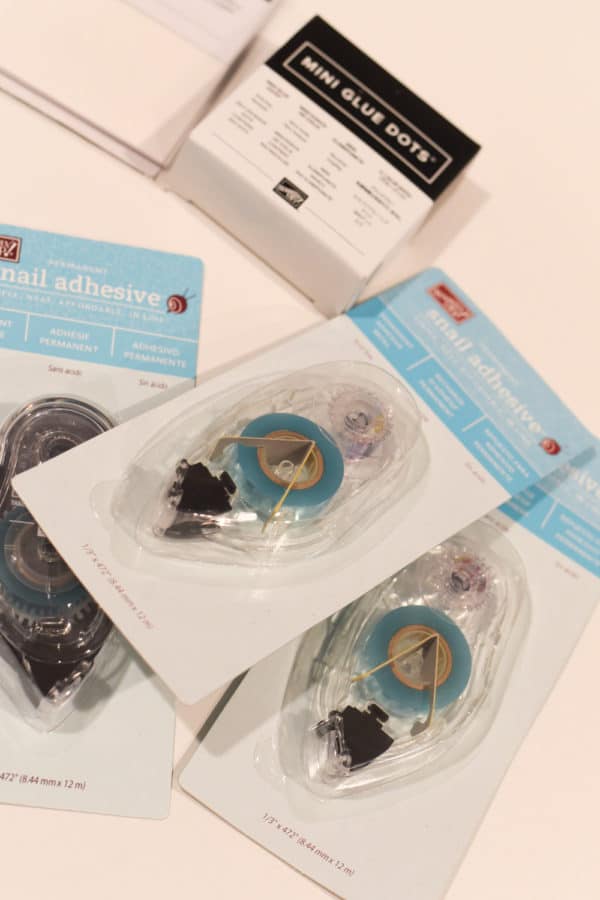
I absolutely loved the designer paper, and I thought it would perfect for my mobile. I also used the Sahara Sand Trim and this snail adhesive. If you have never used it…it is seriously my favorite adhesive.
Anyways, I loved all the paper that was available, and it was perfect for this mobile.
I thought about just using circles for this project, but I ended up deciding to go with different shapes, which I think was a fun idea. I actually used the shapes that were used for this fabric mobile.
Enough babbling from me, though. Here is what you need to make this fun, paper mobile.
Materials
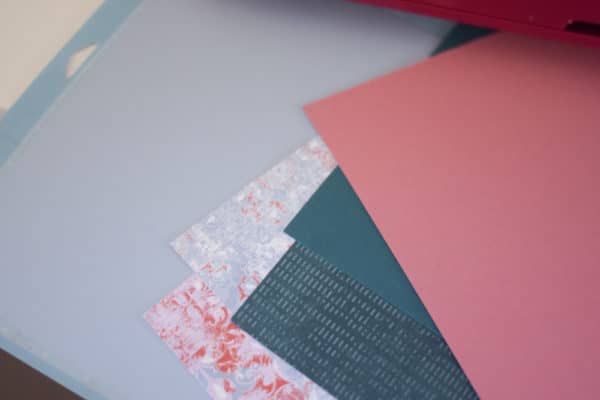
- Multiple pieces of medium weight paper (I used various six different sheets from the Woven Threads Designer Paper from Stampin’ Up because I have six different shapers)
- Thick thread or embroidery floss
- Embroidery Hoop – you can choose whatever size you want, but we did an 8″ hoop
- Sahara Sand Trim
- Snail adhesive
- Hot glue gun with hot glue gun sticks
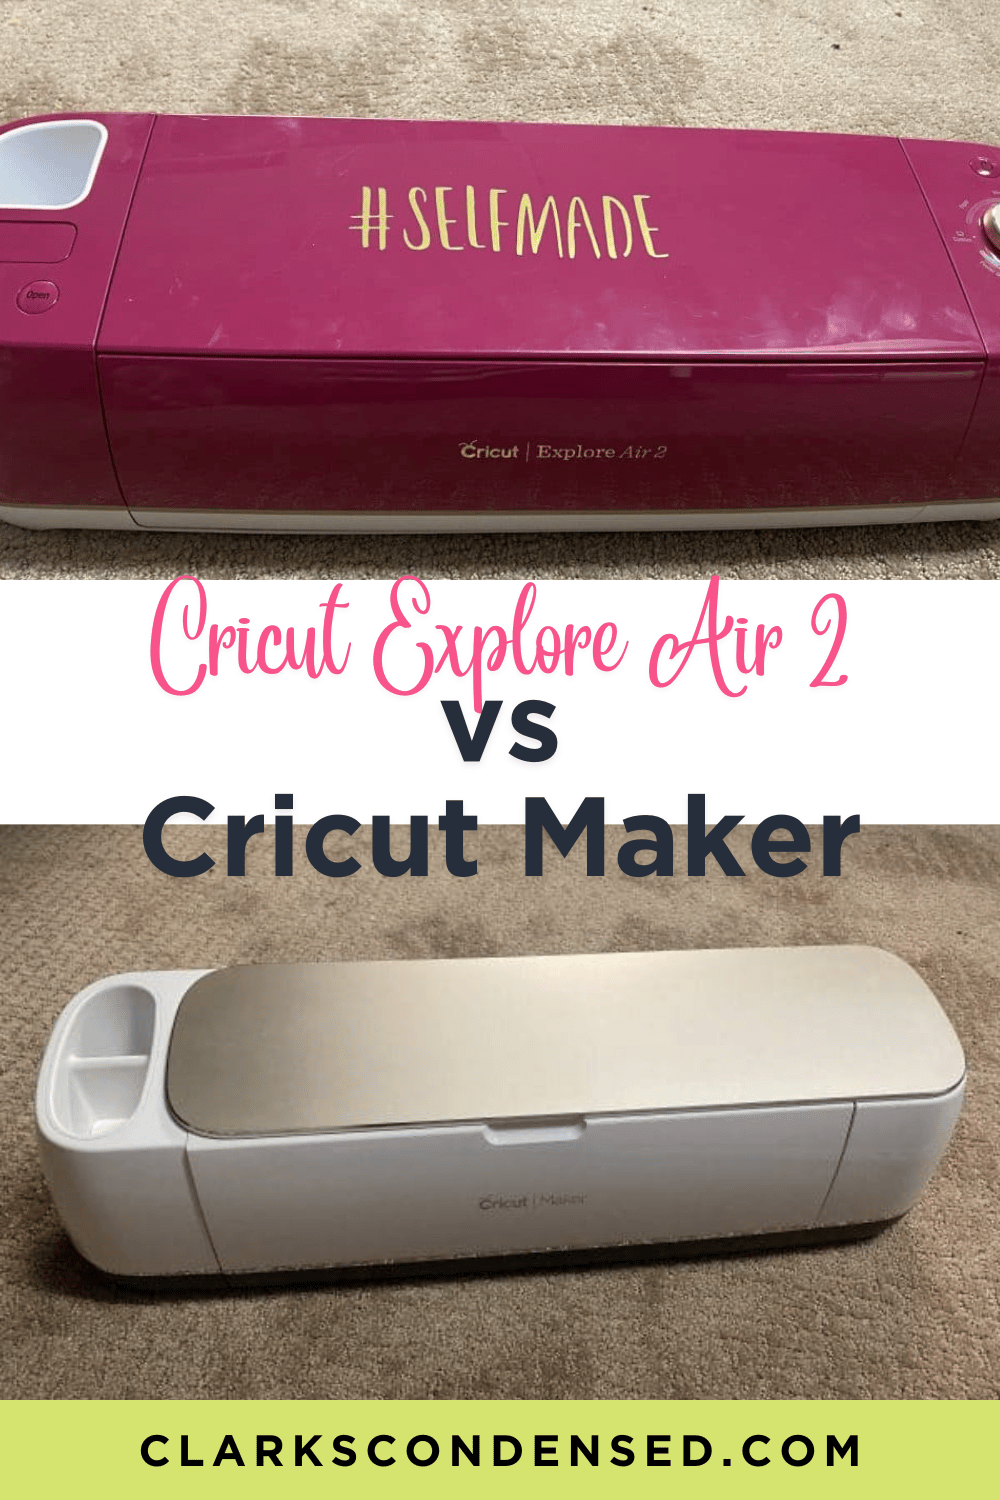
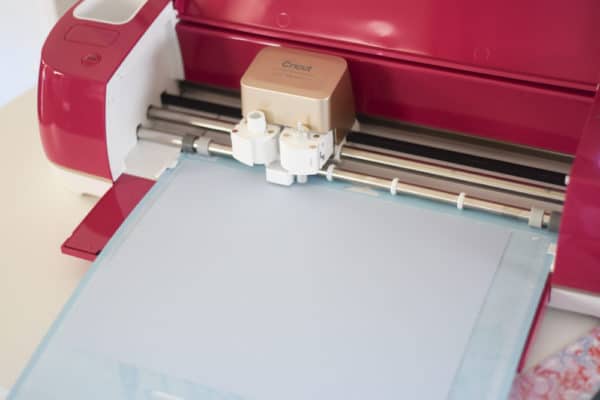
- Cricut Explore Air 2 or Cricut Maker with Fine Point Blade
- LightGrip Mat
A Few Notes
- Initially, I created score lines on all the shapes, but I quickly realized those were too cumbersome and unnecessary to work with. The snail adhesive worked perfectly.
- At first, I only used the snail adhesive on one shape to adhere to the string, but the adhesive is sticky, and it ended up making a mess. So, instead, it’s best to cut double the number of shapes you want for your mobile and have the string be in between the two shapes. Much easier to handle.
- I also tried to adhere the trim to the embroidery hoop using glue dots…this was a bad idea. Just use hot glue to make it nice and stable!
Instructions
Open this file in Design Space. You can adjust the sizes of the shapes if you’d like.
Press make it.
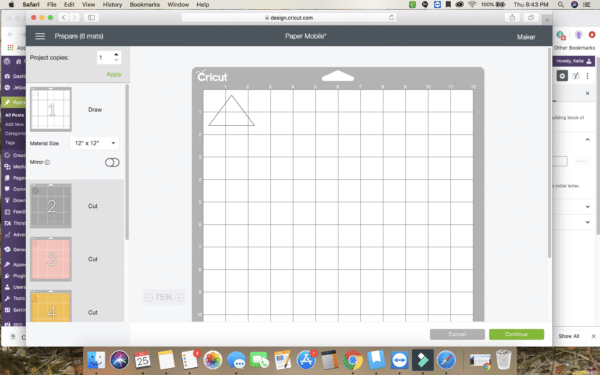
In the top left corner, change the number of project copies. I recommend 25 – this should give you plenty of shapes to create your mobile and have a piece of paper for the front and back.
Press continue, select your material, and load your mat into the machine for the first set of shapes.
Continue until everything is cut out.
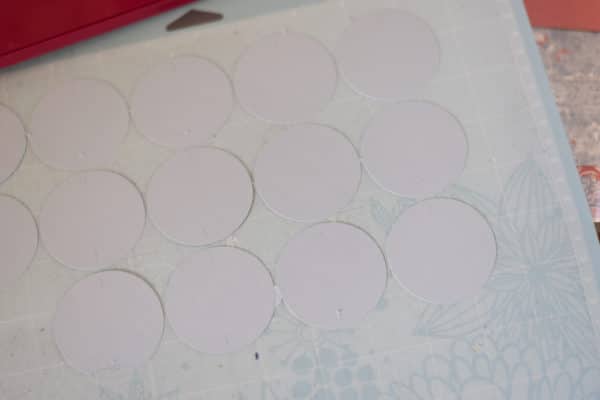
Once everything is cut out, place into piles of different shapes.
Cut out the embroidery floss or string to varying lengths – whatever you want for your mobile. You will need eight pieces.
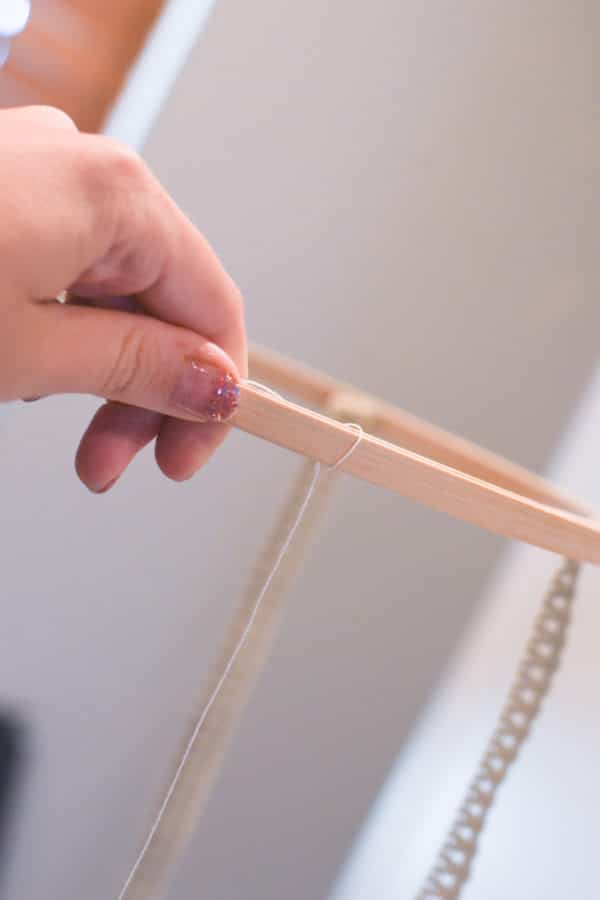
Tie the strings to the embroidery hoop evenly.
Now it’s time to add the shapes. If you want to be methodical about what order they are in, I would do lay them out on the table. Otherwise, start grabbing them at random.
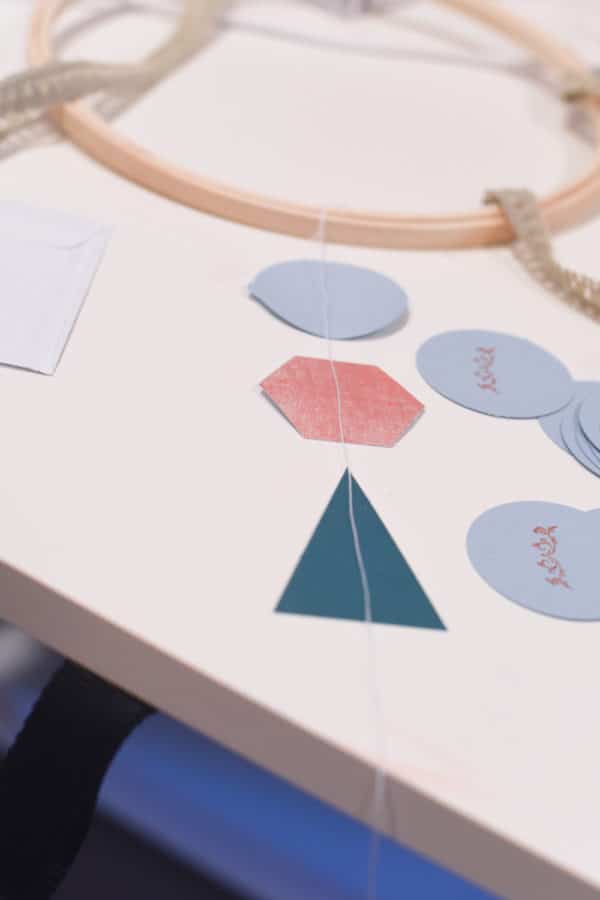
Place one shape underneath the thread, about 1″ from the embroidery hoop.
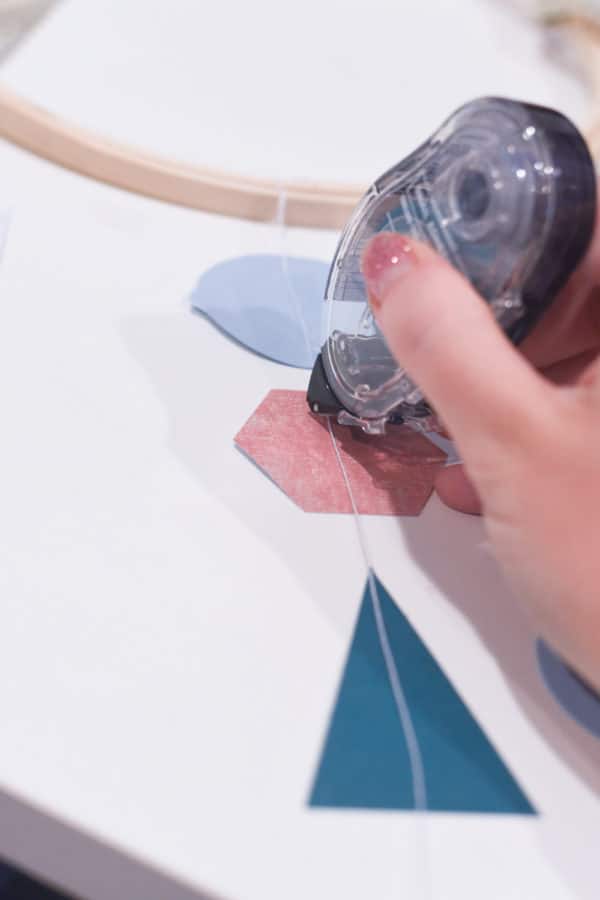
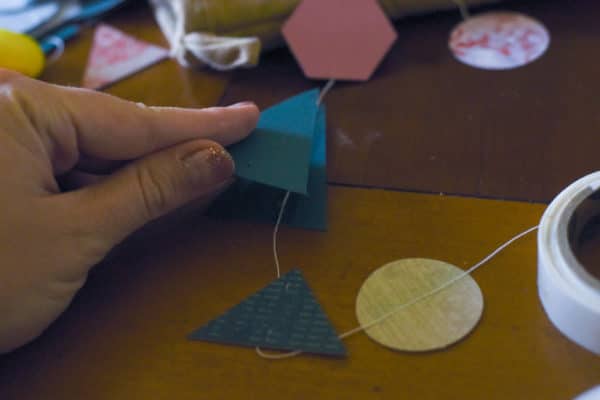
Using the snail adhesive, roll over the thread to adhere it the shape. Grab a matching shape and put it on top.
Add another shape another inch or so down and continue until you get to the end of the string. Repeat with all the strings.
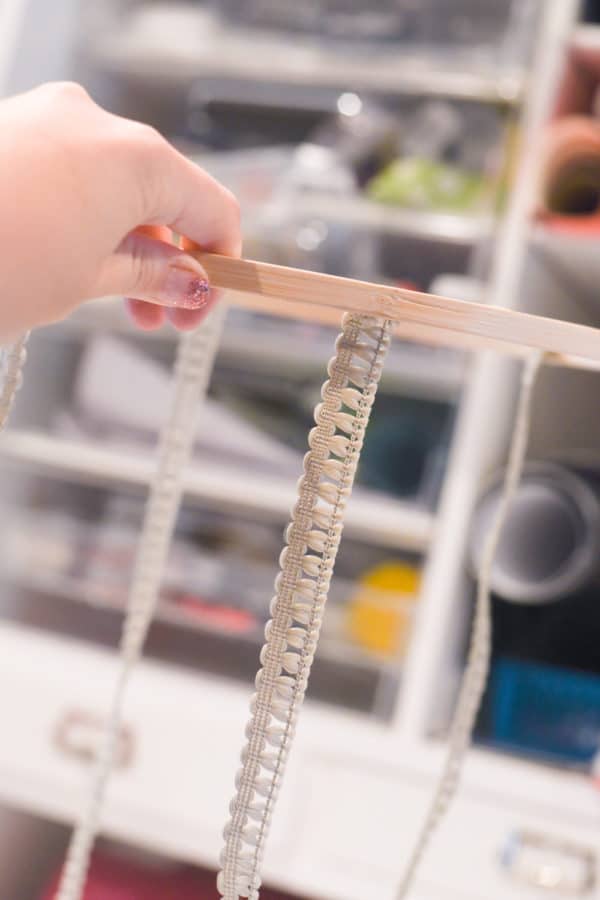
Once this is done, cut out four even pieces of the trim. Hot glue these in four spots (equally spaced) on the embroidery hoop.
Tie in a loop at the top.
Hang up and enjoy!